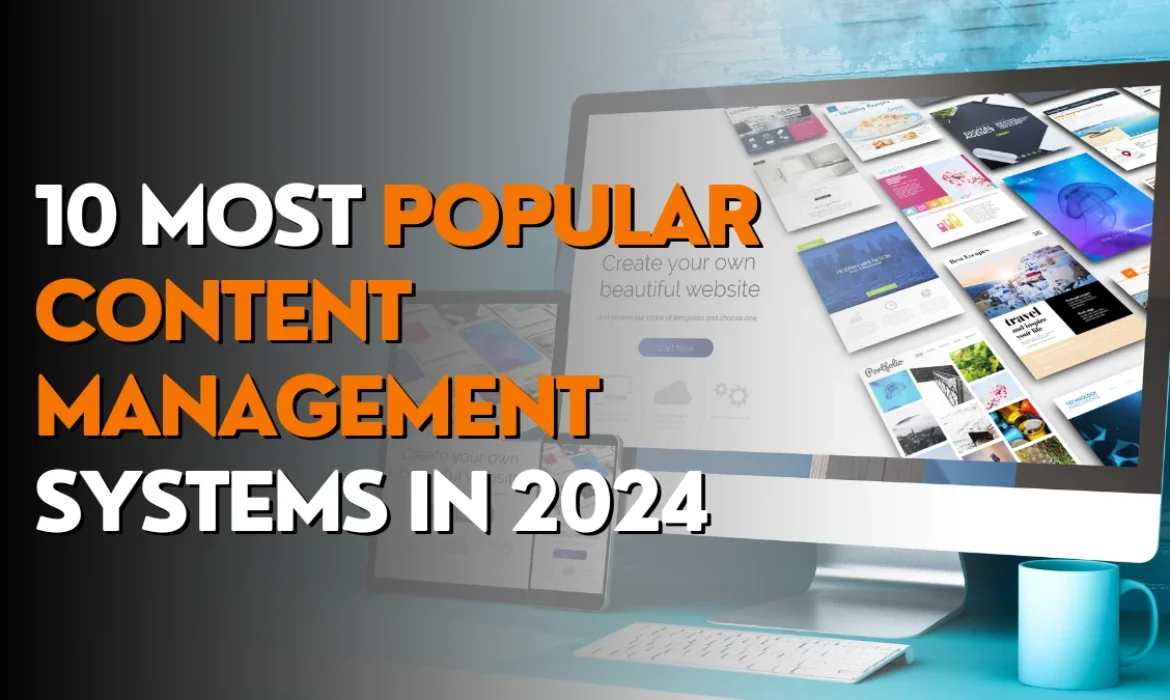
10 Most Popular Content Management Systems in 2024
Do you have any plans to introduce your online business web portal?
Have you searched or decided to choose the CMS for your website?
Not yet?
Ohh…
If you are planning to take your business online and wish to launch your own official business web URL and haven’t found any Content Management System to arrange your business info and relevant content, then here we have come with the 10 most popular CMSs for you. You can study all, compare, analyze, and make decisions easily. So, let’s travel through a wonderful journey with us and start to hunt for the appropriate one.
10 Most Popular Content Management Systems in 2024
Basically, Content Management Systems provide a user-friendly and efficient way to create, manage, and update digital content, making them a valuable tool for individuals and organizations seeking to maintain an effective online presence. The Leading Content Management Systems that we are going to study are the conventional, modern, widely used, fully functional, and professionally designed themes that will surely gain mass acceptance in 2024 as well. So, allow us to explain each CMS one by one.
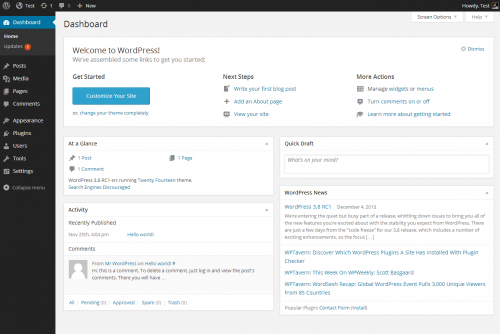
1. WordPress
Pricing: $45 per month for the Commerce Plan
As we all know, WordPress is the second most widely used open-source content management system (CMS), known for its ease of use, flexibility, and extensive community support. So, let’s know more about this user’s favorite CMS. WordPress has a user-friendly and intuitive interface, making it accessible to users with varying levels of technical expertise. The number one CMS boasts a vast ecosystem of themes and plugins, allowing users to easily customize the appearance and functionality of their websites. This WordPress Themes are easy to use and doesn’t require any coding knowledge.
Moreover, it has a large and active community of users, developers, and contributors. Also, the CMS supports various content types out of the box, such as posts and pages. Users can also create custom content types and define taxonomies, providing flexibility in organizing and categorizing content. WordPress has built-in support for multilingual websites, and users can easily create content in multiple languages. Additionally, there are plugins available for more advanced multilingual features.WordPress distributes updates often to fix vulnerabilities because it takes security seriously.
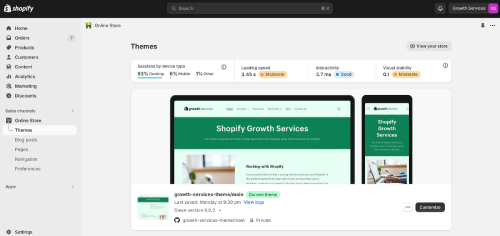
2. Shopify
Pricing: $39 – $399
Shopify must be an again familiar name after WordPress for you. Isn’t it?
It is a broadly-used e-commerce platform that allows individuals and businesses to create and manage their online stores. Shopify is known for its user-friendly interface, making it easy for individuals with varying levels of technical expertise to set up and manage an online store. Users can create their own customized online store with a variety of templates and themes. The platform supports the creation of product pages, a shopping cart system, and a secure checkout process. Shopify supports multiple payment gateways, allowing businesses to accept payments through credit cards, PayPal, and other methods.
Additionally, it offers Shopify Payments, a proprietary payment method. Besides this, the CMS delivers tools for managing product listings, inventory, and variations. Both digital and physical goods sales are supported by it. It takes security seriously, and all online stores built on the platform are hosted on secure servers. Initially, Shopify’s themes are designed to be mobile-responsive, providing a consistent and optimized shopping experience across devices. It has an extensive App Store that allows users to enhance the functionality of their stores. Apps cover a wide range of features, including marketing, inventory management, customer support, and more.
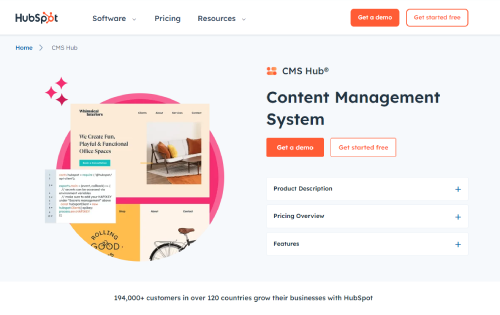
3. HubSpot CMS
Pricing: $800 per month for large businesses and enterprises
HubSpot CMS (Content Management System) is a web content management platform offered by HubSpot, a company known for its marketing, sales, and customer service software. The purpose of HubSpot CMS is to assist companies in developing, maintaining, and improving their websites.HubSpot CMS allows users to easily create and manage website content. It includes a drag-and-drop editor, making it accessible for users without extensive technical expertise.
The CMS includes tools for content personalization, enabling businesses to deliver targeted content to specific audiences based on user behavior, preferences, and other criteria. It also delivers built-in SEO tools to help optimize your content for search engines. This includes features like on-page SEO recommendations and the ability to manage meta tags. Furthermore, the CMS seamlessly integrates with other HubSpot tools, such as the HubSpot CRM, marketing automation, and sales software. HubSpot CMS includes security features to help protect your website from potential threats. It includes SSL support for secure connections, and HubSpot actively monitors and addresses security issues.
4. Wix

Pricing: $16 – $159 per month
We are sure that you must have used or seen adds running on the internet for promoting Wix as a fantabulous and super easy CMS for web development. It is a popular cloud-based website builder that allows individuals and businesses to create websites without the need for advanced technical skills. The user interface of the CMS is based on a drag-and-drop editor, making it easy for users to create and customize their websites visually. It offers a wide range of templates for various types of websites, from portfolios and business sites to online stores and blogs. Users can choose a template as a starting point and then customize it to fit their needs. Wix has an App Market where users can find and add additional features and functionalities to their websites. This includes tools for e-commerce, contact forms, social media integration, and more.
Wix provides an integrated e-commerce platform that allows users to set up online stores, manage products, process payments, and track orders. For users who prefer a more automated approach, Wix ADI can create a website by asking the user a series of questions about their preferences and needs. Apart from this, Wix provides free hosting for websites created on their platform. Users can choose to use a free Wix domain or connect their own custom domain. You can get customer support through various channels, including a help center, tutorials, and a community forum. Premium plans may also include priority support.
5. Joomla
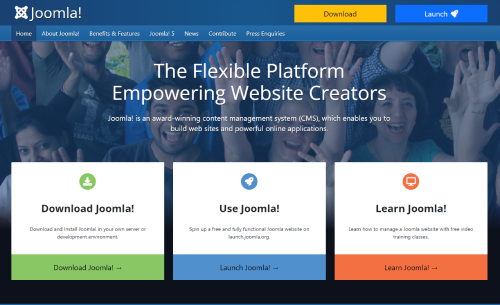
Pricing: Free
Joomla comes at number five on our list. It is a powerful and flexible open-source content management system (CMS) that allows you to build websites and online applications. Joomla provides a user-friendly interface for managing and organizing content on your website. It supports the creation and management of articles, categories, tags, and more. The extensibility of Joomla is one of its advantages. You can enhance the functionality of your Joomla website by installing extensions, which include components, modules, plugins, and templates. Joomla lets you customize the appearance and feel of your website with templates.
There are numerous free and premium templates available that you can use to customize the design of your site.
The CMS takes security seriously and provides regular updates to address vulnerabilities. It’s essential to keep your Joomla installation, extensions and templates up to date to ensure a secure website. Last but not least, Joomla has a vibrant and active community of developers, users, and contributors. You can find support, documentation, and resources on the official Joomla website and forums.
6. SquareSpace

Pricing: $36 – $65 per month for Commerce plan
Moving on to next, Squarespace is another popular website-building platform that enables individuals and businesses to create and manage their websites without needing extensive technical knowledge.
Squarespace is an all-in-one platform that provides everything you need to build and run a website, including domain registration, hosting, and design tools. Squarespace is known for its elegant designs and is often favored by individuals and small businesses looking for a visually appealing and easy-to-manage website. Users can start with a free trial and then choose from various premium plans based on their needs. Similar to Wix, Squarespace uses a drag-and-drop editor that allows users to customize their websites by moving elements around on the page. Squarespace includes integrated e-commerce features, enabling users to set up online stores, manage products, process payments, and handle order fulfillment. It supports digital and physical products. The CMS issues robust blogging capabilities, including features for scheduling posts, tagging, and categorizing content. It also supports features like RSS, comments, and social sharing.
7. OpenCart
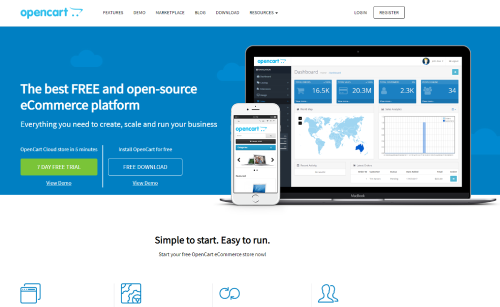
Pricing: Free
OpenCart is an open-source online shopping cart system that allows you to create and manage your online store. It is free software, which means you can download, use, and modify it according to your needs.OpenCart has an intuitive and user-friendly admin interface, making it accessible to users with varying levels of technical expertise. The platform supports a wide range of extensions and themes that you can use to customize and extend the functionality of your online store. The CMS allows you to manage multiple stores from a single admin interface, making it convenient for businesses with multiple online storefronts.
In addition to this, OpenCart supports multiple languages and currencies, allowing you to reach a global audience. You can easily manage your products, categories, and manufacturers through the admin panel. It supports various product types, including physical and digital goods. Furthermore, OpenCart supports a variety of payment gateways and shipping methods, providing flexibility for your customers. Being open-source, OpenCart has an active community of developers and users. You can find support, extensions, and resources through the OpenCart community.
8. Drupal
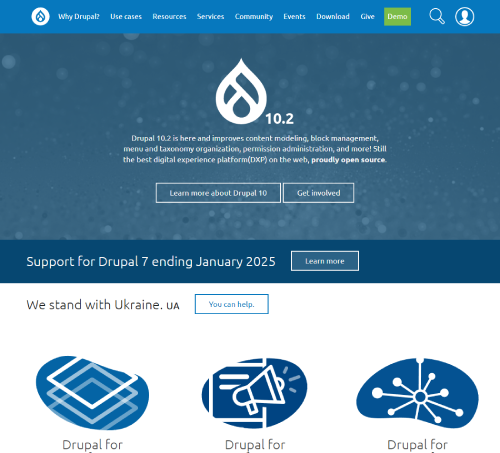
Pricing: Free
Drupal is a powerful and flexible open-source content management system (CMS) that is widely used for building a variety of websites and web applications. Basically, Drupal is known for its modular architecture, allowing users to extend its core functionality with a vast array of contributed modules. It has a large and active community of developers, designers, and users who contribute to its ongoing development and provide support through forums, documentation, and events. It is scalable and can handle a wide range of projects, from small websites to large, complex applications.
The CMS permits users to define custom content types and create intricate content structures using its taxonomy system. Drupal provides built-in support for multilingual websites, allowing content to be translated into different languages. Also, the CMS has a strong focus on security. The Drupal Security Team actively addresses vulnerabilities and releases security updates promptly.
9. Duda
Pricing: $19 – $149 per month
Duda is a website design and development platform that focuses on providing tools for web professionals, agencies, and small businesses to create and manage responsive websites. Duda offers a drag-and-drop website builder that allows users to create responsive websites easily. This ensures that websites look and function well on various devices, including desktops, tablets, and smartphones. In Duda, you will get a range of pre-designed templates to help users get started with their website. Users can enhance their websites with a variety of widgets from Duda’s widget library. Duda offers eCommerce capabilities, allowing users to create online stores and manage products. It includes features like product variations, secure checkout, and inventory management. The CMS allows web professionals and agencies to white label their platform, enabling them to customize the platform with their branding and offer it as a service to their clients.
If you’re considering using Duda, it’s advisable to explore their official website, review their plans, and take advantage of any trial offerings they may have.
10. Adobe Commerce
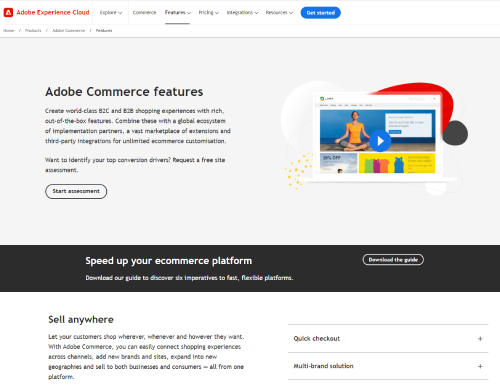
Pricing: Customized pricing
Adobe Commerce refers to the e-commerce platform previously known as Magento Commerce. Adobe Commerce is an enterprise-level e-commerce solution developed by Adobe, a well-known company in the field of creative software. Magento comes in two versions—Magento Open Source (formerly Community Edition) and Magento Commerce. The open-source version is free to use, while Magento Commerce is a premium, feature-rich solution designed for larger businesses. One of the strengths of Magento is its flexibility and customization capabilities. Users have extensive control over the design, functionality, and content of their online stores.
Magento Commerce is designed to scale and support the growth of businesses. It can handle large product catalogs, high traffic volumes, and complex e-commerce requirements. Magento allows users to manage multiple online stores from a single admin interface. This is particularly useful for businesses with different brands or operating in multiple regions. There is a robust user and developer community for Magento. Community forums, documentation, and other resources are available for support. As part of the Adobe ecosystem, Magento Commerce integrates well with other Adobe solutions, providing a comprehensive suite for businesses that utilize Adobe’s creative and marketing tools.
Final Thoughts
While wrapping up the blog, we came to the conclusion that every CMS shares almost similar features. But still, there are differences in cost and somewhere security, plugin support, and the way each CMS presents your work varies. All the Top 10 CMS that we have listed and explained here are SEO-optimised, User-friendly, and responsive. Apart from this, you can check them all on their officials for more recent details, and if it matches your requirements, then surely you will benefit from establishing your connection with the global audiences for better reach and expand your business to grow sales. You can compare prices and features of the theme, and then you will be able to make a final decision.
How to Customize The WordPress Theme?
Do you want to alter your theme for the website? Looking for a way to make it possible? Now, you can stop your discovery for a way to customize your online business website. Because here we are to help you to suggest the best possible ways for this.
We should Thank WordPress; it has given us freedom of choice and personalized themes that are predesigned and developed by professionals. In WordPress, you can obtain a tremendous collection of best WordPress themes that can be the best and strong foundation for all kinds of professional business websites. All the WordPress themes are completely customizable.
Many times, website owners want to present their business information in a unique environment so that it should look something different than the competitors. It’s one of the most effective strategies to invite organic traffic and make them stick to the site for a long. Furthermore, if you, as a website owner or a business person, want to control the visual appearance of your site functionality, then your purpose is truly recommendable.
Now, let’s have a look at the technical definition of the theme customization before we proceed with the details.
What is meant by theme customization?
Theme customization refers to the process of making changes and adjustments to the design, layout, and appearance of a website or applicant’s user interface based on a specific theme or template. This customization allows individuals or organizations to personalize the look and feel of their website or application to better align with their brand, content, or user preferences.
Here are some common aspects of theme customization:
- Color Schemes: Modifying the colors used throughout the theme to match a specific brand or desired aesthetic.
- Typography: Changing fonts, font sizes, and font styles to improve readability and convey a particular style.
- Layout: Adjusting the arrangement of elements on the page, such as the placement of headers, footer, sidebars, and content sections.
- Images and media: Replacing or modifying images, videos, and other media used in the theme to showcase custom content.
- Logo and branding: Integrating a company or personal logo, tagline, and other branding elements into the theme.
- Widgets and modules: Adding, removing, or customizing widgets, modules, and components to amplify functionality or highlight specific content.
- CSS and HTML: Editing the theme’s cascading style sheets (CSS) and HTML to make more advanced design changes.
- Responsiveness: Ensuring that the theme adapts to different screen sizes and devices, providing a consistent user experience.
- Navigation and menus: Customizing the structure and style of menus and navigation elements to improve user interaction and accessibility.
- Page Templates: Creating custom page templates for specific types of content such as landing pages, product pages, or blog posts.
In a nutshell, theme customization is commonly associated with Content Management Systems (CMS) like WordPress, Joomla, and others, which offer predesigned themes that users can modify to suit their needs. Additionally, web developers and designers can deliver more extensive and tailored theme customization services to create unique and distinctive websites or applications.

Prime Reason to customize a theme
Whichever theme you select, its predesigned layout will take precedence over the look of your website. You may set your website apart from other websites that use the same theme by altering it to give a distinctive appearance. Customizing a WordPress theme allows you to make your website look pretty and function exactly how you want it to. You can make changes to the design, layout, colors, and functionality.
Advantages of customizing WordPress Theme
Customizing a WordPress theme offers numerous advantages, allowing you to create a website that aligns perfectly with your brand, content, and functionality needs. Here are some of the key advantages of customizing a WordPress theme:
- Make your website look exclusive against the other competitors.
- Visually appeals to the target audiences.
- Delivers a firm structure and effectiveness.
- Enhances the User experience and the functionality of the theme.
- Optimized performance
- SEO friendly
- Content presentation
- You can make your site more accessible to the users once you alter the theme.
Today, in this blog, we are going to learn some basic steps to customize the WordPress theme. So, let’s begin the steps.
Steps to customize the WordPress theme
The practical processes of customizing your WordPress website will be covered in this part. Let’s walk through the various ways you can alter a WordPress theme.
- Choose a Theme
If you haven’t already, select a WordPress theme that serves as a good starting point for your website. The WordPress theme repository and third-party theme suppliers offer thousands of free and Premium WordPress themes.
- Install and Activate the theme.
After you have chosen a theme, just turn to your WordPress dashboard, navigate to “Appearance”->Themes, and hit the ‘Add New’ option. Search for your chosen theme and install it. Then, activate the theme.
- Customize the theme
To customize your theme, you can use several methods and tools within WordPress.
- Use the Full Site editor (beta version) to alter a WordPress Theme.
Depending on the theme you picked and the WordPress version your site is running, you can use Full Site Editing, a block-based site editor that is part of the Gutenberg project that expands the block editing feature beyond pages and posts. To use Full Site Editing, you are required to have WordPress 5.9 or its higher version installed and a theme that is compatible with blocks.
- Make use of Customizer.
Most themes provide a live customizer where you can make changes to your site and see the results in real time. To access it, go to ‘Appearance’-> ‘Customize.’ Common options in the Customizer include site title, tagline, header image, background, colors, and more.
- Theme Options or Settings
Some themes include a separate settings page within the WordPress dashboard where you can configure various aspects of the theme.
- Make use of Page Builder.
Many themes are compatible with page builders like Elementor, Divi, or Beaver Builder. These page builders also offer a visual interface for customizing your site’s layout and content.
- Customize Site Identity
In the Customizer, start by customizing your site’s identity. You may change or alter the site title and logo. Upload a custom logo or set a site icon to magnify brand recognition.
- Adjust the layout and Typography.
Customize the layout and typography according to your preferences. You may change fonts, font sizes, line spacing, and more. Also, you may adjust the width and alignment of your content.
- Customize Colors and Background
Change the color scheme and background to match your brand or personal style. You may set text colors, links, backgrounds, headers, and more.
- Customize Header and Footer
Depending on your theme, you can have options to customize the header and footer. You can also change the header layout, add or remove elements, and customize the footer content.
- Configure Manus
Create and customize navigation menus to organize your site’s content. You can usually do this in the ‘Appearance’-> ‘Menus’ section of your WordPress dashboard.
- Add Widgets
Widgets are small content blocks you can place in your theme’s widgetized areas, for example, sidebars, footers, etc. Customize these widgets with content like recent posts, social media feeds, or custom text.
- Create and Customize Pages
Create pages for your website’s content and customize their layouts. Use the page builder or the default block editor to arrange content as desired.
- Install Plugins
Enhance your site’s functionality by installing and customizing plugins. There are also plugins for SEO, contact forms, social sharing, e-commerce, and more.
- Test Responsiveness
Make sure your theme customization is responsive and looks good on various devices such as desktop, tablet, and mobile.
- Preview and Publish
Before making changes live, use the Customizer’s preview feature to see how your site will look. Once you are satisfied, hit ‘Publish’ to store the changes that you have made.
- Regularly Update
Keep your theme and plugins up to date to ensure security and compatibility with the latest version of WordPress.
Conclusion
After such a long elaboration and guidance on How to Customize The WordPress Theme, we can say that altering a WordPress Theme empowers you to create a website that not only looks great but also functions optimally for your specific goals and audience. It provides the flexibility and control you need to build a successful online presence.
In the end, we recommend that the level of customization available may vary depending on the theme that you select. More advanced customization may require coding knowledge and access to the theme’s source code, which is typically not recommended for beginners unless you have web development skills.
7 Most Common WordPress Errors and How to Fix It
Are you working on a WordPress content management system? Dealing with errors on WordPress? What kind of error you are facing or struggling to fix it? Yes… you read it correctly. WordPress is a broadly used Content Management System, and like any other application, it can encounter multiple kinds of errors from time to time. Here are the 7 common WordPress errors.
7 common WordPress errors
White Screen of Death (WSOD)
This error occurs when a blank white screen appears and there is no information about the problem. It’s a super anonymous error. It can be caused by issues such as a poorly coded theme, a plugin’s exhausted memory limit, or a corrupted core file.
How to fix it?
The White Screen of Death in WordPress is a common error issue, and it can be caused by various factors such as plugin conflicts, theme issues, OHO errors, or memory limit exhaustion. Here are some steps you can take to troubleshoot and fix an error.
- Enable Debugging in the wp-config.php file in the root directory of your WordPress Installation.
- Increase memory limit.
- Disable the plugins by renaming them with the help of FTP or your hosting provider’s file manager.
- Rename the folder containing your current theme to switch to the default theme. If the problem gets resolved, your theme may be causing the issue. Consider updating the theme or contacting the theme developer for support.
- Update WordPress through the admin dashboard or by downloading the latest version from its official WordPress website.
- Incorrect file or directory permissions can cause issues. So make sure that files and directories have the correct permissions.
Internal Server Error (HTTP 500)
Internal Server Error (HTTP 500) is a generic error message that indicates a problem with the server but doesn’t provide specific details. Causes include corrupt .htaccess files, exhausted PHP memory limit, or conflicts with plugins or themes.
How to fix this error?
- Check a .htaccess file if it is corrupt. It can create internal server errors. You can try renaming it to something else and then refresh your site to view if the issue persists.
- Verify the file permissions. Incorrect file or directory permissions can cause internal server errors. Ensure that your WordPress files and directories have the correct permissions.
- Check for syntax errors. If you recently edited your theme’s functons.php file or added custom code to it, make sure that there are no syntax errors.
- Check Server Configuration. If you have access to your server’s configuration files, ensure they are correctly configured. Check for any misconfigurations or restrictions.
Error Establishing a Database Connection
When WordPress is unable to communicate with the database, this error message appears. It can be caused by incorrect database login credentials, a corrupted database, or server issues.
How to fix this error?
- Incorrect credentials for the database can cause this error. So check it first.
- Check whether the hosting information is correct or not, like hostname.
- Contact your hosting providers if the server is down. Server down can also be the reason for displaying an error.
- Ensure that there is sufficient disk space on your hosting account. A lack of disk space can prevent the database from functioning properly.
- Check the database server status, Size, and quota.
404 Not Found Error
This error indicates that the requested page is not found. Common causes include permalink issues, corrupted .htaccess files, or misconfigured server settings.
How to fix this error?
- Make sure that the URL you are trying to access is correct. Typos or incorrect URLs are common causes of 404 errors.
- If you recently changed your permalink structure, there might be an issue with the new configurations. So, ensure that your permalink structure is set correctly.
- Verify that the configuration of your. htaccess file is proper.
- If the 404 error is occurring for a particular page or post, consider recreating it. Sometimes, the page or post may have been accidentally deleted or not published.
- Use a tool or plugin to check for broken links on your site. Broken links can lead to 404 errors. Update or eliminate any broken links that you come across.
- Your browser might be caching the 404 error page. Clear your browser cache and try accessing the page again.
Connection Timed Out Error
This error occurs when the server takes too long to respond. It can be caused by slow server performance, network issues, or problems with the theme or plugins.
How to fix this error?
- Ensure that your internet connection is stable. A temporary connection issue could be causing the timeout.
- Temporarily deactivate all plugins to check if one of them is causing the timeout. If you can’t access the WordPress admin panel, you can deactivate plugins by renaming the ‘plugins’ folder in your WordPress installation directory.
- Temporarily switch to a default WordPress theme. If the issue is theme-related, switching to a default theme should help you identify the problem.
- Sometimes, memory limits can cause connection timeouts. Increase the PHP memory limit.
- Over time, your database can become bloated, leading to slower response times. Optimize your WordPress database using plugins like WP-Optimize or phpMyAdmin.
Issues with Themes and Plugins
Problems with WordPress themes and plugins are common. Compatibility issues, poorly coded themes or plugins, or conflicts between them can lead to errors. It’s pertinent to keep themes and plugins updated.
How to fix it?
Themes:
- Pick a single of the WordPress default themes to replace your current theme. It can help to determine if the issue is related to your theme.
- Ensure that your theme is updated to the latest version. Outdated themes may have compatibility issues with the WordPress core or other plugins.
- Refer to the documentation for any particular instructions or recommendations. Some themes might require additional configurations or plugins.
- Turn off every plugin and go back to the original theme. Reactivate your theme and check if the issues persist. If not, one of the plugins might be causing the problem.
Plugins:
- To check if the problem has been fixed, deactivate every plugin.
- To avoid compatibility problems, make sure all of your plugins are up to date.
- Check the documentation for each plugin to make sure you have configured them correctly. Some plugins may require specific settings to work properly.
- Enable WordPress debugging to get more information about errors.
- Ensure that your WordPress installation is using a supported PHP version. Some plugins may require a minimum PHP version to function properly.
Mixed Content Errors (HTTP and HTTPS)
If your site has an SSL certificate and you are loading content over HTTP, or vice versa, browsers may block some content, causing mixed content errors. This can be fixed by ensuring that all resources are loaded using the correct protocol.
How to fix it?
- Identify the mixed content with the help of browser developer tools and WordPress plugins.
- Make sure the themes, plugins, and WordPress core are all current. Developers often release updates to address compatibility and security issues, including those related to HTTPS.
- Update the site URL and content.
- Check your theme’s settings for any hardcoded HTTP links. Update them to use HTTPS.
- If you have embedded images with HTTP URLs in your content, update them to use HTTPS. This includes featured images, post content, and custom fields.
- If you use a CDN, make sure it is configured to serve content over HTTPS. Update CDN settings if necessary.
When encountering these WordPress errors, it is crucial to:
- Back up your site: Before making any changes, back up your WordPress site to avoid data loss.
- Check error logs: Reviewing error logs can provide insights into the specific issues causing errors.
- Deactivate plugins and switch themes: Temporarily deactivating plugins and switching to a default theme can help identify if the issues are related to a specific plugin or theme.
- Consult the WordPress Community: Forums and online communities are valuable resources for seeking help and solutions to common WordPress errors.
Conclusion
Issues with themes and plugins are common in WordPress, but they can usually be resolved with some troubleshooting.
The resolution of these errors may vary based on specific circumstances, and it is recommended to seek assistance if you are unsure about making changes to your WordPress site.
We have seen all the common errors that occur in WordPress. You just need to keep in mind to perform these troubleshooting steps on a staging site first, especially if you are not familiar with the impact of these changes, to prevent any possible hiccups with your live website.
Always back up your site before making significant changes, especially if you are modifying URLs and content. This helps you revert to a working state if any issues arise.
Benefits of Using Content Delivery Networks for Your Website
Do you want your website to give the best user experience to the visitors coming to the site? What a question it is. Of course, any website owner wants to provide the best services to their visitors so that they can share and establish a good bond with each other and take their business for expansion.
Now, obtain a cutting-edge solution that will provide better performance, reliability, and security for your web properties and deliver the best user experience to visitors who will come to your site, surf it, and look to understand your business and products. Every visitor should feel comfortable while going through your website. A flawless, quick-loading and functionally strong site impresses visitors and encourages them to stay connected with the site and revisit consistently. It helps to turn them into paying customers and grow your sales gradually. Content Deliver Networks functions for managing the client-server applications, and it works so that a site can flow without any jerk.
CDN is also responsible for issuing many other advantages. Today, in this article, we will gain knowledge about the benefits of using Content Delivery Networks for the site. Before that, we will be studying the basics of Content Delivery Networks.
What is meant by Content Delivery Networks?
Content Delivery networks are the networks of distributed servers that work together to deliver web content, such as text, images, videos, and other resources to users based on their geographic location. CDNs are designed to improve the performance, reliability, and availability of content on the internet while reducing the load on the origin server, which is the central Server where the content is originally hosted.
Features of Content Delivery Networks
Websites and web services commonly use Content Deliver Networks to improve the user experience, reduce latency, and ensure content availability. They are especially valuable for websites with a global user base, eCommerce platforms, and media streaming services. And other content-heavy online applications. Popular CDN delivers include Akamai, Cloudflare, Amazon CloudFront, and Fastly. among others. Here are some features of CDN:-
Geographic Distribution: Content Delivery Networks have servers strategically located in various regions and data centers around the world. When a user requests content, the CDN routs that request to the nearest Server to reduce latency and speed up content delivery.
Caching: CDNs store copies of web content on their servers. This caching allows them to serve frequently requested content quickly without needing to retrieve it from the original Server each time. Cached content is updated periodically to ensure it’s up to date.
Load Balancing: CDNs distribute incoming web traffic across their network of servers, preventing any single server from becoming overloaded. This load balancing enhances the performance and availability of websites and web applications.
Distributed Denial of Services (DDoS) Protection: CDNs can absorb and mitigate DDoS attacks by distributing traffic across multiple servers and applying security measures to filter out malicious traffic.
Security: CDNs offer security features such as SSL/TLS encryption, web application firewalls, and content filtering to protect against various online threats and vulnerabilities.
Benefits of Using Content Delivery Networks for Your Website
Content Delivery Networks offer numerous benefits for websites, making them an essential component for many online businesses and organizations. Here are some of the key advantages of using CDNs:
Improved Website Performance
CDNs distribute your website’s content to multiple servers located in different geographic regions. This reduces the physical distance between the user and the Server, resulting in faster loading times and improved website performance. Users experience quicker page load times and smoother interactions.
Enhanced User Experience
Faster loading times and reduced latency lead to a better user experience. Users are more likely to stay engaged with your site and are less likely to bounce due to slow-loading pages. This can help improve user satisfaction and increase conversion rates.
Increased Website Availability
CDNs can help ensure the availability of your website, even during traffic spikes or server failures. They can automatically route traffic to the nearest available Server or scale resources as needed to handle high loads, reducing downtime.
Bandwidth Savings
CDNs can reduce the load on your origin server by caching and delivering content from edge servers. This can lead to significant bandwidth savings and potentially lower hosting costs, especially if you are billed based on data transfer.
Enhanced Security
Many CDNs offer security features such as DDoS protection, Web Application Firewall (WAF), and SSL/TLS encryption, which help protect your website from various cyber threats. These additional security layers can safeguard your site and customer data.
Global Reach
CDNs have a network of edge servers located in various parts of the world. This global presence allows your website to serve content to users in different geographic locations, reducing latency and ensuring a consistent user experience regardless of their location.
SEO Benefits
Faster loading times and improved website performance can positively impact your website’s search engine rankings. Search engines like Google consider page speed as a ranking factor, so a CDN can help boost your SEO efforts.
Scalability
CDNs are designed to handle traffic spikes and fluctuations. They can automatically scale resources to accommodate increased demand during promotional events, product launches, or traffic surges without affecting your origin server’s performance.
Mobile Optimization
CDNs can optimize content delivery for mobile devices, ensuring that your website performs well on smartphones and tablets. Given the increase in traffic, this is especially crucial.
Analytics and Reporting
Many CDNs offer analytics tools that provide insights into your website’s performance, user behavior, and traffic patterns. This data can help you make informed decisions about content optimization and resource allocation.
Cost-Effective
While there may be a cost associated with using a CDN, the benefits it offers in terms of performance, availability, and security can outweigh the expenses, especially for websites with a global audience.
Minimizes load on the Server
Remember that a Content Delivery Network comprises a geographically dispersed network of servers. Client devices retrieve data packets from numerous main servers where the material is kept. Any server is not at risk of being overloaded thanks to the strategically placed servers spread across great distances. As a result, the overall capacity is freed up to serve more concurrent users, which lowers bandwidth and delivery costs.
Different Business Models that get advantages from Content Delivery Networks
Any organization with an online presence may get advantages from implementing Content Delivery Networks. Customer experience is improved with fewer network connection interruptions. Following are some of the more typical industries that employ CDNs.
Education: Over the past 10 years, online courses have become increasingly popular. Now, participants can participate in the same course from anywhere in the world without having to travel. Students in many of these courses must stream audio and video lectures. Using a CDN guarantees that the participant’s user experience won’t be affected by their location in relation to the Server.
Entertainment and Media: To deliver content to viewers, many media and advertising websites use streaming services. No matter where the user is located, using a CDN improves the process so that there is less likelihood of any network outage or slowness.
eCommerce: eCommerce businesses are relying heavily on Content Delivery Networks to make sure their products are accessible for purchase around the clock. Continuous uptime enables businesses to reach larger markets and frequently results in higher customer retention rates.
Online Gaming: Due to the massive amount of data and transactions as well as the large number of users connected at once, gaming is one of the most taxing applications. Organizations that are associated with gaming must develop strong systems with the highest levels of availability, dependability, fault tolerance, and scalability in order to deliver the highest uptime possible.
Summary
Content Delivery Networks can significantly enhance your website’s performance, availability, and security while also improving the user experience. By reducing latency, optimizing content delivery, and protecting against various online threats, Content Delivery Networks play a crucial role in ensuring your website’s success in the competitive online landscape.
Understanding Custom Post Types in WordPress | Complete Guide
WordPress is one of the most popular blogging platforms in the world, and for good reason. It’s easy to use, highly customizable, and comes with a wealth of features right out of the box. It has became leading Content Management Systems for Business Website. However, did you know that you can create custom post types in WordPress? This powerful feature allows you to define your own content types beyond the default post and page types. Custom post types can help you better organize and showcase your content, whether you’re running a blog, an e-commerce website, or anything in between. In this article, we’ll explore understand custom post types in WordPress, including what they are, how they work, and why they’re so powerful for WordPress users.
Understanding Custom Post Types in WordPress
Custom post types in WordPress allow users to add content types beyond just posts and pages, allowing for greater flexibility and customization of their website. A custom post type is essentially a new type of content that is defined by the user and can include its own unique features and functionality.
For example, a website that features recipes may want to create a custom post type for recipes, which would allow for specific fields such as ingredients, cooking time, and serving size to be added to each recipe post. This makes it easier for visitors to search and browse through recipe content, and for the website owner to organize their content more effectively.
Understanding and utilizing custom post types in WordPress can be a game-changer for website owners who want to go beyond the default post and page types. By creating custom post types, they can create a more tailored user experience that meets the specific needs of their website and audience. Additionally, custom post types can be further enhanced with custom taxonomies, which allow for even more targeted organization and filtering of content.
Overall, custom post types are a powerful tool in the arsenal of any WordPress user who wants to take their website to the next level of customization and functionality. With a little knowledge and experimentation, anyone can create custom post types that will truly make their website stand out.
Must Read: Ultimate guide to create a website using WordPress Themes
Benefits of Using Custom Post Types
Custom post types offer numerous benefits to WordPress users, including:
1. Enhanced Organization: Custom post types allow for the categorization of content in a more targeted and specific way. This enables website owners to create a more organized and structured website, making it easier for visitors to find relevant content.
2. Improved User Experience: With custom post types, website owners can create a more tailored user experience that meets the specific needs of their audience. Custom fields, taxonomies, and post types can be used to create intuitive navigation, improved search functionality, and easy access to related content.
3. Increased Flexibility: Custom post types give WordPress users the freedom to create new and unique content types beyond just posts and pages. This increased flexibility allows for greater customization and a more personalized website experience for visitors.
Using custom post types, WordPress users can make their websites more professional and impactful. You can create recipe posts for a food blog or event types for a community calendar with custom post types.
How to Create Custom Post Types in WordPress
Creating custom post types in WordPress is a simple and straightforward process. Here are the steps:
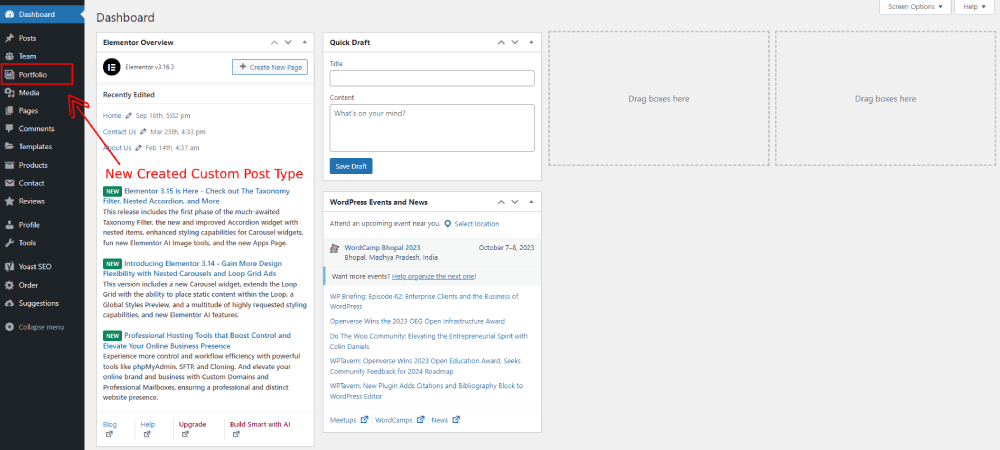
1. Install and activate a custom post type plugin: There are numerous custom post type plugins available in the WordPress repository. Install and activate the one that suits your needs.
2. Create a new custom post type: After activating the plugin, navigate to the plugin settings and click ‘Add New’. Here, you will need to provide a name and a few other details for your custom post type.
3. Set up custom taxonomies: Taxonomies are used to categorize your content. Custom taxonomies can be created and associated with your custom post type.
4. Add custom fields: Custom fields can be used to capture specific data about your posts. A popular custom field plugin is Advanced Custom Fields.
5. Associate custom templates: Once you have created your custom post type, you can create custom templates to display your content in a unique and visually appealing way.
With these steps, you can easily create and manage custom post types in WordPress. You can create and manage your content using custom post types to create a portfolio, business listing, or directory.
Adding Custom Fields to Your Custom Post Type
Adding custom fields to your custom post type is an essential step that can help you capture more specific information about your content. Custom fields give you the flexibility to add unique content and enhance the functionality of your website.
Here are the steps to add custom fields to your custom post type in WordPress:
- 1. Install a custom field plugin: There are several custom field plugins available, such as Advanced Custom Fields, Pods, and Meta Box. Install and activate the plugin that suits your needs.
- 2. Create a custom field group: Navigate to the custom field plugin settings and click ‘Add New’. Here, you’ll need to provide a name and other details for your custom field group.
- 3. Add fields to your group: Once you’ve created your custom field group, you can add specific fields to capture data. You can add text fields, image fields, select fields, etc.
- 4. Associate the group with your custom post type: You’ll need to associate the custom field group with your custom post type to display the fields on the post editing screen.
- 5. Display the custom field data: You can display the custom field data in various ways, such as using template tags, shortcodes, or custom functions.
Adding custom fields to your custom post type can enhance the user experience and provide more information about your content. It can also help you create a more versatile and dynamic website.
Displaying Custom Post Types on Your Website
Displaying Custom Post Types on Your Website
Once you have created your custom post type in WordPress, it’s time to display it on your website. Here are some steps to follow:
1. Create a custom template: In order to display your custom post type, you will need to create a custom template in your WordPress theme. This template will be used to display the posts from your custom post type.
2. Use a loop: Next, you will need to use a loop to display the posts from your custom post type. This can be done using the standard WordPress loop function, or you can use a custom loop function specific to your custom post type.
3. Customize the display: You can customize the display of your custom post type by using different HTML and CSS elements. This can help you create a unique look and feel for your custom post type.
4. Use shortcodes: Another option for displaying your custom post type is to use shortcodes. WordPress has built-in shortcodes that allow you to display posts from your custom post type in different ways. For example, you can use a shortcode to display only the most recent posts from your custom post type.
5. Use plugins: There are also a number of plugins available that can help you customize the display of your custom post type. For example, you can use a plugin to add a filter to your custom post type, or to display posts from your custom post type in a specific order.
By following these steps, you can easily display your custom post types on your website. This will help you create a more dynamic and engaging website for your users.
Advanced Techniques for Custom Post Types
Custom post types are a powerful feature of WordPress that allow developers to create their own content types, such as portfolios, event calendars, and job listings. Once you’ve created a custom post type, there are a number of advanced techniques you can use to take your website to the next level.
1. Custom Taxonomies: By creating custom taxonomies, you can organize your custom post type content into categories and tags, just like regular posts and pages. This can help improve the navigation and user experience of your site.
2. Custom Fields: Custom fields allow you to add additional data to your custom post type, such as dates, locations, and prices. This data can then be displayed on your website using templates and shortcodes.
3. Custom Post Statuses: You can create custom post statuses, such as “In Progress” or “Needs Review,” to help manage your custom post type content more efficiently. This can be especially useful if you have a team of contributors working on your website.
4. Custom Templates: By creating custom templates for your custom post type, you can completely control how your content is displayed on your website. This can include custom layouts, styles, and functionality.
5. Custom Queries: Custom queries allow you to display your custom post type content in a variety of ways, such as by date, category, or tag. This can be helpful for creating dynamic pages, such as archives and search results.
6. Custom Post Types in Widgets: You can add your custom post type content to widgets using plugins like Custom Post Type Widgets. This can be useful for creating a custom sidebar or footer on your website.
7. Custom Post Types in Navigation: You can also add your custom post type content to your website’s navigation menus using the WordPress Menu Editor. This can help improve the accessibility of your custom post type content.
By using these advanced techniques, you can take full advantage of custom post types in WordPress to create a dynamic, engaging website that stands out from the crowd.
Final Thoughts on Custom Post Types in WordPress
In summary, custom post types are a powerful feature of WordPress that give website developers the ability to create their own content types. By utilizing custom taxonomies, custom fields, custom post statuses, custom templates, custom queries, custom post types in widgets, and custom post types in navigation, you can create a dynamic and engaging website that stands out from the crowd.
It’s important to remember that while custom post types offer a lot of flexibility, it’s also important to use them thoughtfully and strategically. Consider whether a custom post type is truly necessary for your website, and how it will impact the user experience. Additionally, make sure you thoroughly test any custom post types and associated functionality before launching your website.
With custom post types in WordPress, you can take your website to the next level.
Ultimate guide to create a website using WordPress Themes
Create A Website Using WordPress Themes? don’t have much coding knowledge!! Don’t worry, we are here to help you, so don’t be concerned. You might want to get acquainted with WordPress first. After that, you’ll undoubtedly use WordPress themes to build a custom website for your own website.
Why WordPress …?
WordPress is the most-friendly user to create a website, which almost powers 43% of all websites on the internet. It provides you with an unlimited number of designs and thousands of apps and integrations for your website. WordPress is a open source and it comes with thousands of pre-designed websites and extensions.
it provides Different designs, arrangements, and features are included with each theme. Additionally, a theme is developed specifically to serve a certain type of website customized to the field your enterprise needs. You ought to think about selecting the option that best fits your preferences and needs for your website.
Steps to create a website:
Select a Hosting Provider:

Choosing a hosting provider is an important step in ensuring the success of your website or blog. It can influence if your website will be quick, safe, and always available.
You should base your decision on a few major considerations like hosting speed, hosting price and hosting uptime.
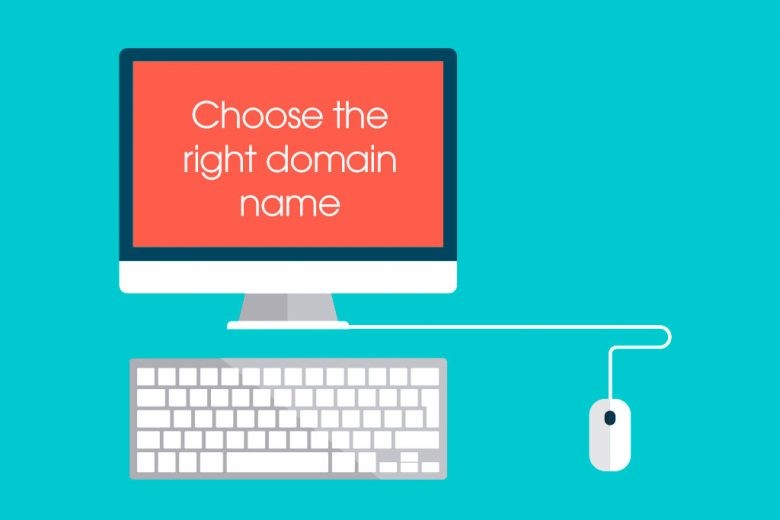
Choose a Domain Name:
You can find the domain name in the search box; it is the name of your website. For a domain name, you can be imaginative and use any word you choose, but it works best if you pick a word or a word combination that is closely related to the name of your business.
Make sure it’s short and memorable so that visitors to your website may simply remember it. Here are some of the top website or blog name generators in case you’re stuck for inspiration. Any domain name extension you like may be used. However,.com,.net, and.org are the most often used extensions. Typically, domain names cost $10–15 per year. I advise getting a domain name and hosting package together so you may save money. if you are Create A Website Using WordPress Themes you can go for WordPress friendly hostings after purchasng the domain Name.
Install WordPress
You can install WordPress and begin editing your blog once you’ve arranged for a domain name and hosting package. Remember to complete all the required fields in your hosting and domain accounts. If you don’t register the domain name right away after buying it, someone else might get it first. Once you’re done, you can quickly install WordPress on your hosting dashboard with a single click.

Pick a WordPress theme to Create a Website Using WordPress Themes
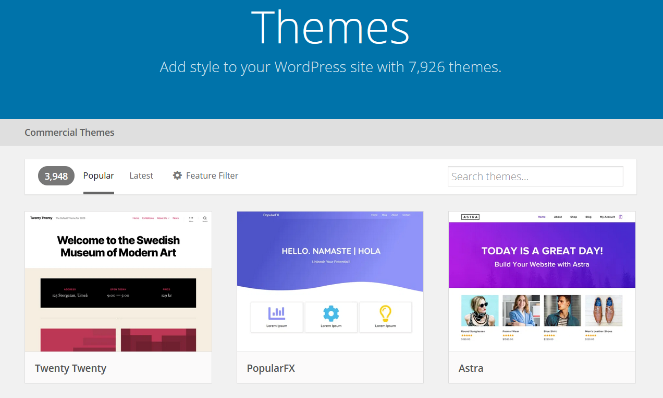
You can save yourself some valuable time by using a WordPress theme, which will have the entire website and design planned out for you. Customizing it will be the only thing you need to do.
I advise picking something practical yet not overpowering. Don’t be afraid to experiment because you won’t know what your visitors will appreciate before they visit your website.
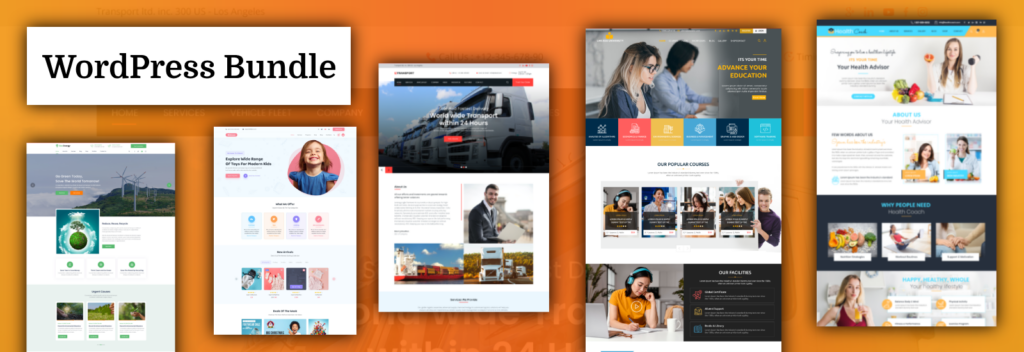
Try the Best WordPress Themes available on WordPress.org website. They are free of cost although with limited functionalities but you will get enough to create your own website. You can also use themes from our WordPress Bundle which has 30+ Premiumj WordPress Theme. if you’re having problems finding anything that works for your needs. Both a blog and a personal website can use this fashionable and useful theme. Here is a comprehensive list of the finest WordPress themes, both paid and unpaid, in case that isn’t to your liking.
With WordPress, changing or installing a theme is quite simple. Just log in and go to the appearance section, themes, and add new.
Make your website unique:
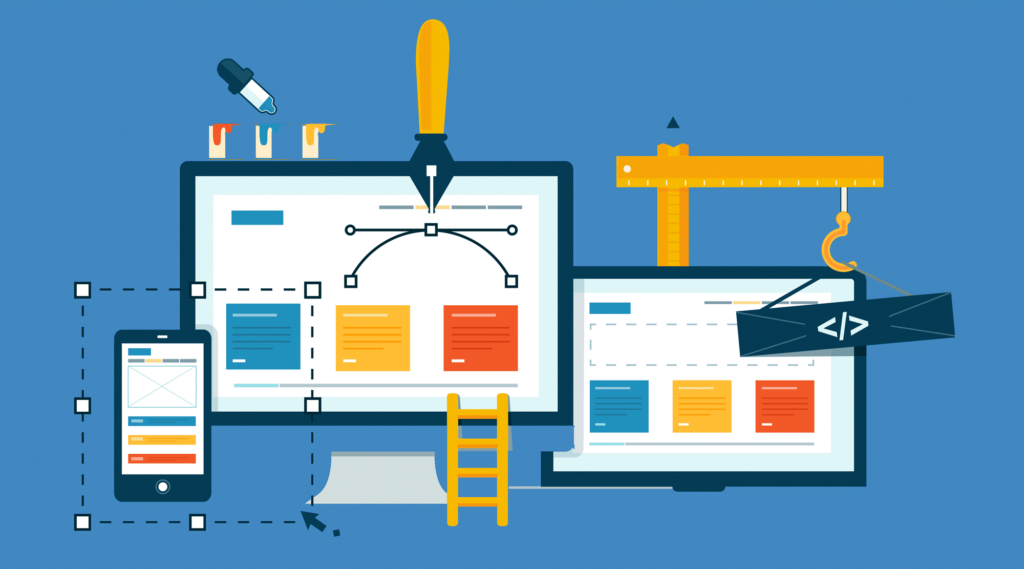
One of the most fascinating aspects of building a website is by far customizing your blog or website. You can add all the necessary components and pages, adjust the layout, and add a navigation bar.
Some themes may not even need customizations; all you need to do is install a certain plugin to get everything you want.
Check out this tutorial if you require any unique customizations. It is considerably more thorough.
Additionally, you can begin to build your website (or a lot). It’s a fantastic moment to put any precise ideas you have for how your website should look into action.
One way to create a unique website is using premade theme although the design is used by many but the way ytou will create the content and images will make your website a unique representation of your Business without much effort. You can check out our WP Themes for creating your Website.
Include the content:
Once everything is set up, you can begin adding your original material to your website. You can include photographs, textual descriptions, blog articles, or anything else you choose.
Your writing should be highly captivating and audience-specific. I am aware that perfecting it takes time, but it is completely worthwhile. Make your content distinct from the others as there is already a lot available.
Optimize your website
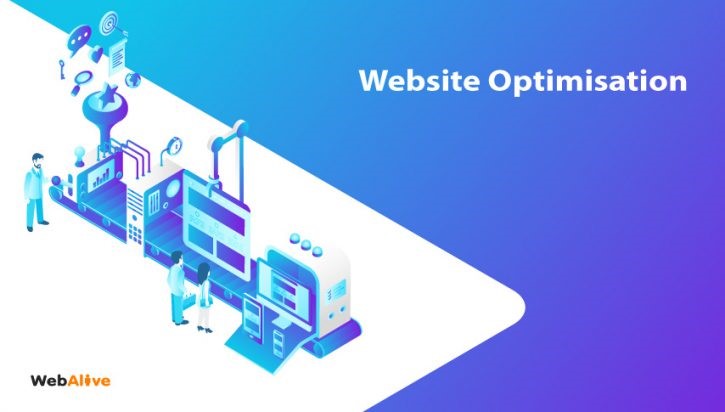
Once you’re done with the setup, it’s time to optimize your website. Running a test through GTmetrix as a starting point will show you what needs to be changed.
You can accomplish a few simple things, such as:
Image optimization; cache enabled; CSS, HTML, and JavaScript script minification.
Bonus advice
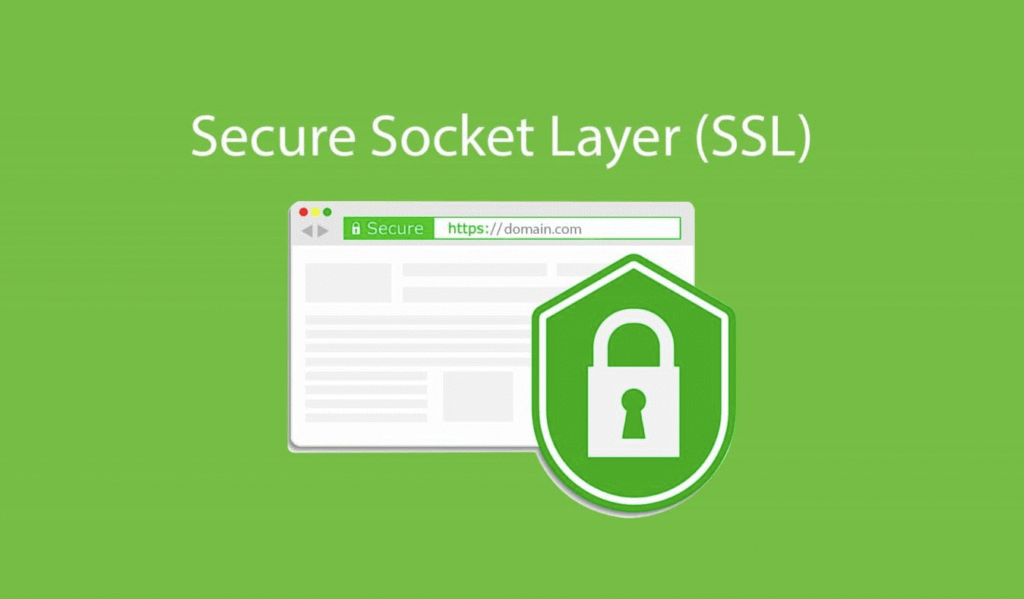
Don’t forget to install an SSL certificate on your domain before publishing your website. Within your hosting panel, you can accomplish that. It will guarantee the privacy of both your visitors’ data and your content.
If you still face any difficulty we are here, feel free to contact us for high-quality web/app development and marketing solutions. This is a bonus point if you want to Create A Website Using WordPress Themes.
Conclusion:
Congratulations! You’ve made it to the end of the ultimate guide to creating a website using WordPress themes. By now, you should have a solid understanding of the key steps involved in setting up a website, from selecting a domain name and hosting provider, to choosing and customizing your WordPress theme, and publishing your first pages and posts.
But your journey doesn’t have to end here. With the right tools and resources at your disposal, you can continue to grow and optimize your website for success. So, let’s ask the question:
What are some additional steps you can take to improve your website’s performance and visibility?
Consider these interactive questions to take your website to the next level:
- Have you optimized your website for search engines? Are you using relevant keywords in your content, meta descriptions, and image alt tags?
- Are you engaging with your audience through social media and email marketing? Are you using calls-to-action to encourage visitors to sign up for your newsletter or follow you on social media?
- Have you considered using paid advertising to drive traffic to your website? Have you set up retargeting campaigns to reach visitors who have already shown interest in your products or services?
By asking these questions and taking action on the answers, you can continue to grow and improve your website over time. Remember, creating a successful website is an ongoing process, but with the right approach and mindset, it’s a journey that can be both rewarding and fulfilling.
Thank you for reading this ultimate guide to creating a website using WordPress themes. We hope you found it helpful and informative. Good luck on your website-building journey!
