Ecommerce Mega Store Free Documentation
Your awesome theme / template documentation
Introduction
- Theme Name : Ecommerce Mega Store
- Author : misbahwp
- Support Forum : https://wordpress.org/support/theme/ecommerce-mega-store/
- License : GNU General Public License v3 or later
- Discription :Ecommerce mega store is a multipurpose and modern theme useful to create all kinds of online store for clothing, electronics, grocery store, gadgets store, baby store, books store, jewellery store, photo store and almost all kinds of store. It is fully customizable theme, which you can use it to create any store you like. It is integrated with WooCommerce plugin to help you setup your online store with ease. The theme is based on bootstrap framework and responsive design will render very well on any devices screen size. You can create your business website in a snap with drag and drop page builder. Start with customizing header and footer sections. It is cleanly coded and optimized for speed. It is cross-browser compatible that loads smoothly and quickly on all browsers. It is translation-ready and can be translated into many languages and also supports RTL languages. Its very base is on bootstrap framework that makes it handier to use. It is SEO-ready so you don’t have to worry about your site’s ranking on major search engines like Google. It is user-friendly to work with and allows heavy customization. With social media option link all your social media pages and showcase your popularity.
How to Establish the Theme
Setup Theme
Template installation is very simple process.
You can also install your theme using WP Admin
The first task is to log in to your WordPress admin area. Next, click on
1. In dashboard click on Appearance -- Themes

2. Click on the Add New button at the top of the themes page once page is loaded.
3. Click the button labelled as 'Upload Theme'.

4. Now you need to click browse button to select your ecommerce-mega-store-free-pro.zip theme and click on install now button.
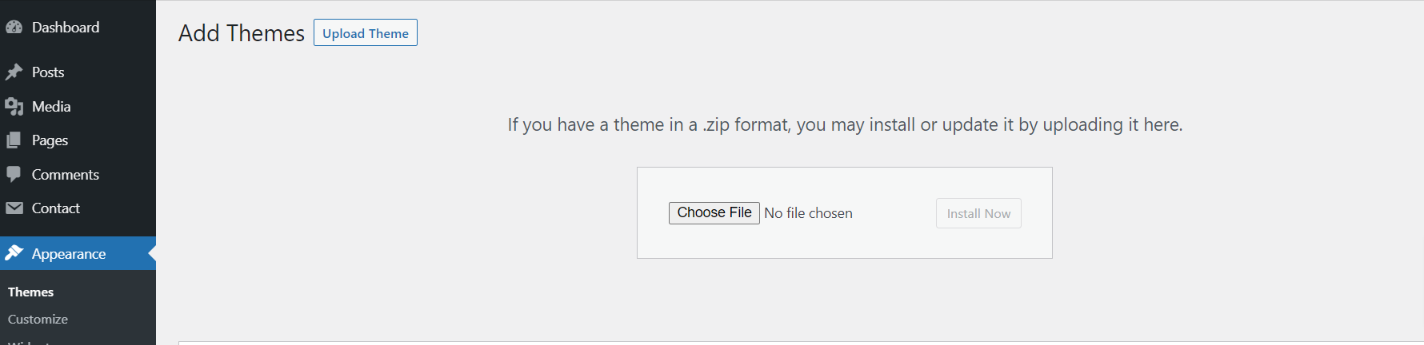
5. WordPress will now install your theme and display a success message, as well as a link to activate or to see the live preview. Congratulations on completing the installation of your theme.
Setup Home Page
The options of this page template (like sections location, disabling sections, number of posts they display) can be controlled it.
To design a home page, follow these steps.
1. Make a page to set the template: Go to Dashboard Pages -- Add New Page
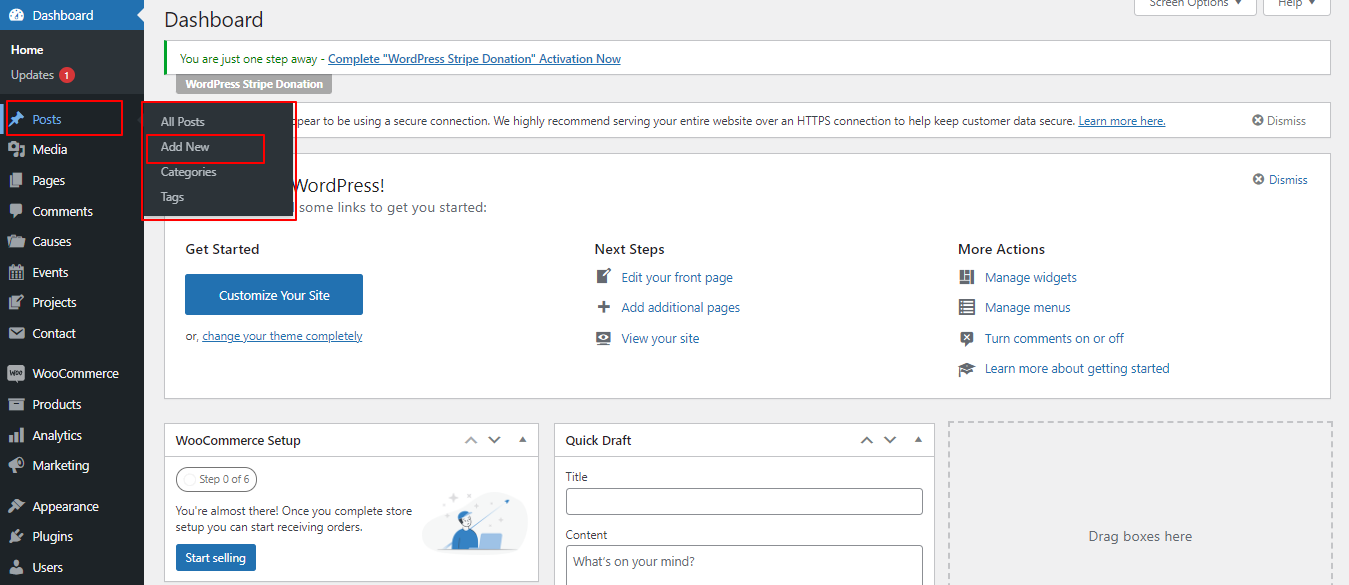
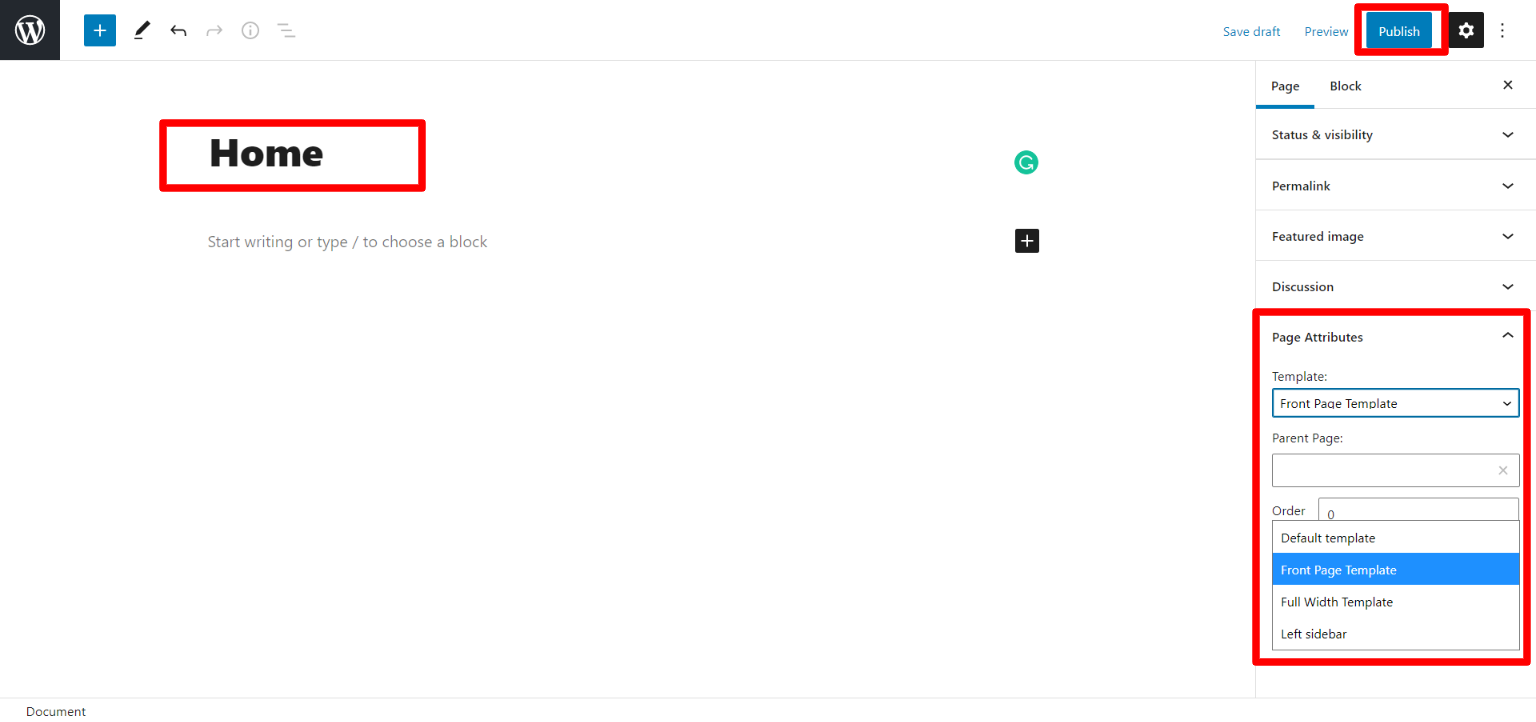
Name it "home" or anything as you like. Then, from the template dropdown, pick "front page template".
The Page Attributes section provides your page a parent page and a template.
1. Make a page to set the template: Go to Dashboard Pages -- Add New Page
Design the front page as follows: Go to Setting -- Reading -- To get the theme template select static page then select home page template.
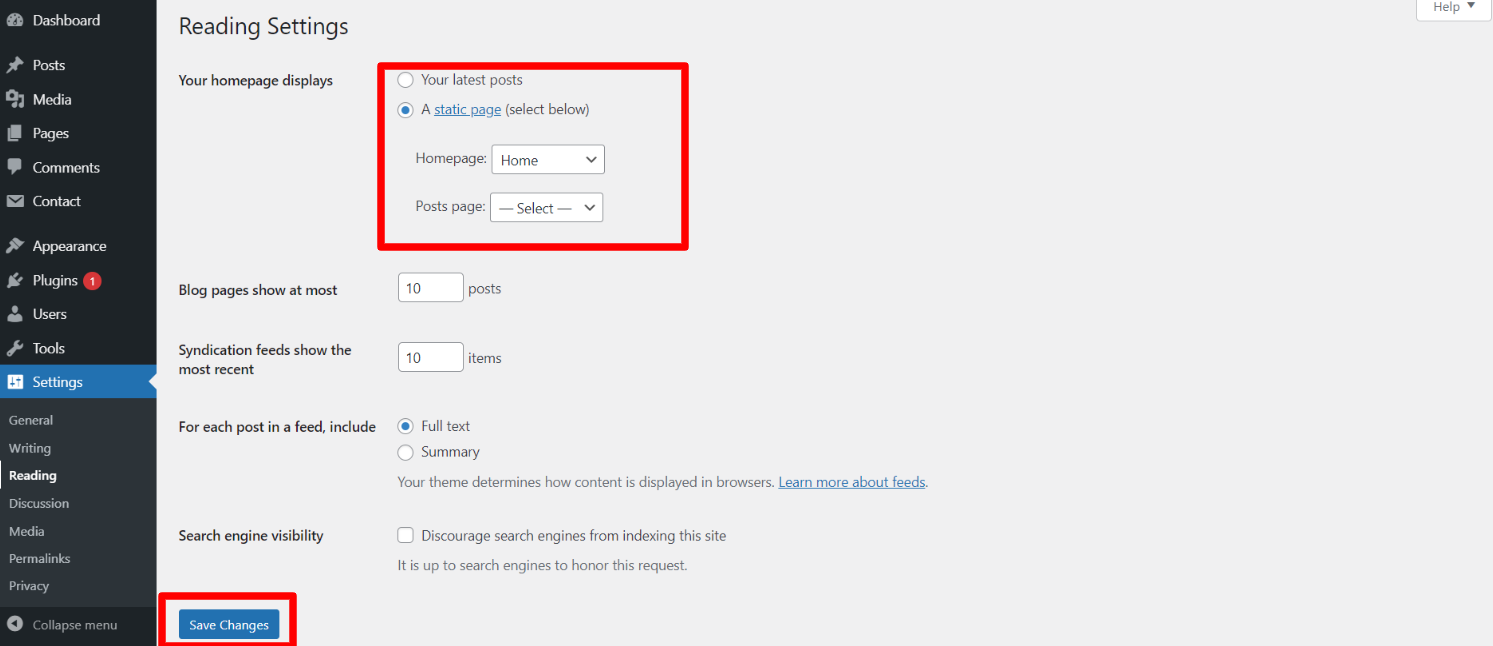
When you're finished, you'll be able to see all of the demo content on the front page.
Necessary Plugins
When you initially activate the theme, you'll be asked to install these plugins on your Dashboard. You can ignore the message if you don't want to install these plugins on theme activation, and if you change your mind later, you can install them manually.
In the dashboard, go to Plugins -- Install Plugins.
Kirki
Plugin download link kirki
WooCommerce
Plugin download link WooCommerce
Setup Menu
Setup Menu
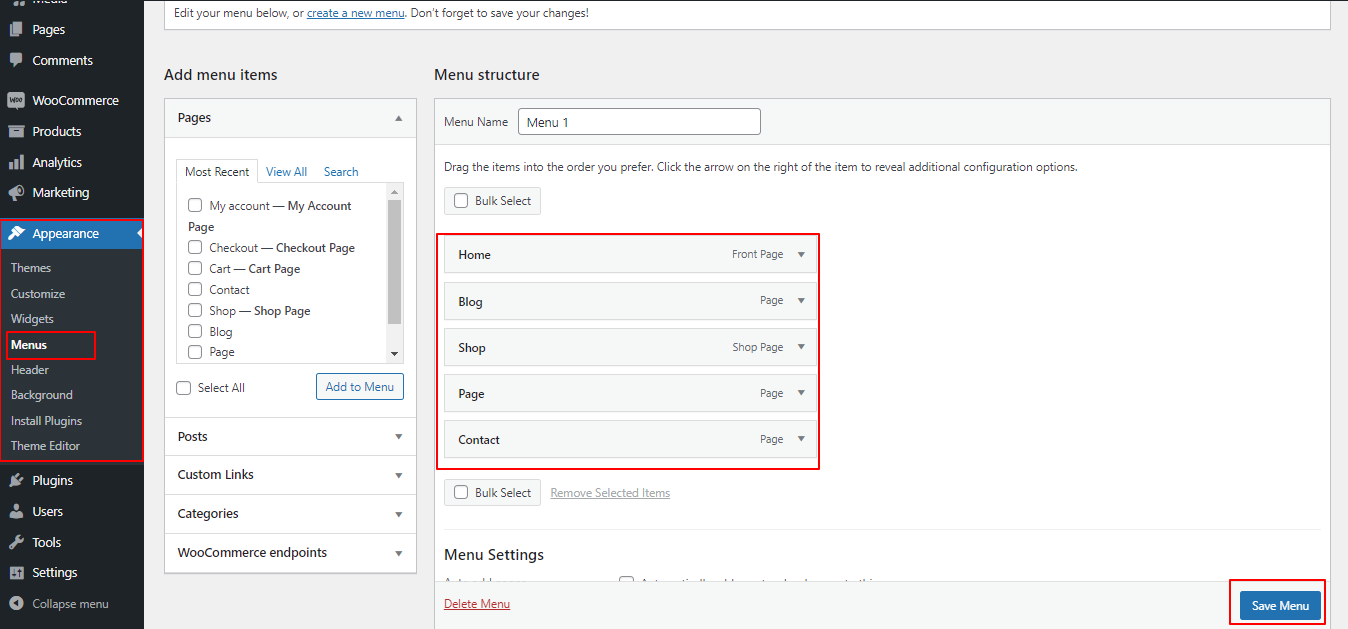
In the dashboard, go to Appearance -- Menu
From the 'Appearance' menu on the left-hand side of the Dashboard, select the 'Menus' option to bring up the Menu Editor.
Select Create a new menu at the top of the page. Enter a name for your new menu in the Menu Name box. Click the Create Menu button.
Your new custom menu has now been defined.

Adding Items to a Menu
Select the Pages that you want to add by clicking the checkbox next to each Page's title.
Click the Add to Menu button located at the bottom of this pane to add your selection(s) to the menu that you created in the previous step.
Click the Save Menu button once you've added all the menu items you want.
Your custom menu has now been saved.
In front end, it will look like this.

Ecommerce Mega Store Free Theme Setup
Top Header Icon
In order to proceed with you can set text , button url and social icon so follow the instructions given below.
In the Dashboard, go to Appearance -- Customize -- Theme Options -- Header Settings
In front end, it will look like this.
Logo Setup
In order to proceed with Theme Logo setup, you can set site title and tagline, follow the below steps.
In the dashboard, go to Appearance -- Customize -- Site Identity -- Set Title and Tagline You can also make the tagline hidden.
In front end, it will look like this.
Slider Section
Fetch Categories
This screen is divided into 2 sections, the Add New Category and category table sections.
All of the categories are listed in this table. Categories are organized alphabetically and hierarchically.
Follow the below steps to setup Category Settings.
In the dashboard, go to Posts -- Categories -- Add New
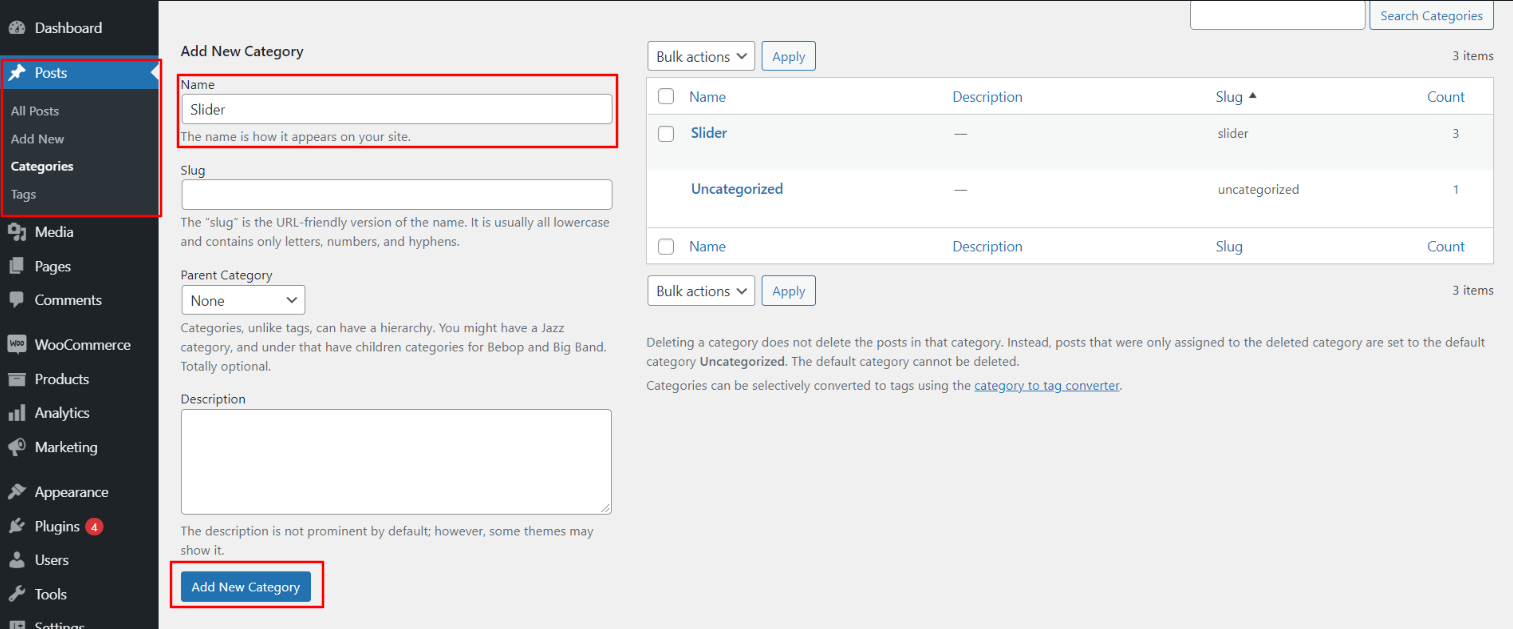
Once you have done with this you will see the categories on your theme customize.
In this section, you have to add new category for each post.
Fetch Post
In the dashboard, go to Posts -- Add New

Now to go on with Post settings, You can set post title, content and image. And Select which Category you want this post to show.
Follow the below steps to setup Post Settings.
In the dashboard, go to Posts -- Add New
You can make multiple posts for category.
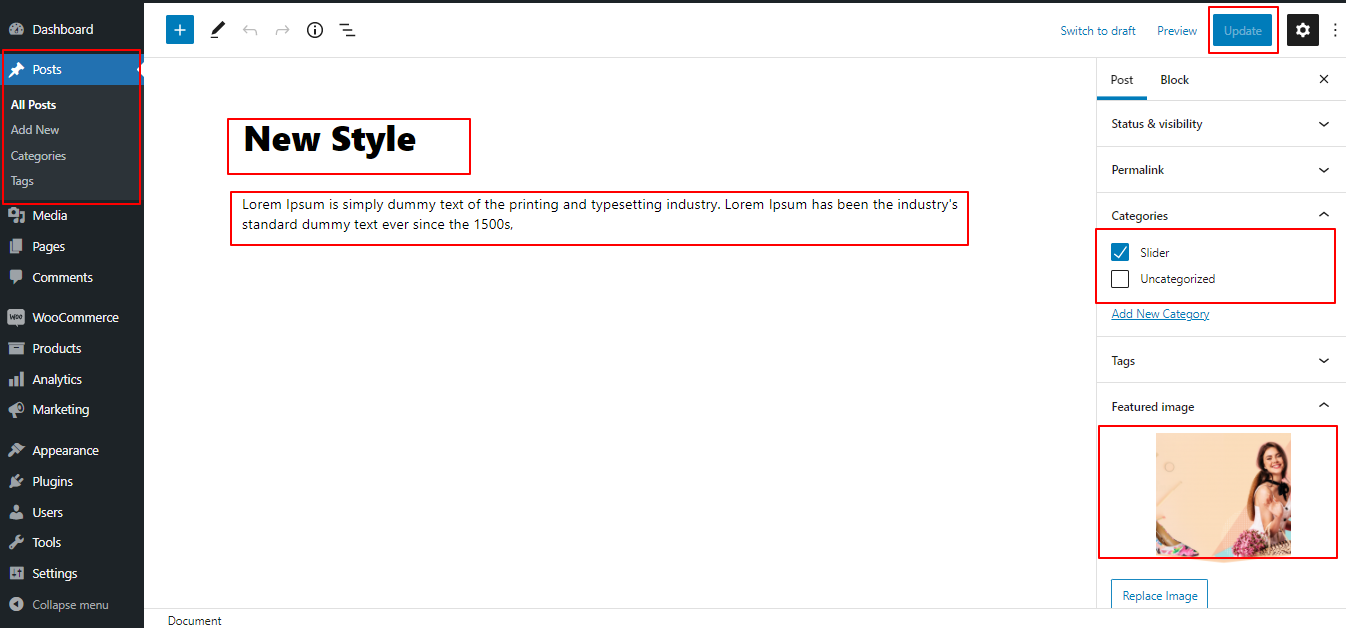
Once you have done with this you will see the post on your front page.
Slider Settings
In order to proceed with Theme Slider Settings , you can set slide show , you can also set slider sub title follow the below steps.
In the dashboard, go to Appearance -- Customize -- Theme Options -- Slider Settings
Select number slides to show, then select the category which you have to show on slider.
Set the slider extra title. You can choose from this options for each slider option.

In front end, it will look like this.

Our Collection Section
Our Collection Settings
Fetch Categories
Important Step: Install WooCommerce plugin in your wordpress.
In the Dashboard, go to Products -- Categories -- Add New

This screen is divided into 2 sections, the Add New Category and category table sections.
All of the categories are listed in this table. Categories are organized alphabetically and hierarchically.
Follow the instructions given below to setup Category Settings.
Once you have done with this you will see the categories on your theme customize.
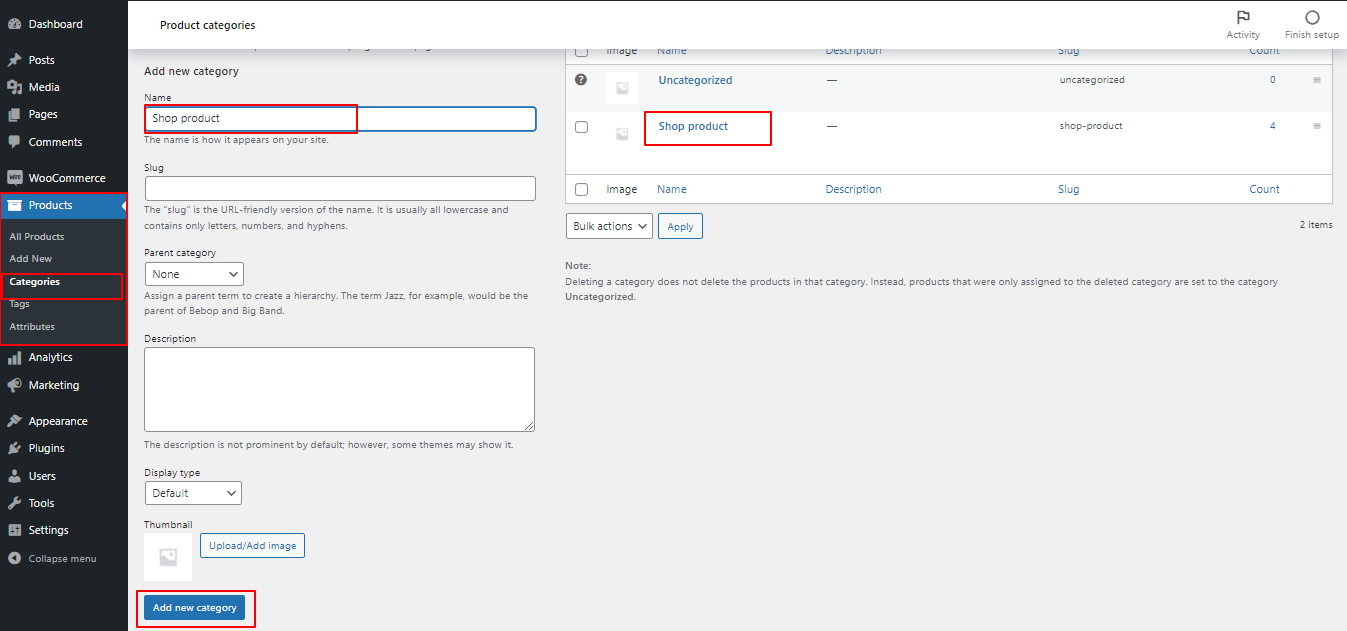
In this section, you have to add new category for each product.
Fetch Products
In the Dashboard, go to Products -- Add New
Name it "home" or anything as you like. Then, from the template dropdown, pick "front page template".
The Page Attributes section provides your page a parent page and a template.
1. Make a page to set the template: Go to Dashboard Products -- All Products
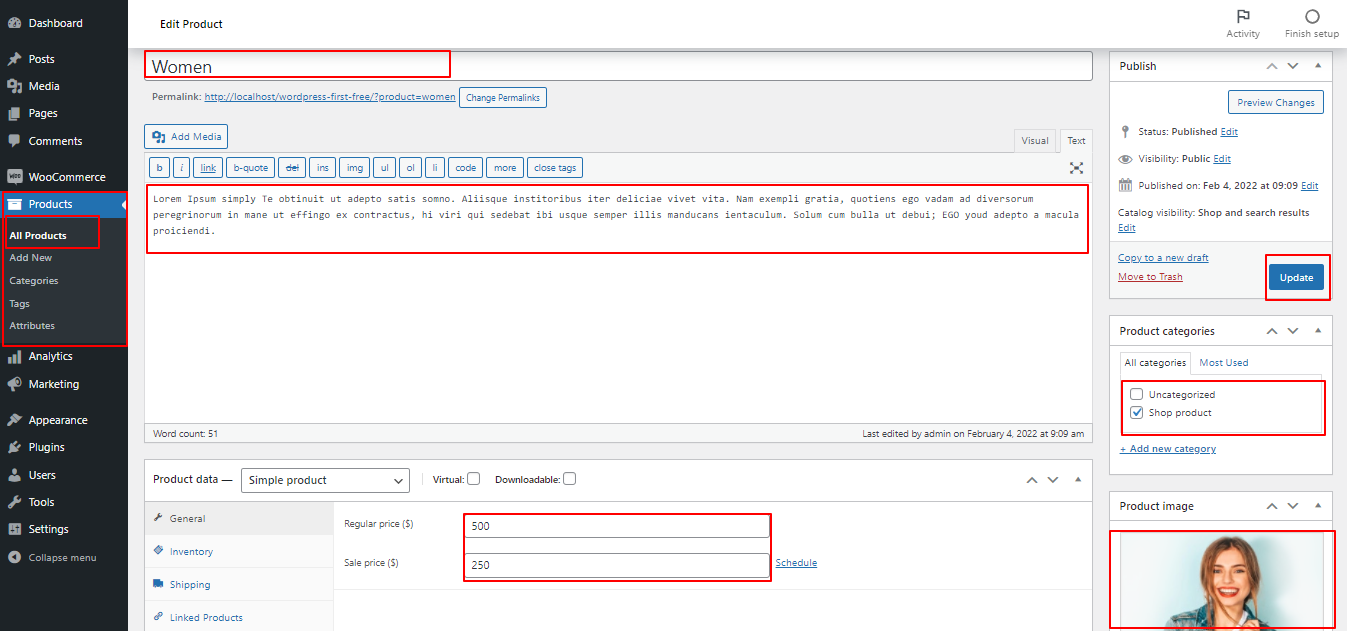
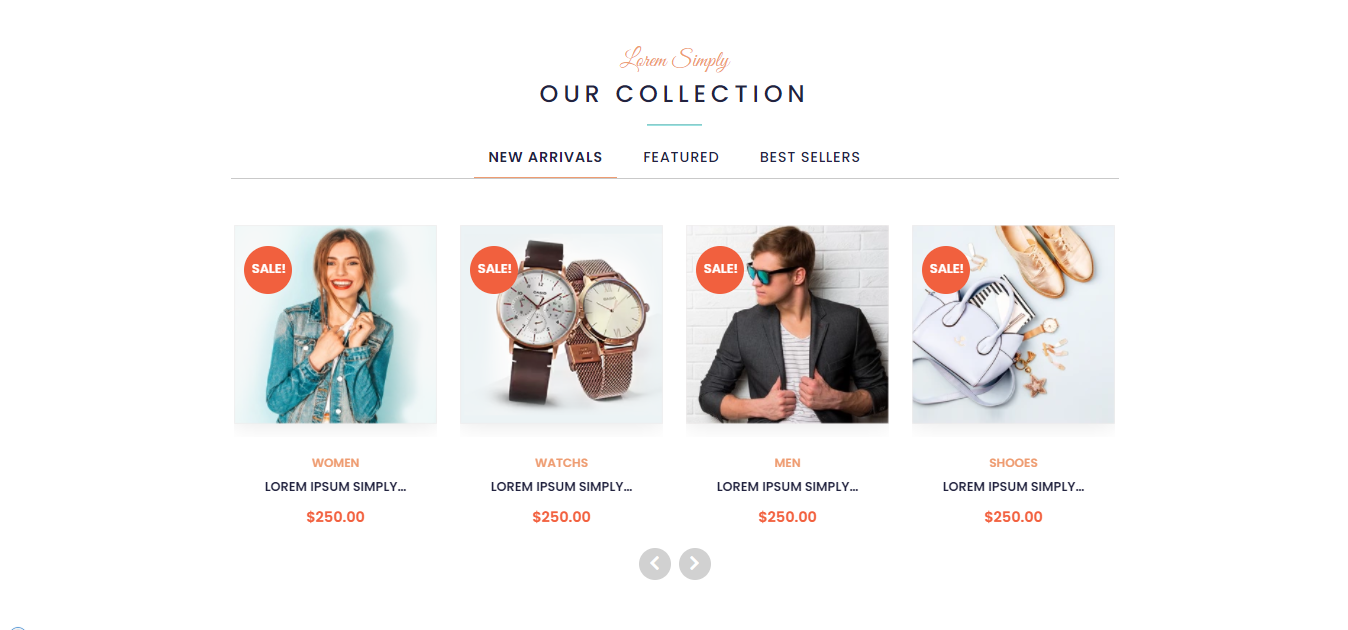
In order to proceed with Our Collection Section follow the instructions given below.
In the Dashboard, go to Appearance -- Customize -- Theme Options -- Our Collection Settings
You can select category to display post choose from this options for each Our Collection settings.

In front end, it will look like this.
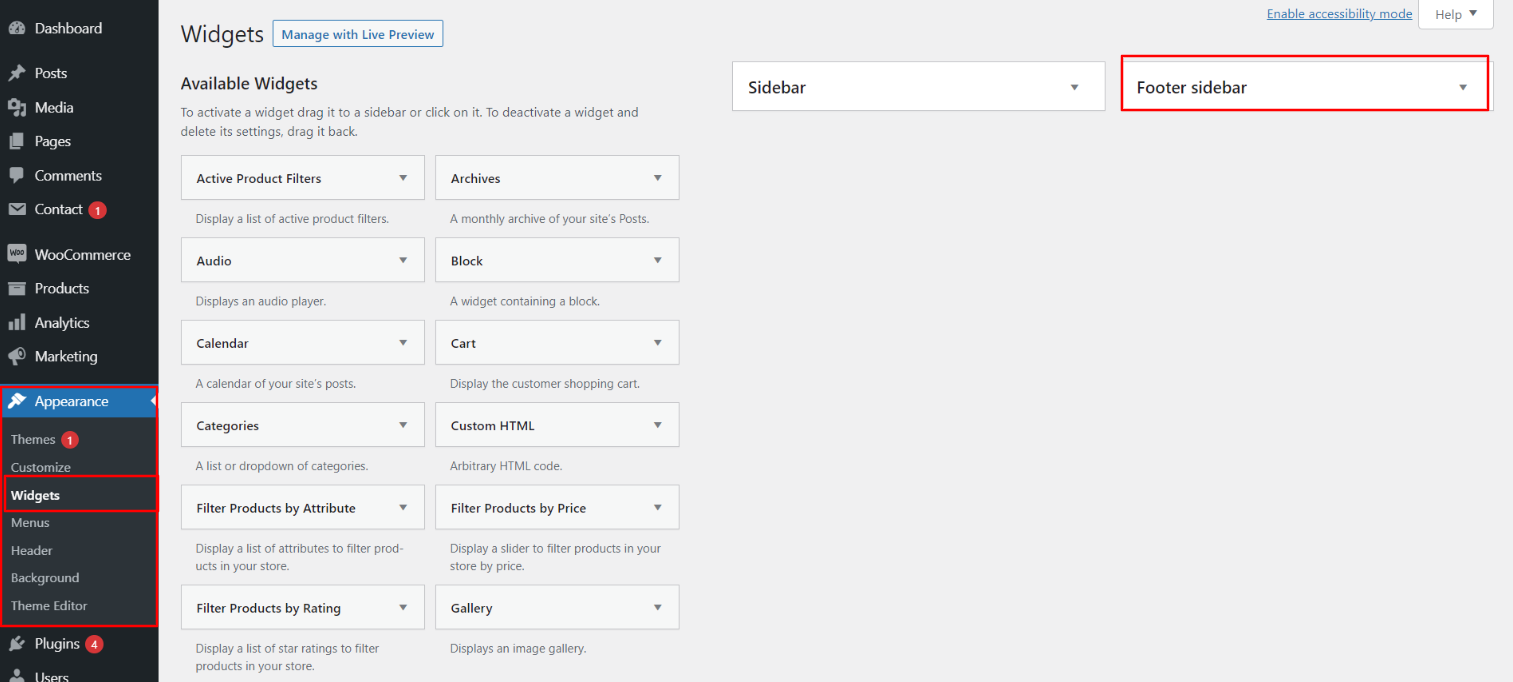
Setup Footer Section
Footer has four Columns. Any widget can be added there..
1. In the dashboard, go to Appearance -- Widgets
To add widgets to the footer, see the screenshot below.
You have options to add more Footer Columns, for that you need to select widgets like text, image, gallery, etc Which will allow you in adding image or text as per your need.
In order to manage content for footer and add some widgets, navigate to, follow the below steps.
2. In the dashboard, go to Appearance -- Widgets -- Footer Sidebar
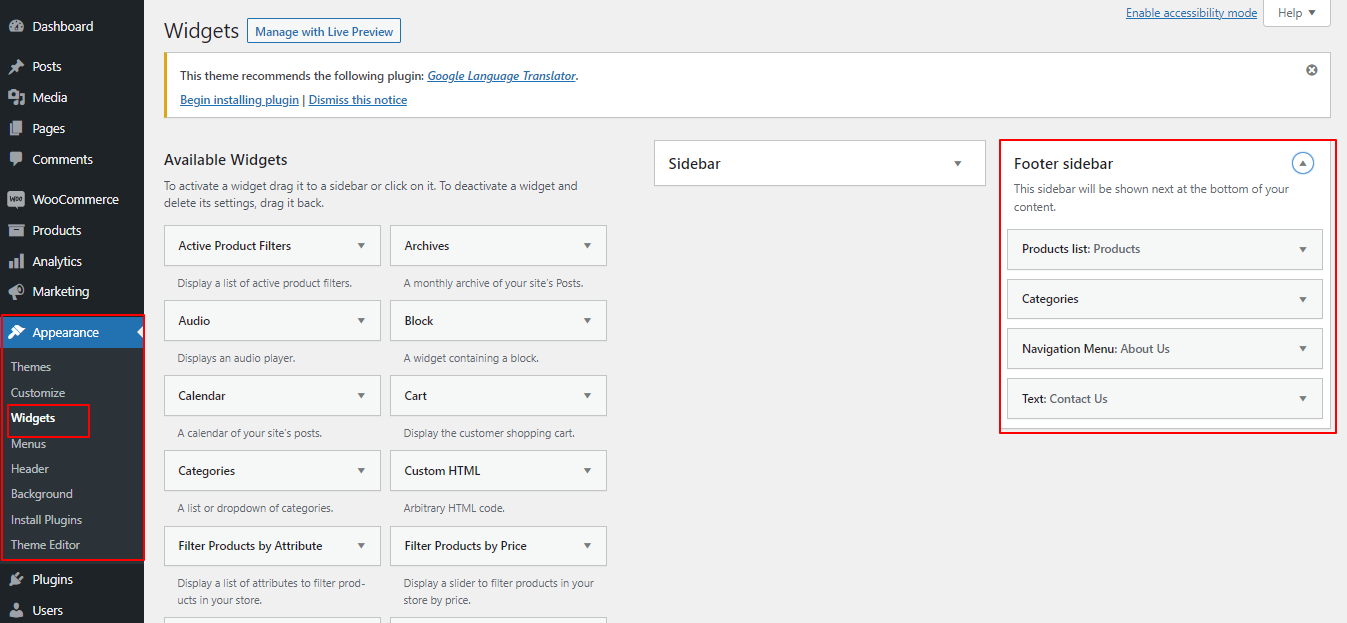
You can also see how footer looks once you add the widget.

Footer Copyright Text
In order to proceed with footer Settings, You can fill the copyright content to footer copyright Settings.
5. In the dashboard, go to Appearance -- Customize -- Theme Options -- Footer Copyright Setting
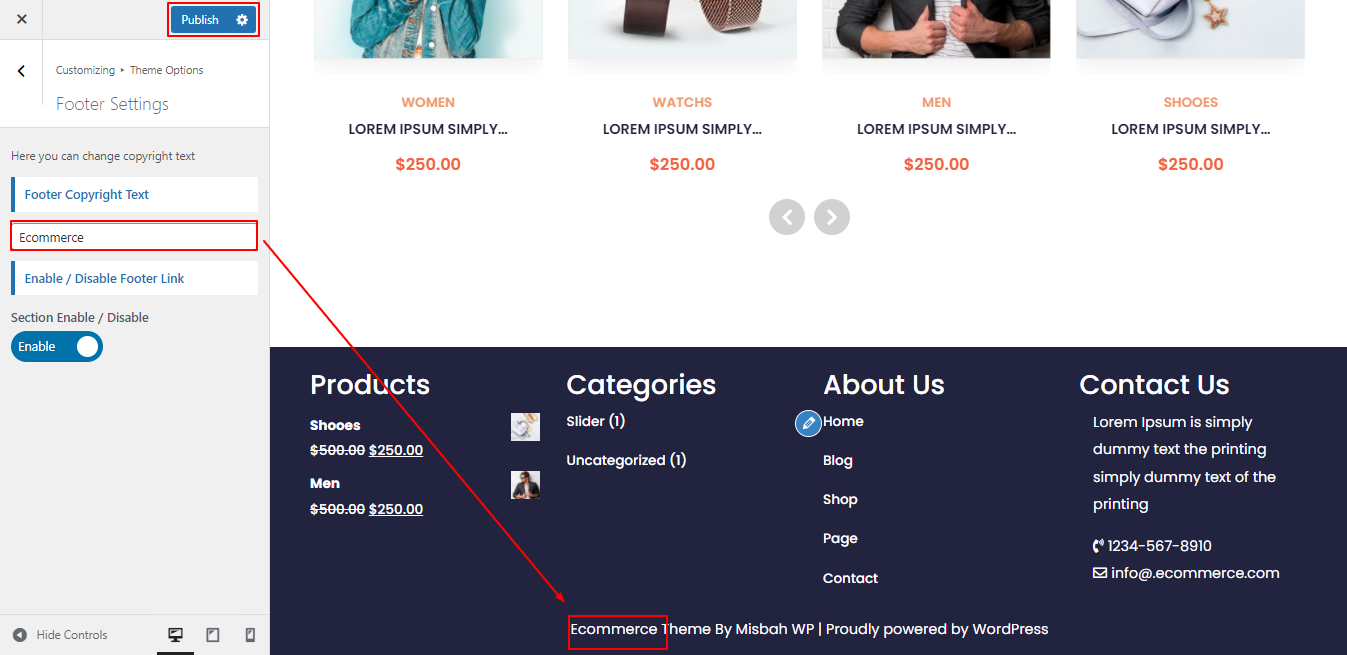
In front end, it will look like this.