Logistic Cargo Trucking Documentation
Your awesome theme / template documentation
Introduction
- Theme Name : Logistic Cargo Trucking
- Author : misbahwp
- Support Forum : https://wordpress.org/support/theme/logistic-cargo-trucking
- License : GNU General Public License v3 or later
- Discription : Free Logistic WordPress Theme is a Transport, delivery company, grid, logistics, freight, and packaging-focused theme. It is a minimal, elegant, retina-ready customizing theme. With this theme, users can deliver their cargo anywhere-everywhere. This is a one-stop solution for making your business online and worldwide transport. The theme has several options to ease your work and make it flexible to customize the theme to the full extent. The users can also add elements like social media icons, images, massaging boxes, buttons, image carousels, custom headings, and rows to place content on the theme page. Moreover, it has a revolution slider, header types, google maps, SEO, live customizer, and shortcodes. It comes with unlimited color options and 100+ family fonts. The theme is user-friendly and comes with the latest version. Free Logistic WordPress Theme looks excellent on any device like mobile or desktop and beyond.
How to Establish the Theme
Setup Theme
It is very easy to install a template.
You can also install your theme using WP Admin
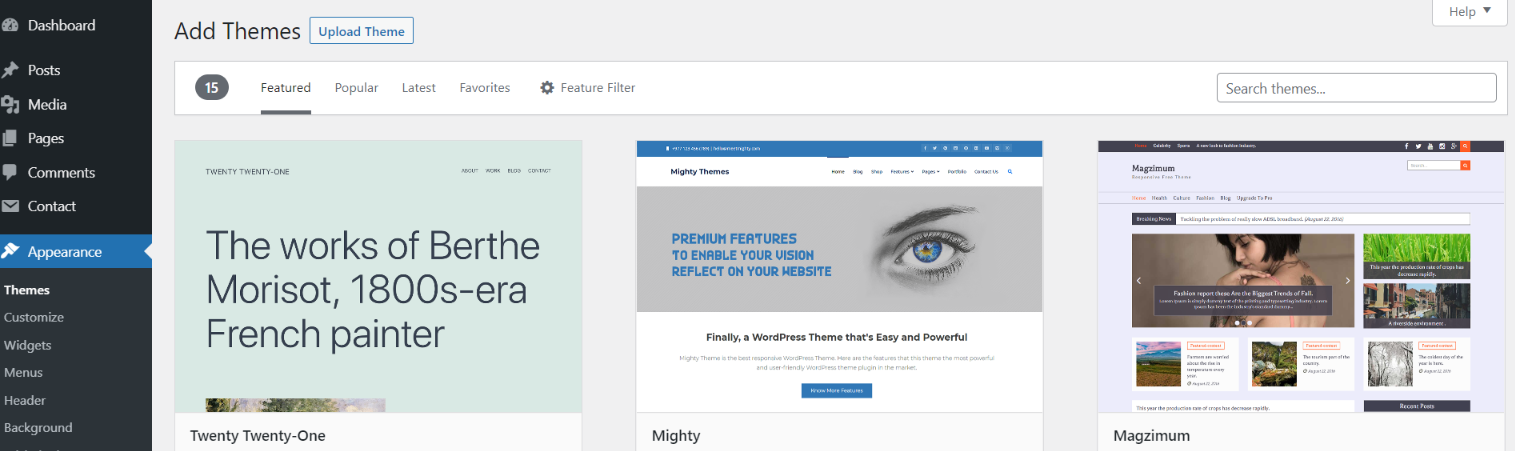
Once the themes page has fully loaded, simply click on the "Add New" button located at the top of the page to proceed.
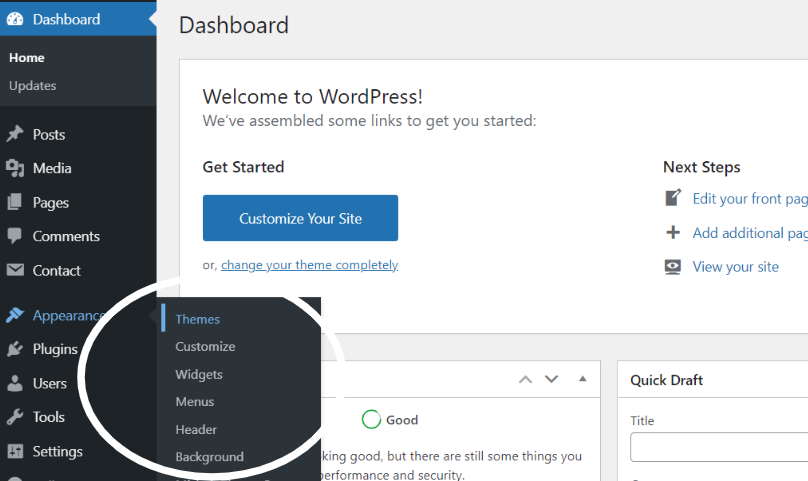
1. In dashboard click on Appearance -- Themes
2. After the page has loaded, simply locate the Add New button situated at the top of the themes page and click on it.
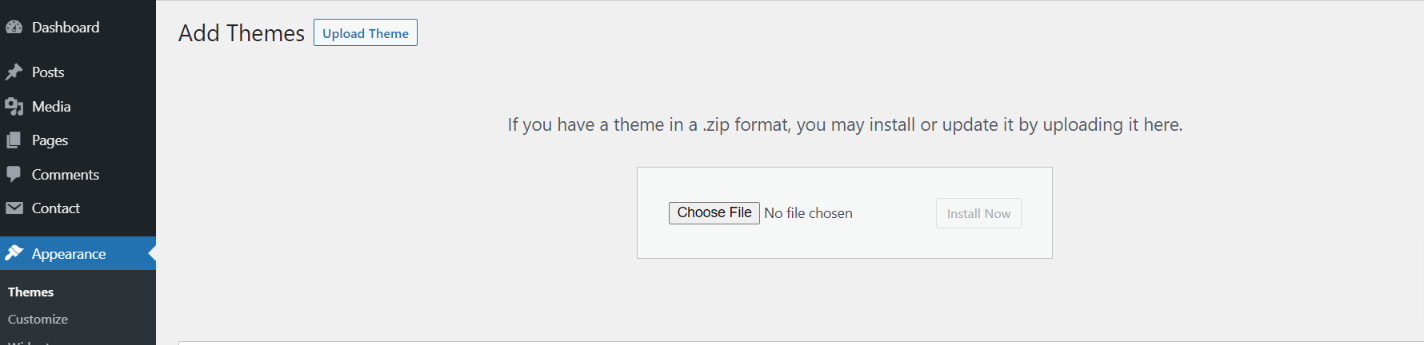
3. Click the button labelled as 'Upload Theme'.
4. To proceed, click on the "Browse" button and select the logistic-cargo-trucking-pro.zip theme. Then, tap on "Install Now" to initiate the installation process..
5. Once you have selected a suitable theme for your WordPress website, the installation process is just a few clicks away. Upon clicking on the "Install" button, WordPress will commence installing your chosen theme, and you will be notified with a success message once the process is completed.
Setup Home Page
The options of this page template (like sections location, disabling sections, number of posts they display) can be controlled it.
To design a home page, follow these steps.
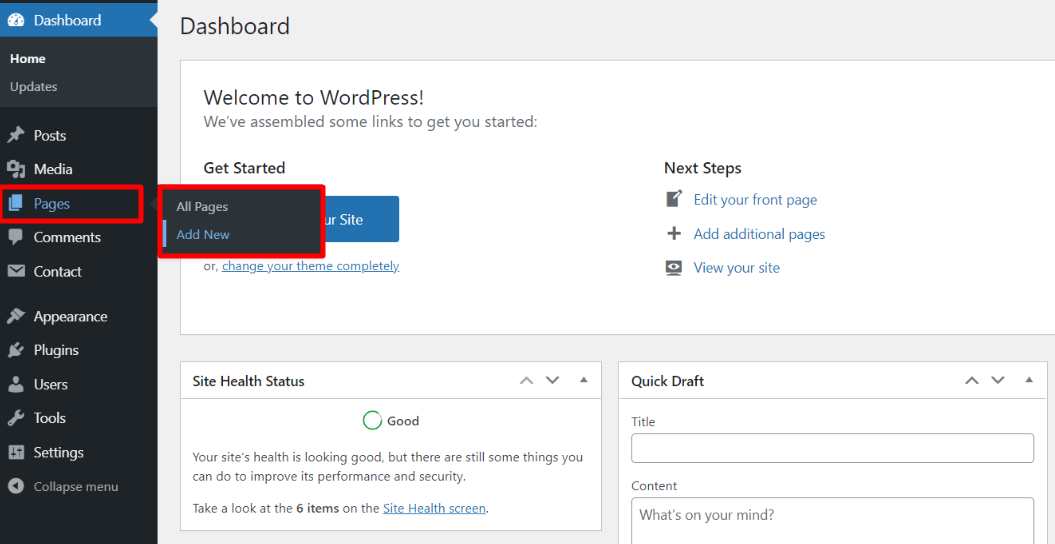
1. Make a page to set the template: navigate to Dashboard Pages -- Add New Page
You can name it "home" or choose any other name that you prefer. Then, from the template dropdown, pick "front page template."
The Page Attributes section provides your page a parent page and a template.
1. Make a page to set the template: Navigate to Dashboard Pages -- Add New Page

Design the front page as follows: Navigate to Dashboard Setting -- Reading -- To get the theme template select static page then select home page template.
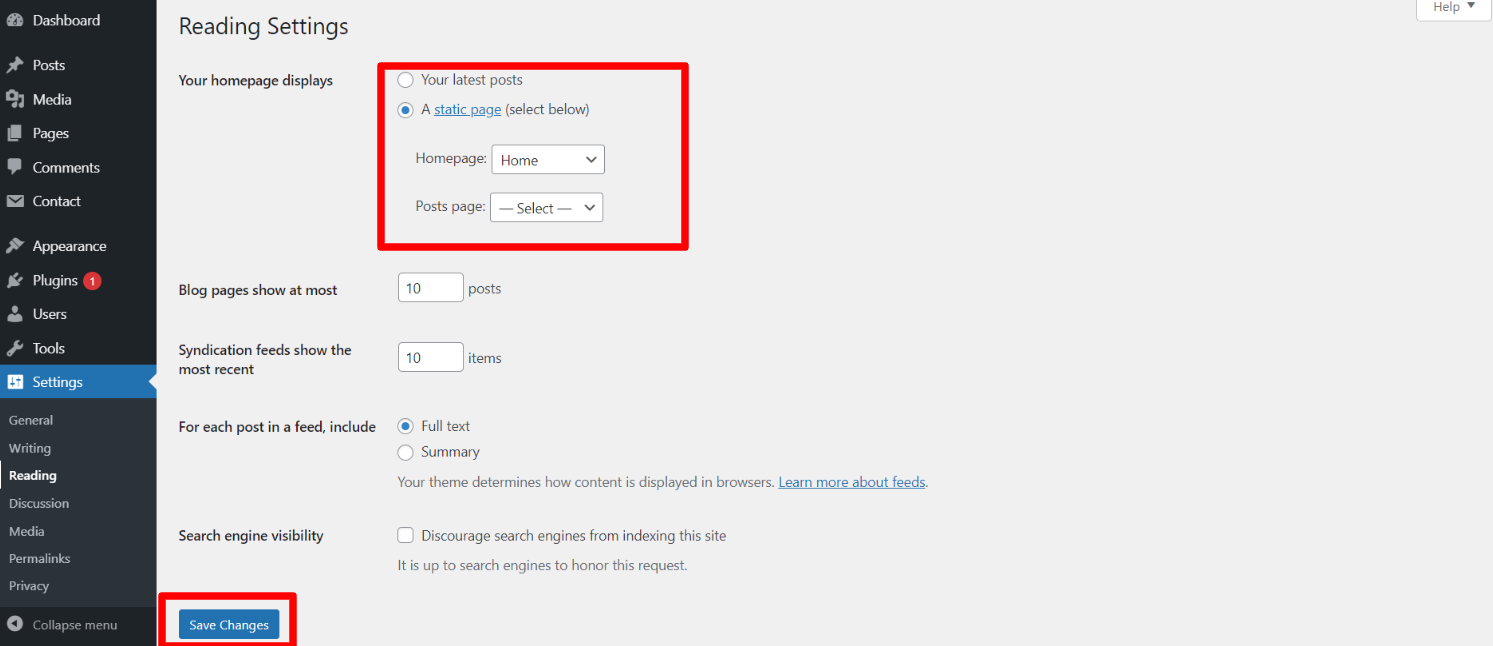
When you're finished, you'll be able to see all of the demo content on the front page.
Necessary Plugins
When you initially activate the theme, you'll be asked to install these plugins on your Dashboard. You can ignore the message if you don't want to install these plugins on theme activation, and if you change your mind later, you can install them manually.
In the dashboard, go to Plugins -- Install Plugins.
Kirki
Plugin download link kirki
Contact Form 7
Plugin download link contact-form-7
Logistic Theme Setup
Top Header
In order to proceed with Theme top header, You can set top header text and social icons, so follow the below steps.
In the dashboard, navigate to Appearance -- Customize -- Theme Options -- Header Settings
Track Your Order Settings
In order to proceed with Theme Track Your Order Settings, you can set button text and url, follow the below steps.
In the dashboard, navigate to Appearance -- Customize -- Header Settings You can also make the tagline hidden
In front end, it will look like this.
Logo Setup
In order to proceed with Theme Logo setup, you can set site title and tagline, follow the below steps.
In the dashboard, navigate to Appearance -- Customize -- Site Identity -- Set Title and Tagline You can also hide the tagline.
In front end, it will look like this.
Contact Info Settings
In order to proceed with Theme Contact Info Settings, you can set icon and content, follow the below steps.
In the dashboard, navigate to Appearance -- Customize -- Contact Info Settings
In front end, it will look like this.
Slider Section
Fetch Categories
This screen is divided into the Add New Category and category table sections.
This table lists all of your categories. Categories are displayed hierarchically and alphabetically.
Follow the below steps to setup Category Settings.
In the dashboard, go to Posts -- Categories -- Add New
Once you have done with this you will see the categories on your theme customize.
In this section, you have to add new category for each post.
Fetch Post
In the dashboard, go to Posts -- Add New
Now to go on with Post settings, You can set post title and content. And Select which Category you want this post to show.
Follow the below steps to setup Post Settings.
In the dashboard, go to Posts -- Add New
You can make multiple posts for category.
Once you have done with this you will see the post on your front page.
Slider Settings
In order to proceed with Theme Slider Settings , you can set slide show , follow the below steps.
In the dashboard, navigate to Appearance -- Customize -- Theme Options -- Slider Settings
Select number slides to show, then select the category which you have to show on slider.
You can set button text and url. You can choose from this options for each slider option.
In front end, it will look like this.
Services Section
Fetch Categories
This screen is divided into the Add New Category and category table sections.
This table lists all of your categories. Categories are displayed hierarchically and alphabetically.
Follow the below steps to setup Category Settings.
In the dashboard, go to Posts -- Categories -- Add New
Once you have done with this you will see the categories on your theme customize.
In this section, you have to add new category for each post.
Fetch Post
In the dashboard, go to Posts -- Add New
In order to proceed with Post Settings, You can set post title and content. And Select which Category you want this post to show.
Follow the below steps to setup Post Settings.
In the dashboard, go to Posts -- Add New
You can make multiple posts for category.
Once you have done with this you will see the post on your front page.
Services Settings
To proceed with configuring the Services Settings, please follow the steps below.
In the dashboard, navigate to Appearance -- Customize -- Theme Options -- Services Settings
You can select number of services to show.
Select number slides to show, then select the category which you have to show on slider.
You can set button text and url. You can choose from this options for each services settings.
In front end, it will look like this.
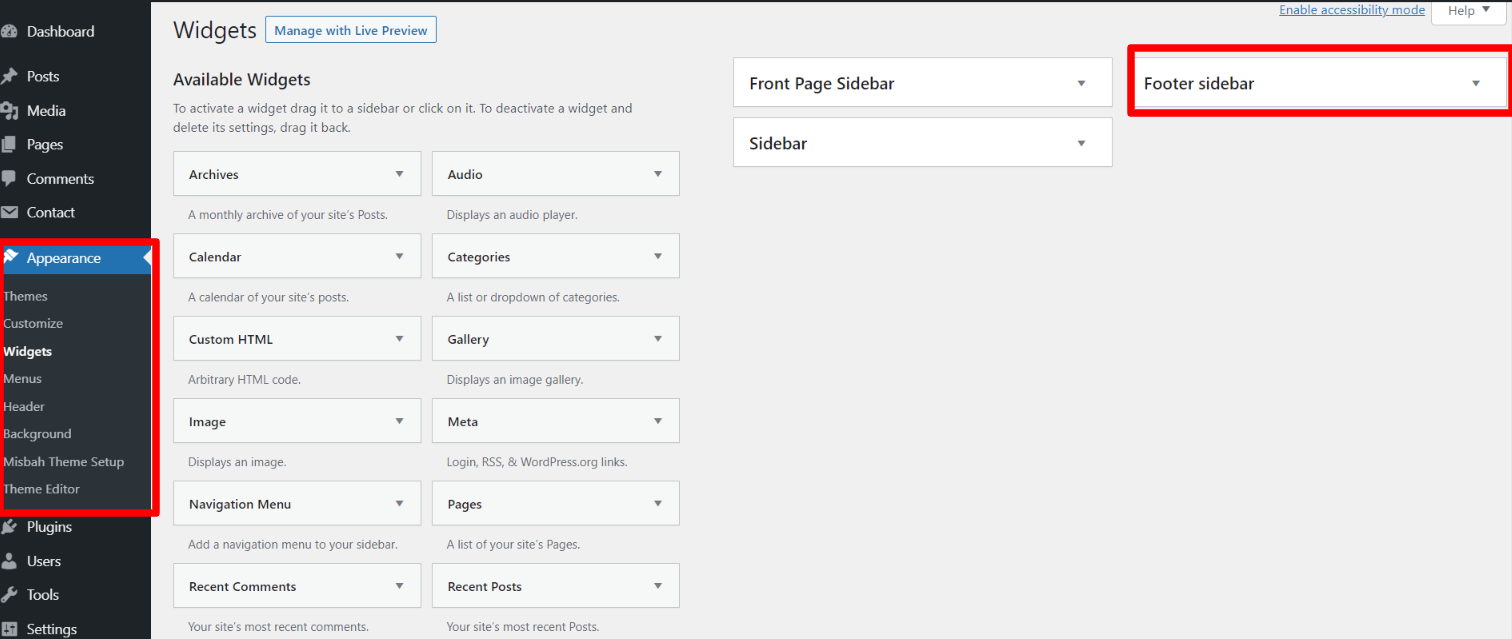
Setup Footer Section
The footer section consists of four columns, which can be utilized to add various widgets.
1. In the dashboard, navigate to Appearance -- Widgets
Checkout out the screen record below to learn how to add footer widget.
If you wish to add more footer columns, you can do so by selecting widgets such as text, image, gallery, etc. These widgets enable you to add images or text as per your requirements.
In order to manage content for footer and add some widgets, navigate to, follow the below steps.
2. In the dashboard, navigate to Appearance -- Widgets -- Footer Sidebar
You can also see how footer looks once you add the widget,
Footer Copyright Text
In order to proceed with footer Settings, You can fill the copyright content to footer copyright Settings.
5. In the dashboard, navigate to Appearance -- Customize -- Theme Options -- Footer Copyright Setting