Misbah Blog Documentation
Your awesome theme / template documentation
Introduction
- Theme Name : Misbah Blog
- Author : misbahwp
- Support Forum : https://www.misbahwp.com/support/misbahwp/
- License : GNU General Public License v3 or later
- Discription : Misbah Blog is apt for all sort of blogging websites. It gives a professional presence to ad-agencies. It is a hassle-free, retina ready and convenient medium to register the online presence without doing any coding. Misbah blog is very easy to use and lightweight apart from this it is Gutenberg ready, RTL compatible and translation ready This theme has simple yet elegant way of showcasing content to make it user and mobile-friendly theme. This blog theme is perfectly suitable for all creative websites, travel bloggers, photography blogs, portfolio, health blogs, multimedia blogs and many more blog categories. It has contemporary look and feel and compatible with all the gadgets (mobiles, tablets and laptops). It comes with many clean and dynamic features but the main attractive feature is social profile link and dynamic grid layout. Misbah blog is also for writers who want to create their blogs. It has simple and creative features to leave positive impact on the readers.
How to Establish the Theme
Setup Theme -
Template installation is very simple process.
You can also install your theme using WP Admin
The first task is to log in to your WordPress admin area. Next, click on
1. In dashboard click on Appearance >> Themes

2. Click on the Add New button at the top of the themes page once page is loaded.
3. Click the button labelled as 'Upload Theme'.

4. Click on Browse Button then select your misbah-blog.zip theme and click on install now button.
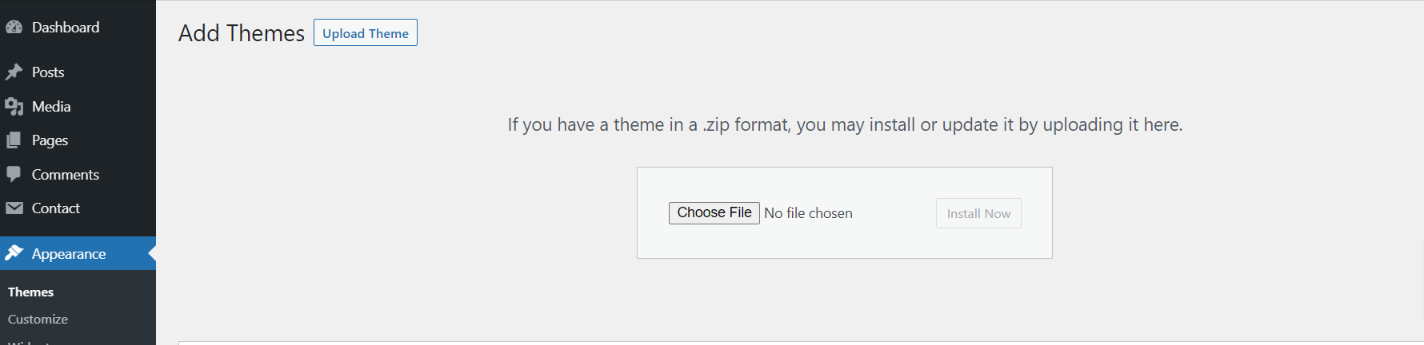
5. WordPress will now install your theme and display a success message, as well as a link to activate or to see the live preview.Congratulations on completing the installation of your theme.
Setup Home Page -
To design a home page, follow these steps.
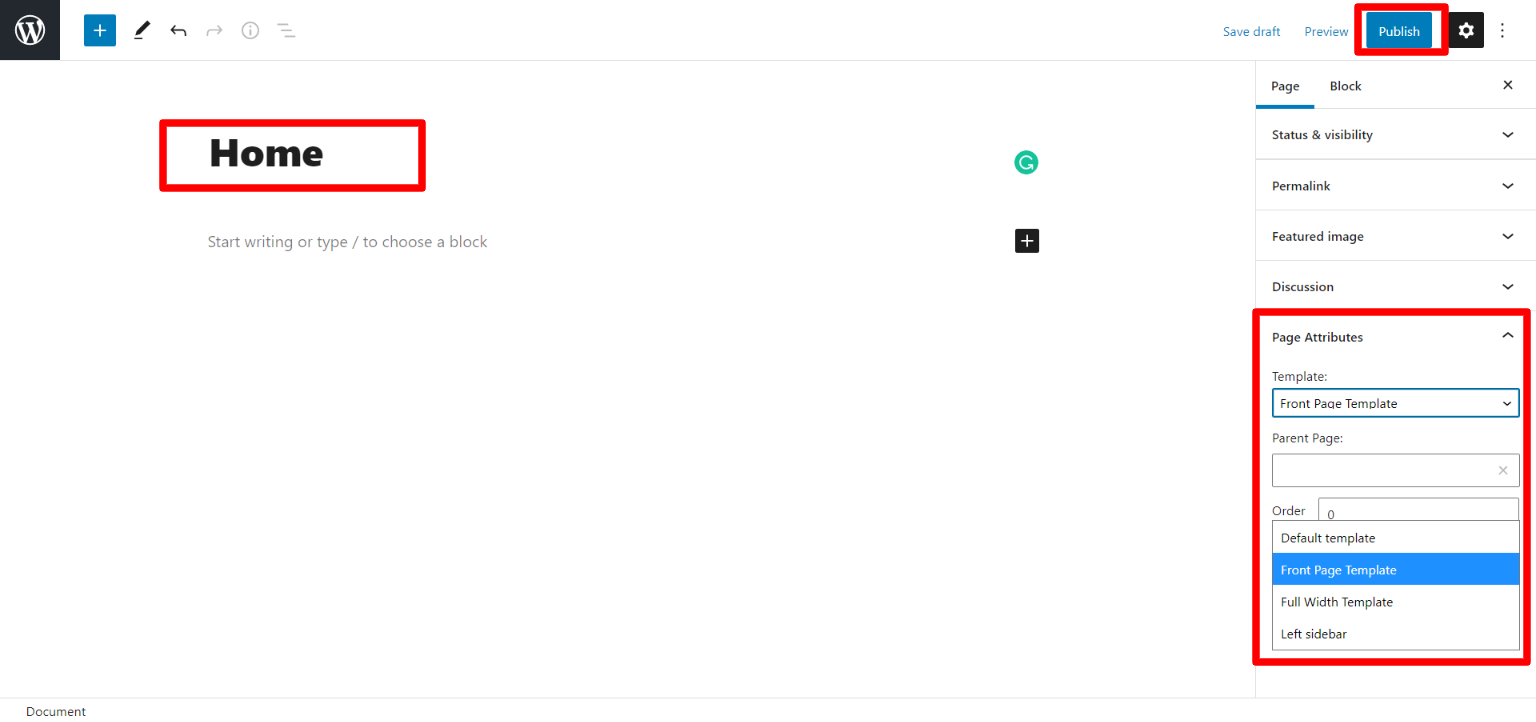
1. Make a page to set the template: Go to Dashboard Pages >> Add New Page

Name it "home" or anything as you like. Then, from the template dropdown, pick "front page template."
The Page Attributes section provides your page a parent page and a template
1. Make a page to set the template: Go to Dashboard Pages >> Add New Page
Design the front page as follows: Go to Setting >> Reading >> Set the front page display static page to home page.

Necessary Plugin
When you initially activate the theme, you'll be asked to install these plugins on your Dashboard. You can ignore the message if you don't want to install these plugins on theme activation, and if you change your mind later, you can install them manually
In the dashboard, go to Plugins >> Install Plugins.
Kirki -
Plugin download link kirki
Misbah Theme Setup
Logo Setup -
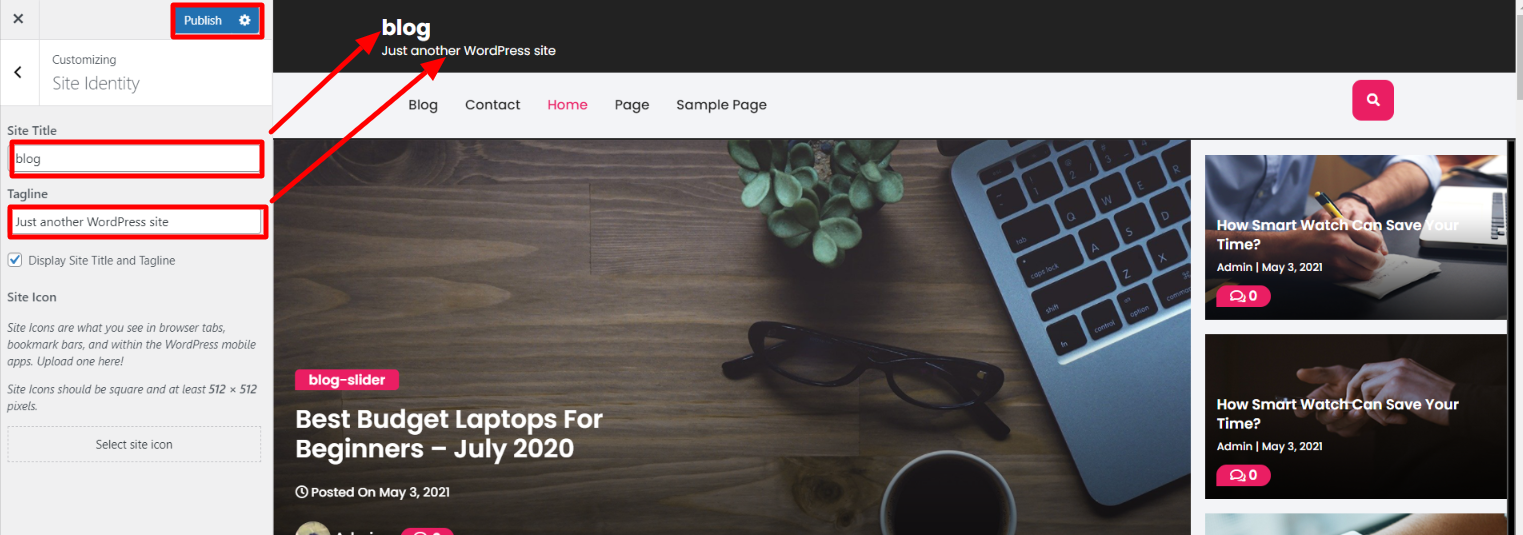
In order to proceed with theme logo setup, you can set site title and tagline, follow the below steps.
In the dashboard, go to Appearance >> Customize >> Site Identity >> Set Title and Tagline You can also make the tagline hidden.
Social Icon -
In order to proceed with theme social icon, you can set social icon, follow the below steps.
In the dashboard, go to Appearance >> Customize >> Theme Options >> Social Icons >> Social Links
In front end, it will look like this.

Blog Slider -
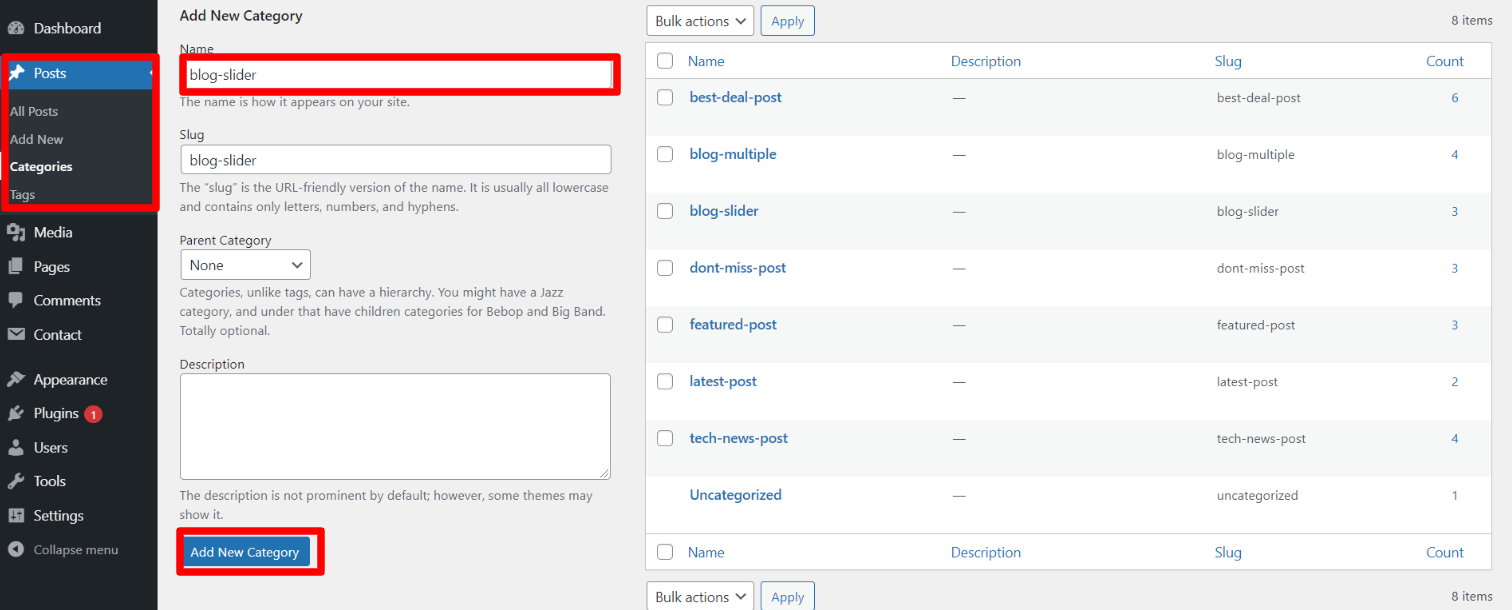
Follow the below steps to setup category.
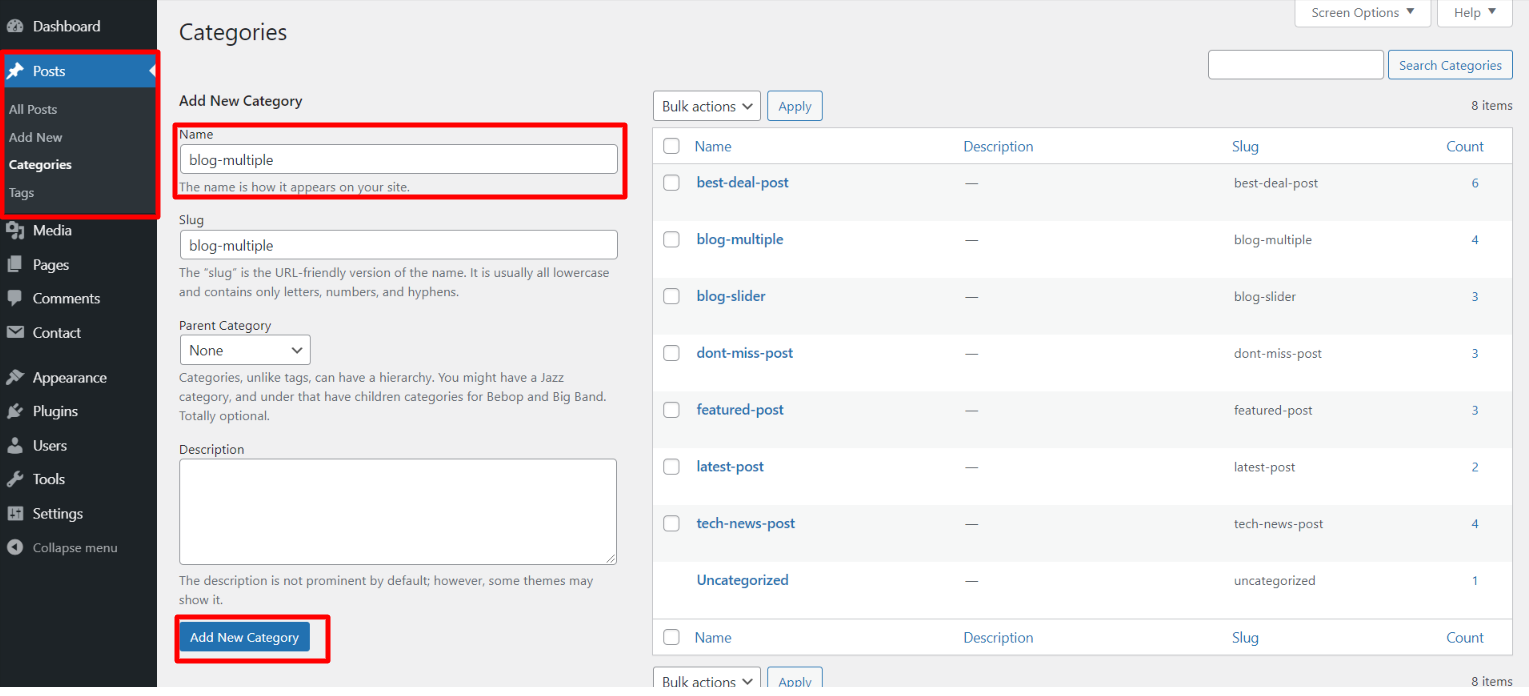
In the dashboard, go to Posts >> Categories >> Add New
Once you have done with this then you have to add post.
In the dashboard, go to Posts >> Add New
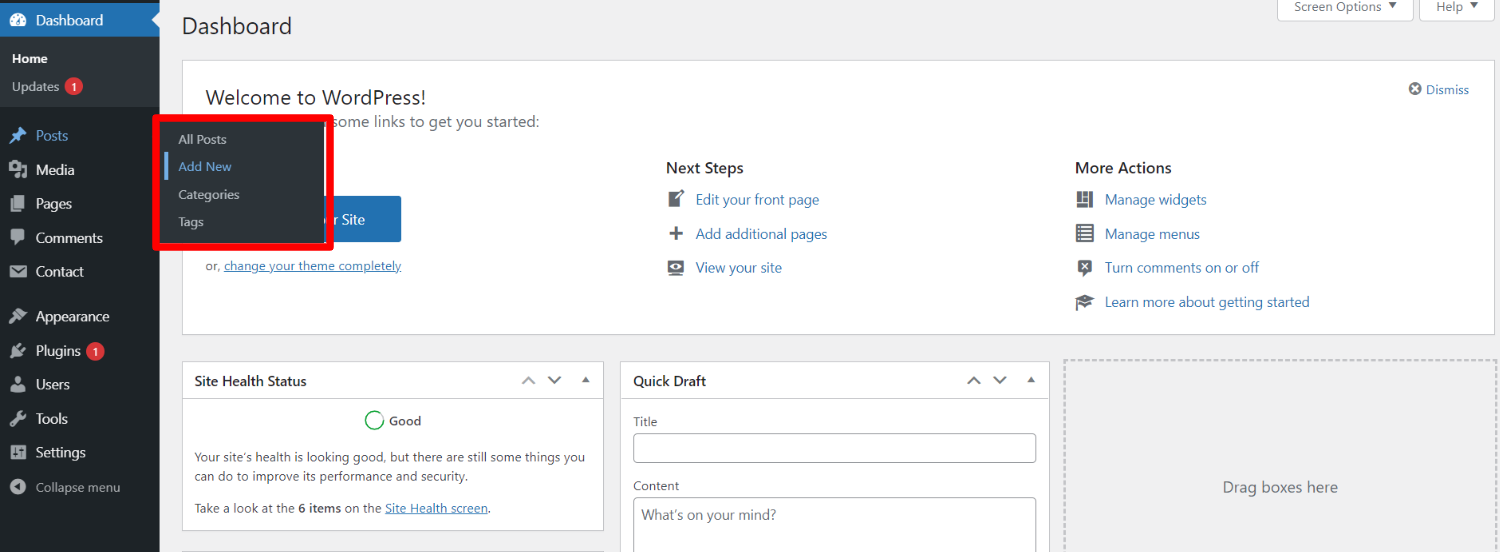
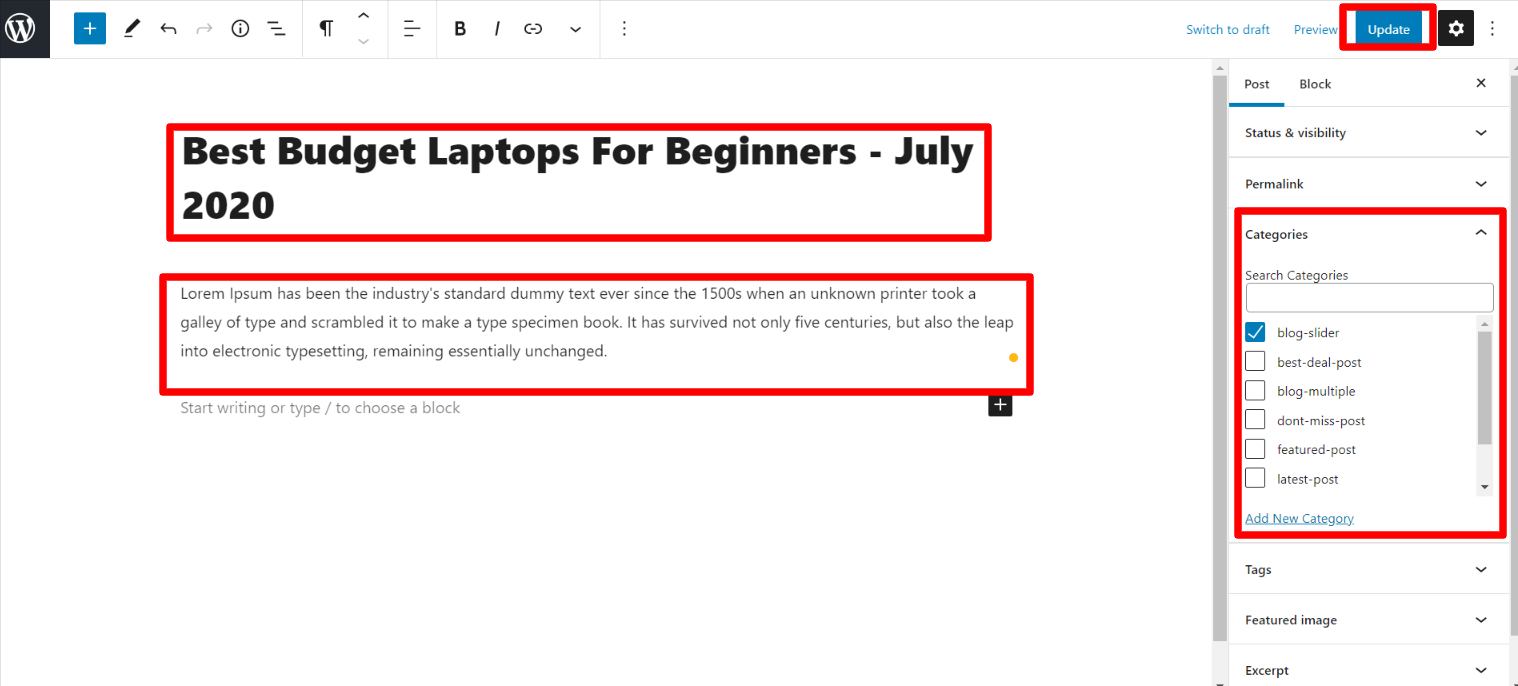
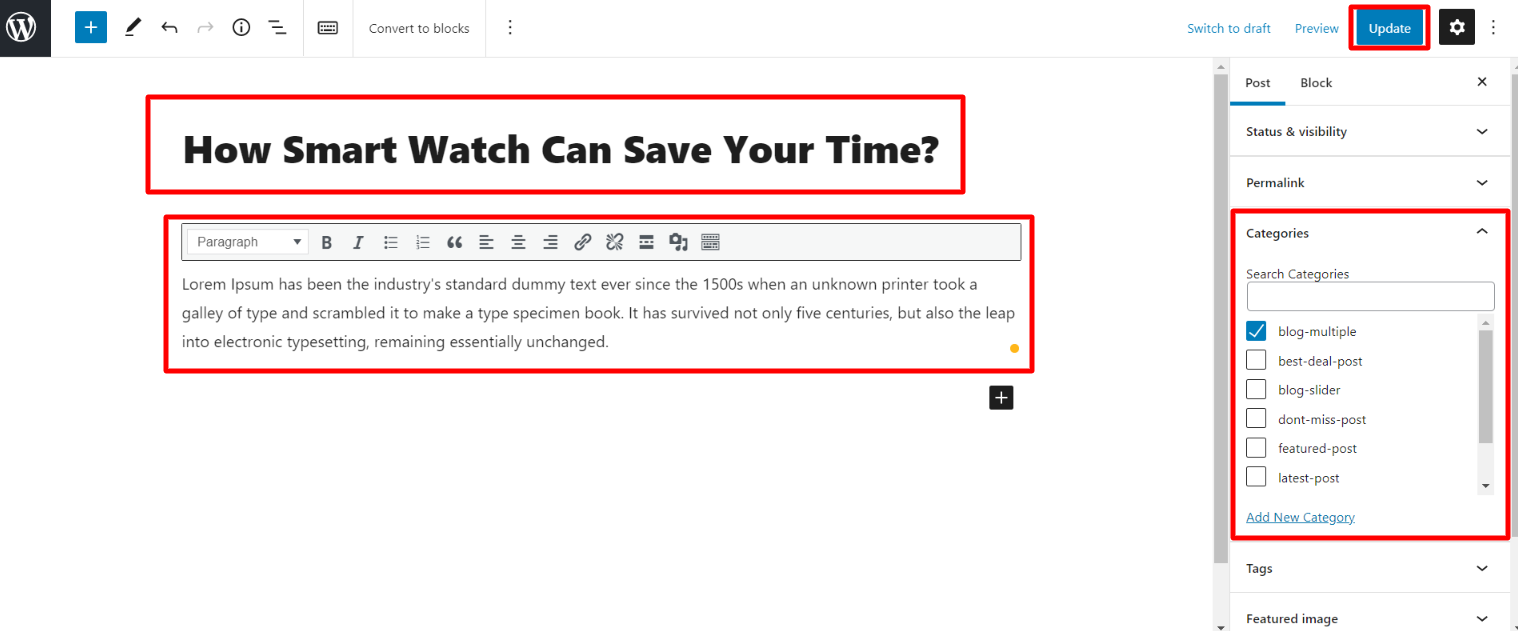
In order to proceed with Post, You can set post title, content and featured image, then select the category you want this post to show.
You can make multiple post for one category.
Blog Slider Settings-
In order to proceed with Theme Blog Slider , you can set slide show , follow the below steps.
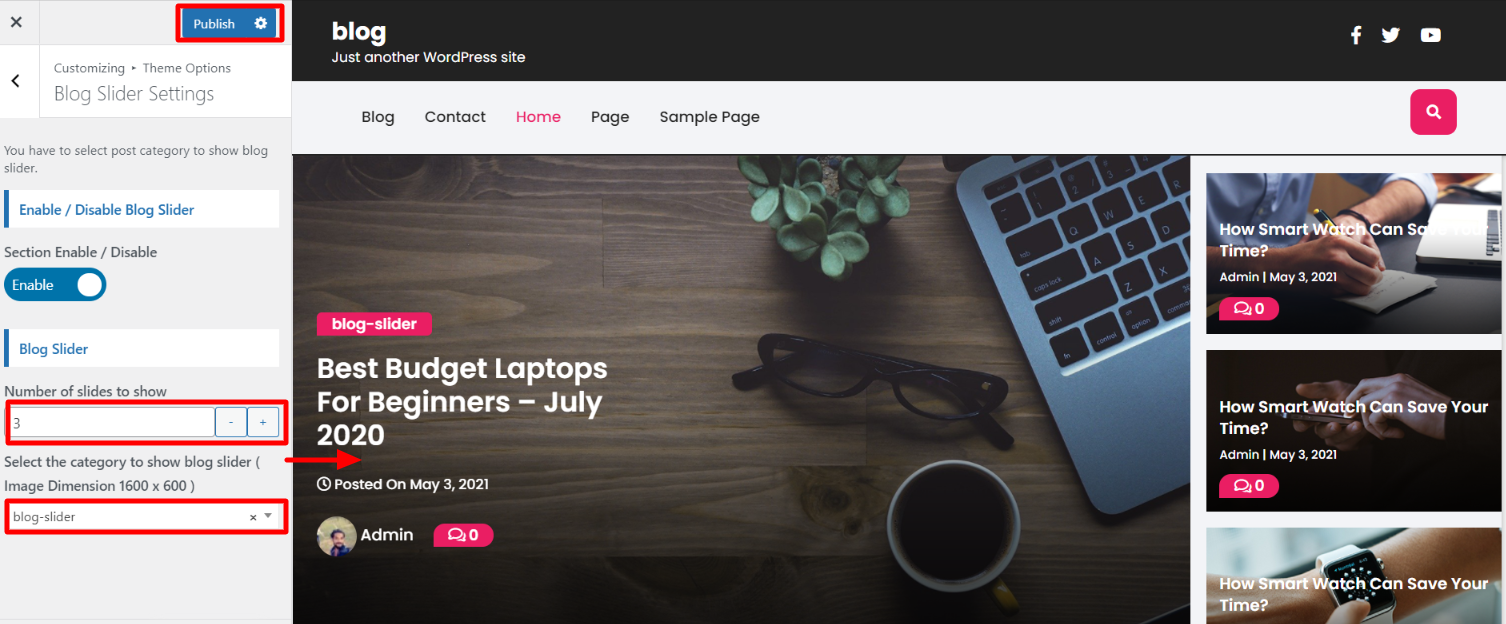
In the dashboard, go to Appearance >> Customize >> Theme Options >> Blog Slider Settings
Select number slides to show, then select the category which you have to show on slider.
Side Blog -
Follow the below steps to setup category.
In the dashboard, go to Posts >> Categories >> Add New
Once you have done with this then you have to add post.
In the dashboard, go to Posts >> Add New
In order to proceed with Post, You can set post title, content and featured image, then select the category you want this post to show.
You can make multiple post for one category.
In the dashboard, go to Posts >> Add New
Side Blog Setting -
In order to proceed with Theme Side Blog , you can set multiple side blog , follow the below steps.
In the dashboard, go to Appearance >> Customize >> Theme Options >> Side Blog Settings
Select number post to show, then select the category which you have to show on side blog.

Featured Post -
Follow the below steps to setup category.
In the dashboard, go to Posts >> Categories >> Add New
Once you have done with this then you have to add post.
In the dashboard, go to Posts >> Add New
In order to proceed with Post, You can set post title, content and featured image, then select the category you want this post to show.
You can make multiple post for one category.
In the dashboard, go to Posts >> Add New
Side Blog Setting -
In order to proceed with theme featured post, you can set featured post, follow the below steps.
In the dashboard, go to Appearance >> Customize >> Theme Options >> Featured Post Settings
Select number post to show, then select the category which you have to show on featured post.
Setup Footer Section
Footer have four coloumns. You can add any widget there.
There are two ways adding widgets to the footer.
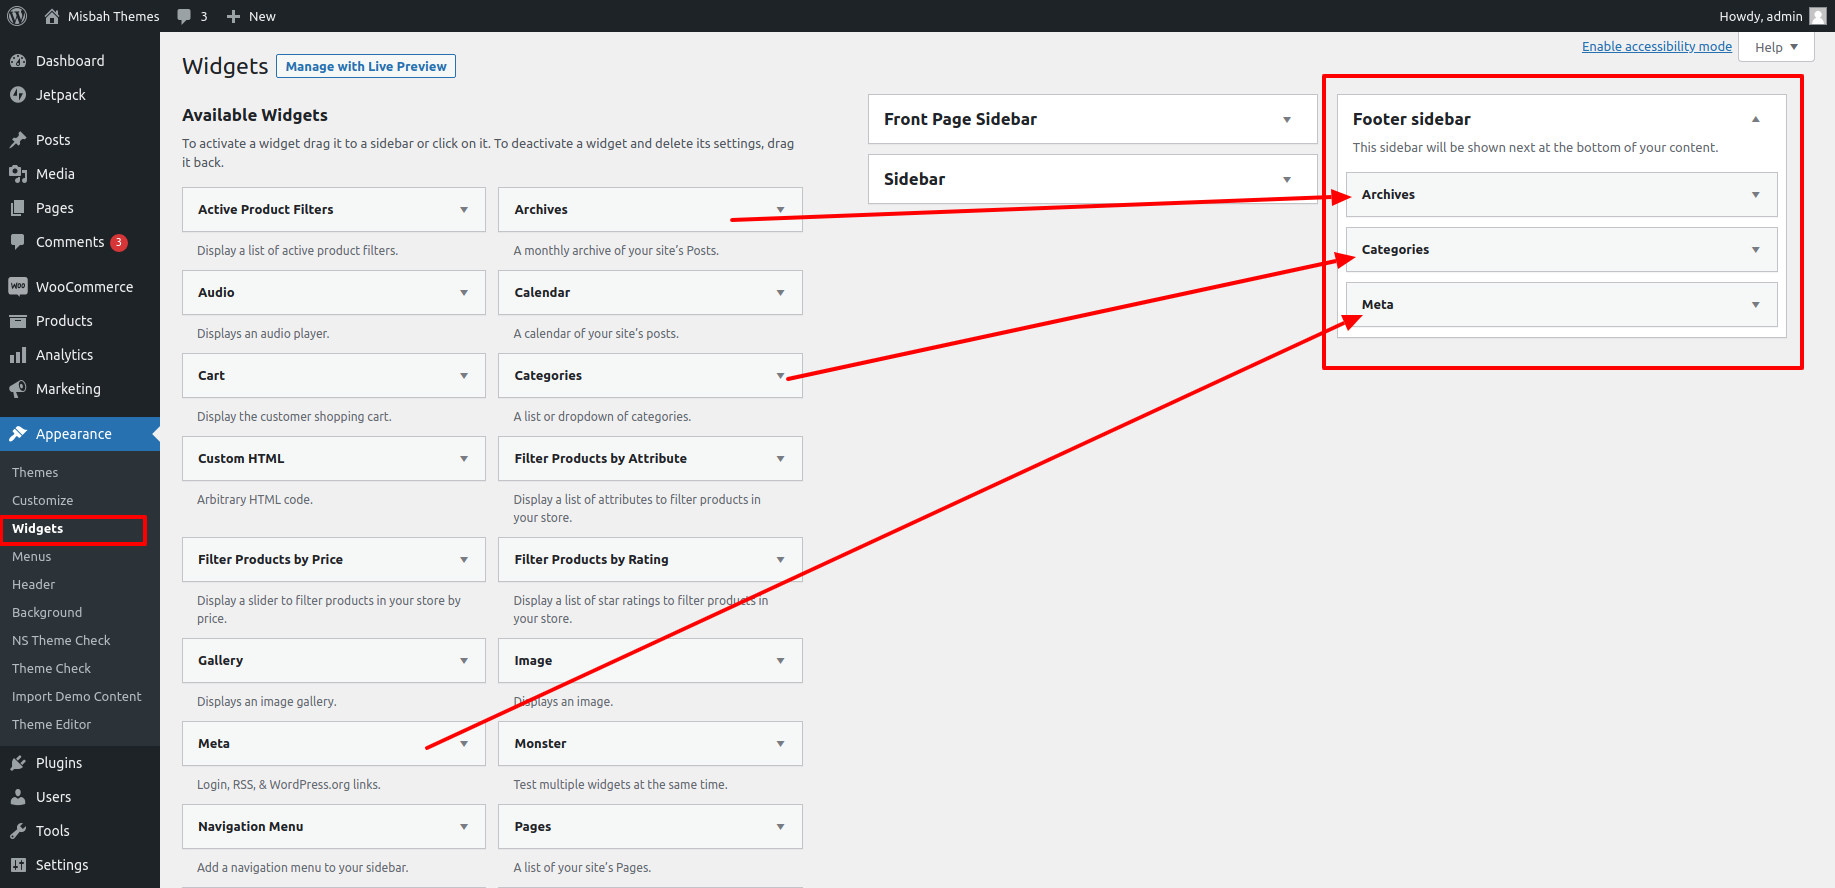
In the dashboard, go to Appearance >> Widgets >> Footer Sidebar
Checkout out the screen record below to learn how to add footer widget.
You can add footer coloumns, for that you need to select widgets like text, image, gallery, etc which allows you to add text or image as per your choice with ease.
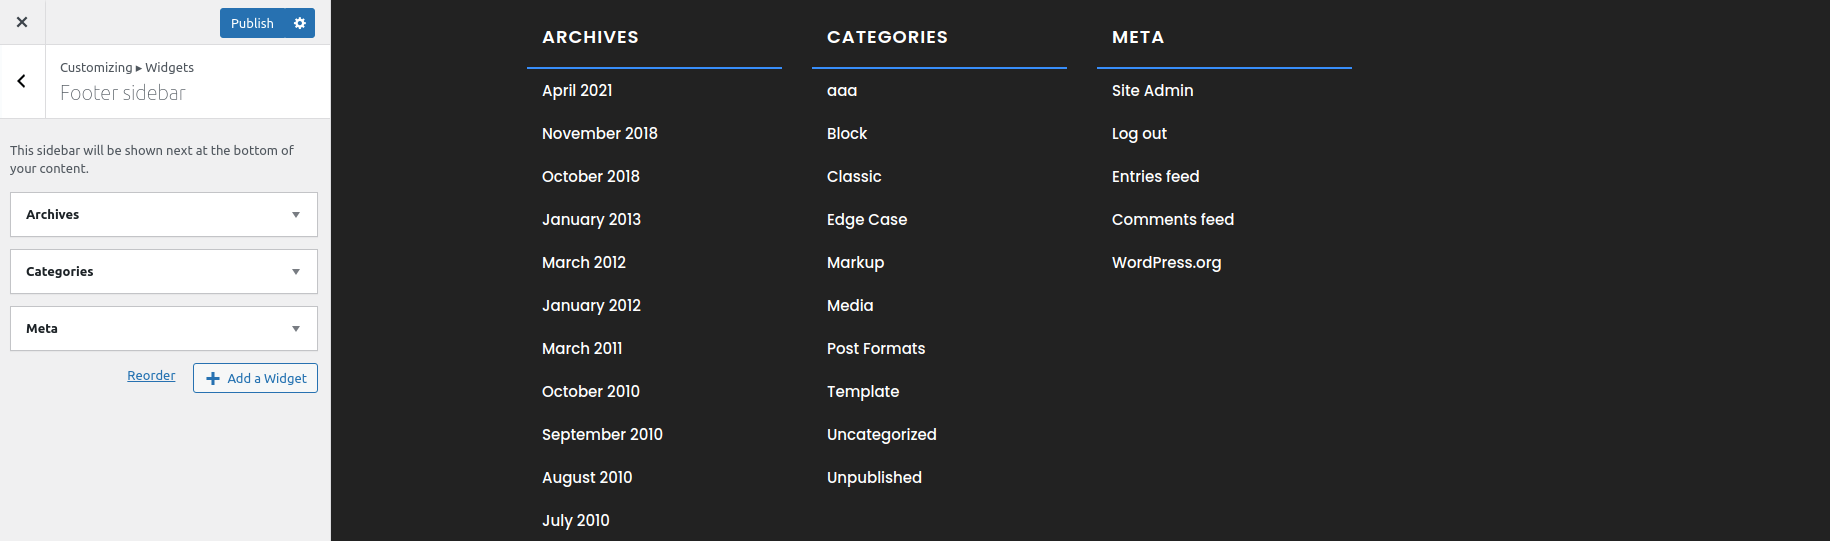
You can also see how footer looks once you add the widget,

Now, let's see the another important way to add widgets to the footer of your website.
You can add footer coloumns, for that you need to select widgets like text, image, gallery, etc which allows you to add text or image as per your choice with ease
1. In the dashboard, go to Appearance >> Customize >> Widgets >> Footer Sidebar
Once you will select widgets, you will get this page, refer the below screenshot.
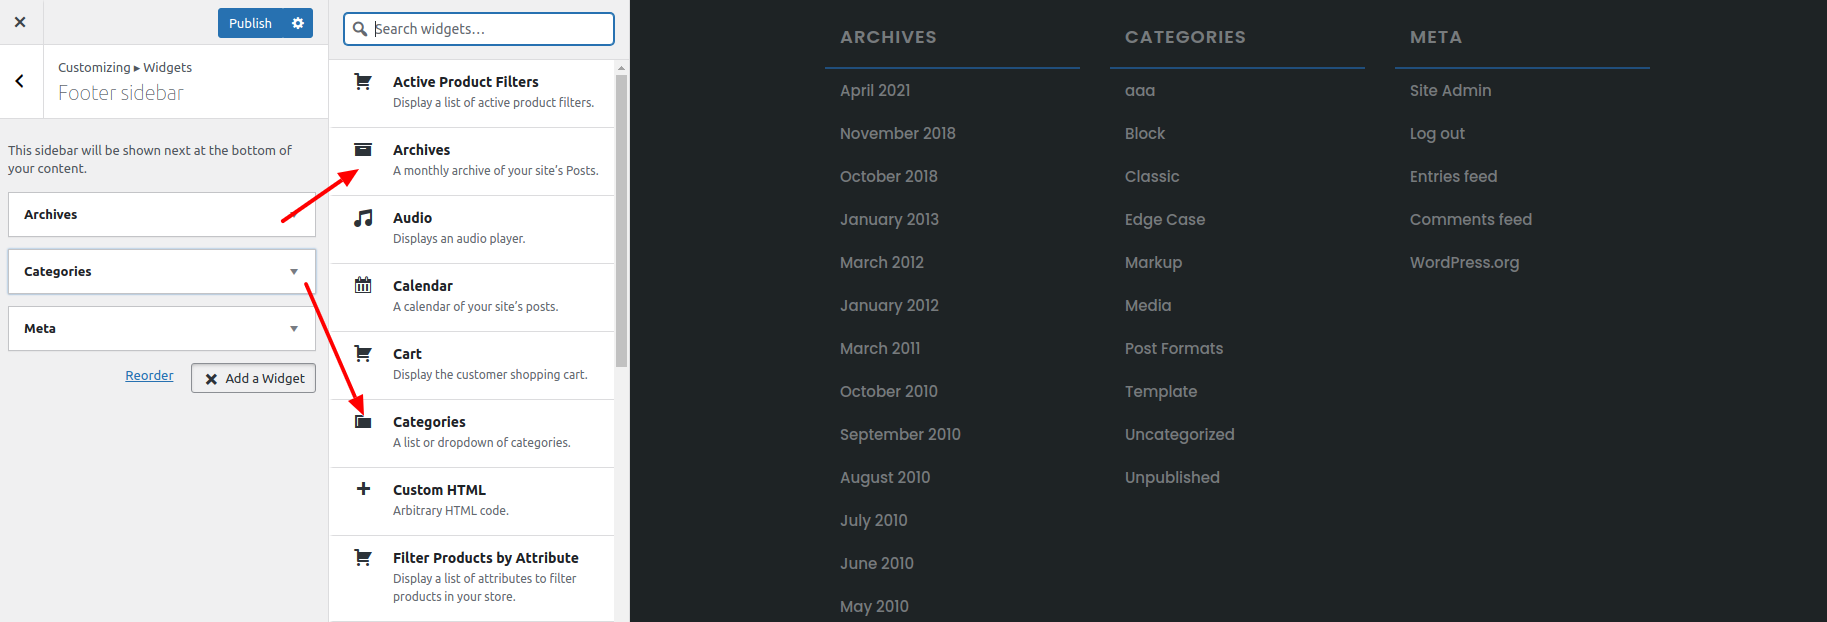
Once you will select widgets, you will get this page, refer the below screenshot.
Footer Copyright Text -
In order to proceed with footer Settings, You can fill the copyright content to footer copyright Settings.
5. In the dashboard, go to Appearance >> Customize >> Theme Options >> Footer Copyright Settings

In front end, it will look like this.
