
How To Edit Your WordPress Footer For A Professional Look
1. Why is it important to edit your footer?
The footer of your WordPress website contains important information about your site, such as your contact details, copyright information, and links to your social media profiles. It’s one of the first things that visitors to your site will see, so it’s important to make sure that it looks professional and reflects the overall tone of your site.
In this article, we’ll show you how to edit your WordPress footer to give it a professional look. We’ll also share some tips on what to include in your footer and how to design it to match the style of your site.
2. How can you edit your footer?
Editing your WordPress Theme footer is actually quite simple. Here are the steps you’ll need to follow:
1. Log into your WordPress admin panel and go to Appearance > Editor.
2. On the right-hand side, you should see a list of files. Click on the one that says “Footer”.
3. Scroll down to the bottom of the file and you will see the code for your footer.
4. Make any changes you would like to make to the code or add any additional elements to your footer.
5. Once you’re done editing the code, click on the “Update File” button at the bottom of the page to save your changes.
It’s important to note that you should always make a backup of the code before making any changes, just in case something goes wrong.
Once you’ve edited your footer, it’s important to preview it to make sure it looks the way you want it to. To do this, simply click the “Preview Changes” button at the top of the page. This will take you to a preview of your WordPress website, where you can see what your footer will look like before making any changes.
3. What are some things you should include in your footer?
When editing your footer, there are certain elements you should include to give your site a more professional look. Here are some of the essential components you should consider adding to your footer:
– Company logo: Adding your company logo to your footer is a great way to provide easy access to your website’s homepage and also to ensure your brand is prominently displayed on your site.
– Copyright information: You should always include the correct copyright information in your footer, so visitors know when the content was originally published. This can help to deter any potential thefts or plagiarism of your content.
– Navigation menu: Putting your website’s navigation menu in the footer is a great way to make it easier for visitors to find the content they’re looking for. This is especially important for larger websites that have a lot of content.
– Contact information: Make sure your contact information is prominently displayed in your footer so visitors will always know how to reach you. This could include email, phone, or even physical address.
– Social media links: It’s important to link to your social media pages in your footer so visitors can easily find you and follow you on different platforms. This will help you build your following and get more engagement with your content.
– Legal information: Depending on your business and industry, you may need to include certain legal information in your footer. For example, this may include a link to your terms and conditions or a
4. How can you make your footer look professional?
Once you have decided what elements you want to include in your footer, the next step is to make sure it looks professional. Here are some tips for making your footer look more professional:
– Keep the design simple and clean: A simple and clean design can help to give your footer a professional and polished look. Avoid using too many colors or too many different font styles.
– Utilize white space: White space can help to make your footer look more organized and makes important elements stand out more.
– Use icons and graphics: Using icons and graphics can help make your footer look more visually appealing and help to make important sections stand out.
– Use a consistent color scheme: Choose a few colors that will be used consistently throughout your footer. This will help create a cohesive and uniform look.
– Keep it organized: Make sure everything is organized and easy to read. Break up larger chunks of text and prioritize important concepts.
– Add branding elements: Adding elements such as your business logo, slogan, or tagline can help give your footer a more professional and branded look.
– Make sure all the links are working: Make sure all the links in your footer are working correctly. This will help create a better user experience for visitors.
5. Conclusion
Editing your WordPress footer is a great way to add a more professional look to your website. By keeping the design simple, using white space, getting creative with icons, using a consistent color scheme, organizing and prioritizing the page elements, and adding branding elements and working links, you can make sure your professional footer is easily noticeable and adds value to the user experience of your website.
With the help of WordPress tools and plugins, customizing your WordPress footer is easier than ever before. Taking some time to adjust and customize your footer elements can make the difference between a generic-looking website and a polished and professional website.

How To Quickly Resolve An Internal Server Error In WordPress
1. Introduction
One of the most common errors that can occur while using WordPress is the “Internal Server Error”. This error can be caused by a number of factors, such as plugins or theme conflicts, corrupt .htaccess file and PHP memory limit.
While this error can be frustrating, the good news is that it can usually be resolved quickly and easily. In this article, we will show you how to quickly resolve an internal server error in WordPress.
2. What is an Internal Server Error?
An “Internal Server Error” is an HTTP status code that indicates a problem with the server. Generally, this status code occurs when a request is made to the server, but the server cannot process it.
These errors can be caused by a variety of things, such as plugin or theme conflicts, corrupt .htaccess file, or insufficient PHP memory limit. Common symptoms of an Internal Server Error include a white screen of death, misbehaving plugins, or a website that just won’t load.
When this error occurs, it’s important to take the time to diagnose and resolve the issue as soon as possible. Depending on your hosting provider, you should also receive an email that provides more information about the roots of the error.
3. Why would you see an Internal Server Error in WordPress?
Internal Server Errors in WordPress can occur for various reasons. The likely causes of such errors include:
– Insufficient PHP memory limit
– Plugin or theme conflicts
– Corrupted .htaccess file
– Database connection issue
– Incorrect file and directory permissions
– PHP errors
– Faulty web server configuration
It is important to take the time to diagnose and resolve the Internal Server Error as soon as possible. If the issue is not resolved, then it may result in disruption of service, data loss, and other problems.
4. How to resolve an Internal Server Error in WordPress
When you encounter an Internal Server Error in WordPress Themes, the easiest way to resolve the issue is to identify the source of the error. To do this, you can follow these steps:
1. Check the error logs for clues. Most server hosting services keep detailed logs of all visits to your site, including any errors. These logs can provide valuable information about potential causes of the Internal Server Error.
2. Update your PHP version. Many Internal Server Errors can be caused by an outdated version of PHP. If this is the case, updating PHP to the latest version should resolve your issue.
3. Disable all plugins. Sometimes, a plugin conflict can cause Internal Server Errors. To test this, try disabling all plugins, then enable them one by one to see if any of them is causing the issue.
4. Re-upload the core file. When all else fails, you can try re-uploading the WordPress core files. This will not affect any of your content or plugins, but it will fix any corrupted files that may be causing the error.
Once you have identified the source of the error, you can then follow the appropriate steps to resolve it. This may involve changing settings in the database, updating plugins and themes, or fixing errors in the .htaccess file.
5. Conclusion
WordPress Internal Server Errors can be a source of frustration for website owners, but there are a few steps you can take to quickly resolve the issue.
Start by checking the error logs for clues as to the source of the error. If that doesn’t help, try updating PHP to the latest version, disabling all plugins, or re-uploading the core files.
Then, you can follow the appropriate steps to resolve the issue – depending on what caused it. This may involve changing settings in the database, updating plugins and themes, or fixing errors in the .htaccess file.
By following the steps outlined here, you should be able to quickly and effectively diagnose and resolve WordPress Internal Server Errors. If you are still having issues, consider getting in touch with your hosting provider or a professional WordPress developer.
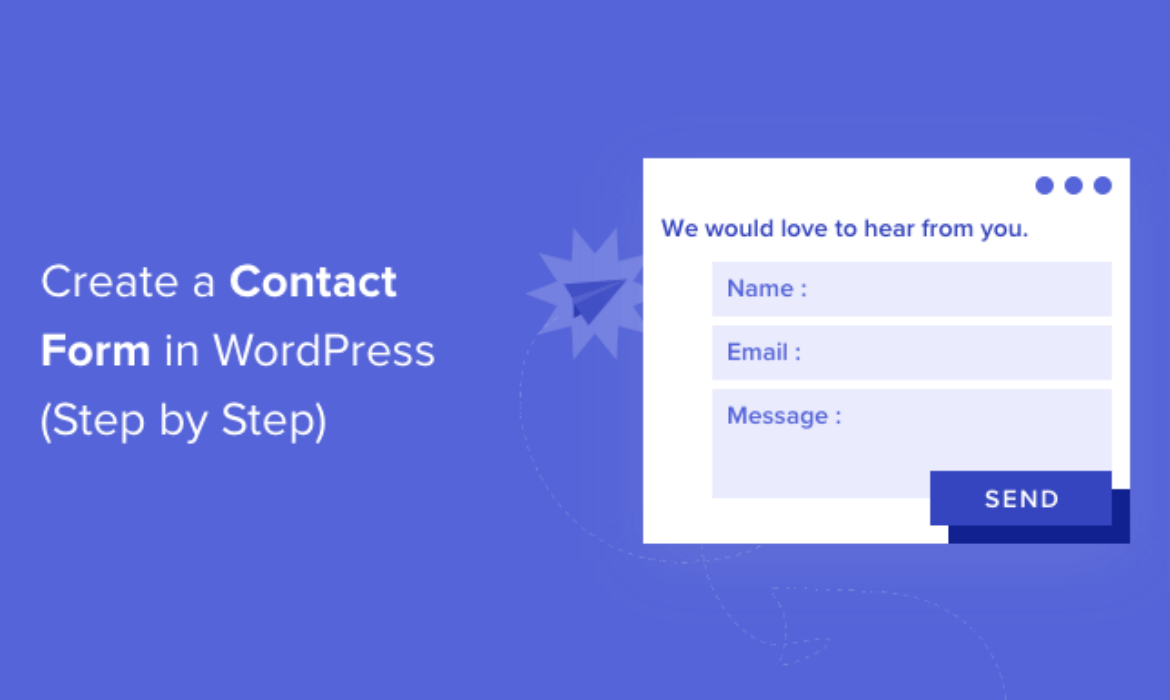
The Ultimate Guide to Creating a Professional Contact Form in WordPress
1. Introduction
Creating a professional contact form on your WordPress website is essential for establishing a strong online presence and connecting with your audience. A well-designed contact form can help you collect valuable information from your visitors, such as their name, email address, and message, which can be used to improve your business or website.
In this comprehensive guide, we will take you through the step-by-step process of creating an effective contact form in WordPress. From choosing the right plugins and form builders to designing a visually appealing form and integrating it into your website, we’ll cover everything you need to know to create a professional contact form that meets your business needs. So let’s get started!
2. Importance of a professional contact form
Having a professional contact form on your WordPress Themes is essential for establishing a strong online presence and connecting with your audience. It is an effective way to gather important information and feedback from your visitors, which can help improve your business or website. Additionally, a well-designed contact form can increase the likelihood of visitors engaging with your site and even converting into customers or clients.
A professional contact form should not only be visually appealing, but it should also be easy to use and navigate. Visitors should be able to quickly find and fill out the form without encountering any issues. Furthermore, the form should be optimized for mobile devices and accessible to people with disabilities.
Another key benefit of a professional contact form is that it allows you to control the types of information you receive. By specifying the fields and questions in the form, you can gather relevant data from visitors and avoid receiving spam or irrelevant messages. This can save you time and energy when responding to inquiries or processing requests.
In summary, having a professional contact form on your WordPress website is important for creating a positive user experience, gathering valuable information, and improving your online presence. With the right tools and design, you can create a contact form that meets your business needs and helps you connect with your audience.
3. How to create a contact form in WordPress?
Creating a professional contact form in WordPress is an easy process that requires minimal technical knowledge. Here are the steps to create a contact form for your WordPress website:
1. Install a contact form plugin: The first step is to install a contact form plugin that integrates with WordPress. There are several options available, with popular ones such as Contact Form 7, WPForms, and Gravity Forms.
2. Configure the plugin settings: After installing the plugin, navigate to the plugin settings and configure them to your preferences. This includes setting up email notifications, spam protection, and other settings that will optimize the functionality of the form.
3. Create a new form: Once you have configured the plugin settings, you can create a new form by adding fields such as name, email, phone number, message, etc. You can also customize the appearance of the form, including the font, color, and layout.
4. Add the form to your website: After creating the form, the final step is to embed it on your WordPress website. This can be done by creating a new page or post and adding the shortcode that comes with the plugin.
With these steps, you can create a professional contact form that will enhance the user experience on your WordPress website and help you connect with your audience. Ensure the contact form remains visible and accessible in the header or footer of your website.
4. Choosing a suitable contact form plugin
When selecting a suitable contact form plugin for your WordPress website, there are several factors to consider. Here are some tips to help you choose a plugin that meets your needs:
1. Ease of use: Look for a plugin that is easy to use and has a user-friendly interface. This will save you time and avoid unnecessary frustrations.
2. Customization options: The plugin should provide enough customization options to make the form match your website’s design and branding.
3. Spam protection features: It is important to select a plugin that has built-in spam protection features to prevent spam submissions from bots.
4. Integration with third-party tools: If you use other tools for email marketing or lead generation, ensure that the plugin integrates with these tools seamlessly.
5. Support and updates: Choose a plugin that provides good customer support and regular updates. This will ensure that any issues can be resolved quickly, and the plugin remains compatible with the latest versions of WordPress.
By considering these factors, you can select a suitable contact form plugin that will meet your requirements and enhance the user experience on your WordPress website. Remember to test the plugin thoroughly before making it live on your website.
5. Designing a professional contact form
Designing a professional contact form for your website is a crucial aspect of creating a positive user experience. Here are 5 tips to help you design a professional contact form in WordPress:
1. Simplicity is Key: A simple contact form design will make it easier for users to complete the form. A cluttered form with too many fields can be overwhelming, resulting in visitors abandoning the form.
2. Use Clear Labels: Clear and concise field labels make it easier for visitors to understand the purpose of each field and provide relevant information.
3. Design for Mobile Responsiveness: With the increasing number of mobile users, it’s important to design a contact form that is mobile-responsive, ensuring that it looks great and functions perfectly on all devices.
4. Branding and Visual Appeal: Your contact form should match the visual branding of your website. Use consistent colors, fonts, and design elements to create a cohesive look.
5. Clear CTAs and Instructions: Use clear and concise language to guide users on how to complete the form, including a clear call-to-action (CTA) that informs visitors of what to expect after submitting the form.
By following these tips, you can create a professional contact form that looks great, is easy to use, and enhances the user experience on your WordPress website. Remember to test the form thoroughly before making it live on your website.
6. Customizing form fields and settings
6. Customizing form fields and settings
When creating a contact form in WordPress, it is important to customize it to fit your specific needs. Here are some options for customizing form fields and settings:
1. Add or Remove Fields: Depending on the purpose of your contact form, you may want to add or remove certain fields. For example, if you are collecting customer feedback, you may want to include a rating scale question. On the other hand, if you only require a visitor’s name and email address, these are the only fields you need.
2. Required Fields: Specify which fields are required in order to submit the form. Required fields are marked with a red asterisk indicating that they must be completed before the form can be submitted.
3. Field Types: Depending on the type of information you wish to collect, you can choose from various field types such as text boxes, radio buttons, drop-down menus, and checkboxes. Each field type has its own set of advantages and disadvantages, so it is important to choose the right one for your specific form.
4. Field Labels and Descriptions: Customize the labels and descriptions for each field to ensure that they are clear and concise. This will make it easier for users to complete the form accurately.
5. Submission Settings: Customize the submission settings by specifying the email address to which form submissions will be sent, as well as any confirmation messages or redirections that should appear after the form is submitted.
Customizing your contact form will not only make it more tailored to your specific needs, but it will also make it more user-friendly and increase the chances of visitors completing and submitting the form.
7. Integration with third-party tools
7. Integration with Third-Party Tools
To make your contact form even more powerful, you can integrate it with various third-party tools and services. Here are some options to consider:
1. Email Marketing Services: If you use an email marketing service such as Mailchimp, Constant Contact, or Aweber, you can integrate your contact form with these services to automatically add new contacts or subscribers to your email list.
2. Customer Relationship Management (CRM) Systems: A CRM system such as Salesforce, HubSpot, or Zoho CRM can be integrated with your contact form to automatically add new leads or contacts to your database.
3. Payment Processors: If you offer a paid service or product, you can integrate your contact form with a payment processor such as PayPal or Stripe to collect payments directly through your form.
4. Social Media Platforms: You can integrate your contact form with social media platforms such as Facebook or Twitter to make it easier for users to contact you through those channels.
5. Google Analytics: By integrating your contact form with Google Analytics, you can track form submissions and user behavior on your website.
Integrating your contact form with these third-party tools can save you time and streamline your workflow. It also provides a better user experience for your visitors and enhances the overall functionality of your website.
8. Securing the contact form
8. Securing the Contact Form
While creating a professional contact form is essential for any WordPress website, it’s also important to ensure that it’s secure. Here are some tips to help secure your contact form and protect user data:
1. Use a Captcha or ReCaptcha – Adding a captcha or reCaptcha to your form can help prevent spam entries and protect your website from bots.
2. Enable HTTPS – Enabling HTTPS encrypts the data transmitted between the user and your server, which can help protect users’ information.
3. Limit Form Access – Limiting access to your form can help prevent unauthorized users from submitting entries or accessing user data.
4. Regularly Update Plugins and WordPress version – To prevent exploitation of vulnerabilities, make sure to keep your plugins and WordPress version updated.
5. Utilize Form Data Encryption – Encrypting your form data can add an additional layer of protection and ensure user data is secure.
Taking these steps to secure your contact form can help avoid potential data breaches and protect users’ sensitive information. Always prioritize the security of your website to ensure the trust and safety of your users.
9. Testing your contact form
9. Testing Your Contact Form
Once you have created a professional contact form for your WordPress website, it’s essential to test it thoroughly before making it live. Testing will help ensure that users can submit their information without any issues and that you receive their messages.
Here are some key steps you can take to test your contact form:
1. Check Form Functionality – Ensure that all fields and buttons on your contact form are working correctly. Test the form multiple times and with different types of submissions to be sure.
2. Test Error Messages – Make sure your contact form displays error messages when required fields are left blank or when there are other submission issues.
3. Test Email Notifications – Make sure that you receive notifications when someone submits a message through your contact form. Test the email notification settings and message content.
4. Test Auto-Responder – If you have set up an auto-responder, test it to make sure it’s working as expected.
5. Perform Mobile Testing – Test the contact form on a mobile device to ensure it’s properly optimized for mobile users.
6. Check for Spam – Make sure that your contact form is not being used to send spam messages by analyzing the content of the messages received.
By testing your contact form thoroughly, you can ensure that it functions as intended, and that you are able to receive messages from interested parties. Remember to test your form regularly to ensure it remains secure and functional over time.
Unleashing the Power of Multilingual Communication: A Comprehensive Guide to Incorporating Google Translate in WordPress
Incorporating Google Translate in WordPress – Introduction: Embracing Multilingualism in the Digital Landscape

In today’s interconnected digital landscape, the reach of a website extends far beyond geographical boundaries. The internet has transcended borders, enabling individuals from diverse cultures and backgrounds to access and engage with content from around the world. Yet, despite this interconnectedness, language remains a formidable barrier. While English serves as a lingua franca for a significant portion of online communication, the richness and diversity of the global audience cannot be encapsulated by a single language.
Enter Google Translate, a revolutionary tool that has reshaped the way we navigate linguistic differences. By seamlessly integrating Google Translate into your WordPress themes, you embark on a journey to conquer these language barriers and connect with a global audience on a profound level. This comprehensive guide is your compass, navigating you through the intricate process of merging Google Translates capabilities with the versatile WordPress platform. The ultimate goal? To create an online space that resonates harmoniously with readers, irrespective of their native tongues.
Harnessing Google Translates Potential: A Universal Language Bridge
Imagine the power of instantaneously translating your website’s content into over 100 languages, enabling people from different corners of the world to engage with your ideas, products, and stories. Google Translate isn’t just a translation tool; it’s a bridge between languages, cultures, and perspectives. Its integration with WordPress ushers in a new era of online accessibility, transforming your website into a global hub of communication and exchange.
The Case for Google Translate
Google Translate is a heavyweight in the realm of translation services, facilitating real-time translation between over 100 languages. By integrating this potent tool into your WordPress website, you’re not only breaking linguistic barriers but also embracing a broader audience and potentially expanding into international markets. With a user-friendly interface and instant translation capabilities, Google Translate enhances user experience and engagement, fostering a truly inclusive online environment.
Step-by-Step Integration Guide
Step 1: Choose Your Integration Method
You have multiple avenues to infuse Google Translates magic into your WordPress website. Two primary methods are plugin integration and manual widget addition.
Plugin Method:
Access your WordPress dashboard.
Navigate to “Plugins” and select “Add New.”
Search and locate your chosen plugin (e.g., “Google Language Translator”).
Install and activate the plugin.
Configure the plugin settings, specifying the languages you wish to offer for translation.
Manual Method:
Visit the Google Translate website (translate.google.com/manager/website/).
Click “Add to your website now.”
Provide your website details and customize settings.
Copy the code snippet generated.
Log in to your WordPress dashboard.
Edit template files (header or footer.php) or utilize a custom widget area to embed the code snippet strategically.
Step 2: Testing and Customization
After successful integration, comprehensive testing is paramount to ensure translated content’s accuracy and coherency. While Google Translate is remarkable, automated translations may occasionally falter, making user feedback a valuable resource for improvements.
Certain plugins extend customization features, enabling you to control the widget’s appearance and behaviour. This empowers you to harmonize the translation widget’s look, positioning, and language selection with your website’s aesthetics and user preferences.
Step 3: Vigilant Performance Monitoring
Continual vigilance over the integrated translation solution’s performance is key. Utilize Google Analytics to glean insights into user engagement and behaviour post-translation. If issues arise or user feedback indicates discrepancies, be prepared to swiftly make necessary adjustments.
Step 4: Balancing Automation with Human Translation
While automated translation tools shine in convenience, precision and cultural nuance are occasionally non-negotiable. For critical content such as legal documents, product descriptions, or marketing material, consider investing in professional human translation. This judicious fusion of automation and human touch heightens your website’s credibility and impact.
Conclusion
In a digital landscape defined by diversity and global connectivity, conquering language barriers is an essential stride towards audience expansion. Google Translate offers an accessible and dynamic solution for WordPress users committed to catering to a varied readership. By diligently selecting the integration method, conducting thorough testing, personalizing the translation widget, and diligently monitoring performance, you’re paving the way for a seamless multilingual experience that fosters user satisfaction and propels your digital presence. While automated prowess is remarkable, weaving in human translation for pivotal moments solidifies your website’s authenticity and resonance across cultures and languages.
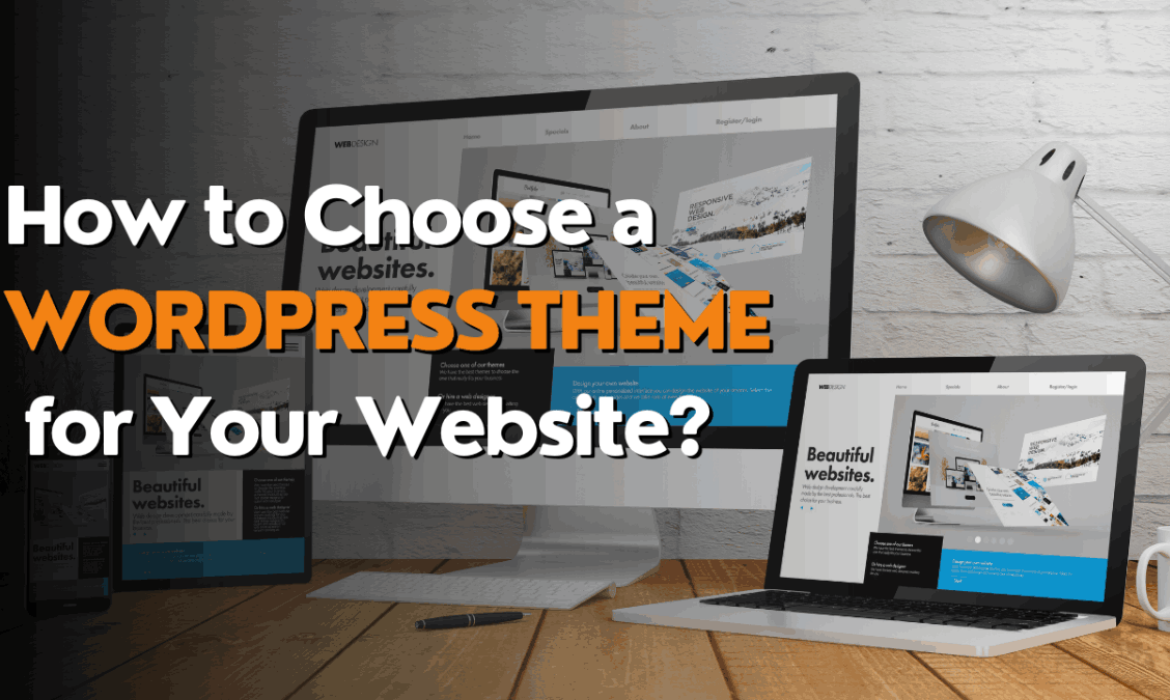
How to Choose a WordPress Theme for Your Website?
Do you want a proper theme for your online business web address? But not able to choose an ideal one? Don’t worry. Here, we will guide you on How to choose a WordPress theme for your Website.
Choosing the Best WordPress Theme for your Website is an important decision, as it can greatly impact the overall look, functionality, and user experience of your site.
WordPress delivers a gigantic collection of web themes that suit all kinds of websites. A theme is a foundation of your site that holds all elements and serves millions of visitors coming to your site. After all, it is a representative of your work.
While choosing a theme, you need to keep in mind some Do’s and Don’ts. If you want to come up with a perfect choice, then you need to follow some guidelines in the process of selecting a theme.
Steps to Help You Choose a WordPress Theme-
Define your Website’s purpose and goals.
- Consider the primary purpose of your Website. Is it a blog, an e-commerce store, a portfolio, a business website, or something else?
- Define your target audience and the goals you want to achieve with your Website. Knowing your objectives will enable you to focus on a more specific theme.
Research your niche
- If your Website serves a particular niche or industry, look for themes designed with that niche in mind. These themes may have built-in features and design elements relevant to your content.
Consider Design and Layout
- Choose a design that matches your brand or personal style. WP Themes come in various styles, such as minimal, modern, classic, and more.
- Pay attention to layout options, including the number of sidebars, header styles, and footer layouts. Make sure the theme’s layout complements your content and business needs.
Responsiveness and Mobile Friendliness
- Ensure the theme is responsive, meaning it adapts well to different screen sizes and devices like mobile, tablet, and desktop. Additionally, Google prioritizes mobile-friendly websites in search results.
Speed and Performance
- The speed of the Website is crucial for user experience and SEO. Look for themes that are optimized for performance, or consider using a caching plugin to enhance load times.
Customization Options
- Check if the theme offers customization options. WordPress customizer or a page builder can make it easier to modify the layout, colors, fonts, and other design elements.
Plugin Compatibility
- Ensure that the theme is compatible with popular WordPress plugins you plan to use, such as WooCommerce for e-commerce, SEO plugins, contact forms, and social media integrations.
SEO-Friendly Features
- Choose themes that were constructed with SEO in mind. Clean code, structured data, and good performance can all impact your Website’s search engine ranking.
Security and Updates
- Choose a theme from a reputable source, such as the official WordPress theme repository or a trusted theme marketplace. Regular updates and good security practices are important.
User Reviews and Ratings
- Read user reviews and ratings for the theme you are interested in. This can provide insights into the theme’s performance, support, and user satisfaction.
Support and Documentation
- Check if the theme developer offers support and documentation. A responsive support team can be valuable if you encounter issues or need help with customization.
Demo and Testing
- Many themes offer live demos that allow you to see how the theme works in a real-world setting. Test the theme’s features and layout to ensure it meets your needs.
Pricing
- Consider your budget. While there are many free themes available, premium themes often come with additional features and support. Decide what you are willing to invest in your theme.
Licensing and Usage Rights
- Understand the theme’s licensing terms. Some themes may have restrictions on how you can use them, especially if you plan to build websites for clients.

Apart from this, you need to select a theme that supports utmost all the plugins that you integrated within the site. A theme must be a layout that can easily be customized. If a theme gets easily customized, then you can decide the color scheme that you want. You can add different pages and remove them when it’s necessary. Before downloading and installing, you need to check whether the theme is updated regularly or not. A low-quality or outdated theme can provide the worst user experience. Your site can suffer through cyber-attacks and affect your site’s elements. So to avoid this all, you have to pick a high-rated and quality premium theme that you think is confident to handle heavy traffic and respond quickly.
Once you have considered all these factors, you can make an informed decision about the WordPress theme that best suits your Website’s needs and goals. It’s a good practice to make a backup of your Website before installing a new theme to avoid any data loss during the transition.
If you are not sure of using WordPress themes you can checkout our guide on What Is a WordPress Theme, and Why Do You Need One?. This guide will help you understand WordPress themes better.
What Do You Need to Avoid While Picking the Theme for Your Site?
We have seen the points to keep in mind while picking an ideal theme for the project. Now, we will be studying some don’ts that you need to avoid in the context of choosing a layout for your web URL.
Avoid Picking a Lengthy Theme.
The key lesson from this is that you shouldn’t choose a theme that is very feature-rich because doing so will end up costing you in the long term. Although a theme with plenty of features may be appealing, the performance of the Website may be adversely affected.
Don’t install every feature you think is cool just because you want to. Although elaborate music players and game features may be enticing, they could cause your site to load slowly. Additionally, features are sometimes developed with an emphasis on completing a certain job rather than necessarily keeping a site secure. New code might raise the likelihood of security weak spots. So, first, focus on your requirements and install the features accordingly. Avoid elements that can cause clutters in the execution.
Avoid Picking a Theme with a Difficult-To-Read Typeface.
This relates to the earlier point about grabbing visitors’ attention quickly to keep them on your Website. You should make it as simple as you can for the visitors to your Website to discover what they are looking for. Make sure that your fonts are readable, stylish, and basic.
There are some fonts that are often used on the internet that you can try. However, some free themes may have restrictions on customizations. Something to keep in mind when choosing a theme: if you are comfortable with CSS, it should be simple to go in and change your theme’s font.
Conclusion
It can be daunting with so many WordPress themes to pick from. But keep in mind that the theme you select will have a significant impact on your WordPress website. So you should carefully consider your options. This post should assist in guiding you through the process of selecting a WordPress theme because there is more to it than just picking one that looks good. .
Most Searched Themes
Education WordPress Theme | Transport WordPress Theme | Ecommerce Mega Store WordPress Theme | Radio WordPress Theme | Travel Booking WordPress Theme | Trucking WordPress Theme | Taxi WordPress Theme | Gaming WordPress Theme

What Is a WordPress Theme, and Why Do You Need One?
Are you in search of a layout for your online business web URL? If yes, then you can have a great collection of WordPress themes that can be suitable for all kinds of business and non-business websites. Once you go through their features, you can opt for any that matches your requirements. Today, we have come up with the introductory blog on WordPress Themes.
Before going too far in the journey of themes, let’s start with the theme definition.
What is a WordPress Theme?
A WordPress theme is a layout and design of your web URL that provides a strong foundation to build a professional-looking website. The theme decides how your website looks. What visitors can see on your site when they browse it all depends on a theme. A structured theme can streamline your workflow and engage the visitors on the site for a long. The selection of a theme must be unique, clutter-free, and galvanizing.
Key Points about the WordPress Themes
Free and Premium Themes
You can receive thousands of free and premium themes available for WordPress. Free themes can be a good starting point for beginners, while premium themes often offer more attributes, customization options, and support.
Theme Customization
WordPress themes can be customized to suit your particular needs. You can often change colors, fonts, backgrounds, and layouts through the WordPress Customizer, which delivers a user-friendly interface for making these changes.
Responsive Design
A good WordPress theme is responsive, meaning it adapts to different screen sizes and devices, including mobile and tabs. It’s mandatory to provide a great user experience on all types of devices.
Widgets and Sidebars
Pre-made themes often come with predefined widget areas and sidebars where you can add various elements like menus, recent posts, and custom content.
Custom Page Templates
Some themes offer custom page templates, allowing you to create different layouts for specific pages. For instance, you might have a unique template for your homepage, a blog page, and a contact page.
Theme Frameworks
Some themes are built on top of robust theme frameworks and flexible parent themes that offer a solid foundation for customization.
Child Themes
To maintain customization while ensuring that your site remains upgradable, it is a good practice to use child themes. Chile theme inherits the functionality and styling of a parent theme and can be modified without altering the original theme.
SEO-Friendly themes
The selection of a theme that is optimized for search engines is crucial for your site’s visibility. Look for themes that are coded with SEO best practices in mind.
Security
Be cautious when selecting themes. Stick to reputable sources like the WordPress theme Repository or well-known theme marketplace to reduce the risk of using a theme with security vulnerabilities.
Support and Updates
Premium themes often come with customer support and regular updates. Ensure that your theme receives updates to remain compatible with the latest version of WordPress.
The Potential of WordPress Themes
Themes are a powerful tool that works beyond arranging colors and layout. Themes have an incredible potential to display your data in a compelling form. It enhances the engagement of users on your site. Your theme can comprise multiple options during construction, such as
- Various layouts, like static or responsive, use one column or two.
- Manifest your content anywhere you want it to be shown.
- You can specify the types of devices on which your content is visible.
- You are allowed to customize its typography and design elements with the help of CSS or theme.json.
Need to use a ready-made WordPress Theme.
Arranging multiple elements like header, footer, sidebars, navigational menus, blog posts, images, and divisions separately with the help of HTML tags and CSS codes is very complex. Also, it requires detailed technical knowledge. If you want to design your theme or layout as per your requirements, you need to plan the placement of each and every element along with the content, which is a very time-consuming job. Thanks to WordPress, it has issued a magnificent collection of pre-built, pro themes that can suit any type of web application. So, instead of creating a theme from scratch, if you can go with ready-made, well-structured, and beautifully designed themes, it would serve more than you imagine and can save time, too.
If you have an official web address ready to go on board, you can start to receive visitors, and your business starts reaching out to global audiences. In short, you can start your business immediately if you have your site ready.
In website building, theme creation is the most time-consuming job. Once you have selected a theme, placing elements and putting your content won’t take too much time, and you will get the outcome in just a few clicks within an hour. That’s why themes play a vital role in website building.
If you want to establish your online presence and stand out against your competitors, themes can quickly configure your site. In addition to this, it won’t require any technical coding knowledge. WordPress themes are completely customizable. You can personalize them as per your choices and notions.
In short, using themes minimizes your efforts to design and code a layout for your site. You can easily manipulate your site with different colors, fonts, styles, and formats.
Which is the Best Theme for WordPress
It’s not that easy to pick any and say it is the best WordPress theme. But we can specify some elements that can make your theme good and which we can recommend.
Key elements that make your WordPress theme a good theme
- A theme must be speedy and responsive and shouldn’t take too much time to load.
- Clean-coded and Lightweight to avoid causing conflicts with plugins.
- Must have high-quality customer support.
- Must have a powerful blog design.
- It should be a straightforward, minimalist design with the proper use of whitespace.
- Compatible with the majority of broadly used plugins. Easily work with the in-built WordPress block editor or with a drag-and-drop page builder.
- Must have settings for arranging a brand and design elements like typography and colors.
Type of WordPress Themes
WordPress is a comprehensive Content Management System where you will get everything that is necessary and required to provide the finest environment for your site. You cannot imagine the kinds of themes that WordPress has delivered. You can get every niche-specific theme over here if you are running a specific type of business website.
Also, you can turn your theme to your requirements as per its design. The themes are customizable and can easily be alerted for newer architecture. If you pick a niche-specific theme, then it must suit your industry-based business type.
Now let’s see the categories of themes that you can find in WordPress as
- Corporate
- Entertainment
- E-Commerce
- Medical
- Blogging
- Forums and communities
- Membership sites
- Social networks
- Directories
- Custom Support
- Food and restaurant
- Hotels and Travel
Difference Between Free and Premium WordPress Themes
WordPress themes are available in free and premium versions as well. Here, you can differentiate and opt for the one that is affordable to you and goes with your requirements.
Free WordPress themes
- Free themes can be downloaded and installed for free instantly. You won’t have to pay for using it.
- As the themes are free, they are much simpler in design and functionality.
- Free themes are easy to understand and implement.
- It lacks customer support, but the user forum in the free themes is used for discussing issues.
- Free themes are also maintained and updated consistently.
Premium WordPress Themes
- Premium WordPress Themes are available at a specific cost. You need to pay a particular amount that usually starts from $30 to $150 for one time.
- You can obtain more advanced features than the free version.
- High-quality customer support via email and chat is provided by the premium version.
- Premium theme developers can deliver consistent security and feature updates.
- Usually, the premium themes comprise knowledgebase articles to reference, which is a true benefit.
- You can get misleading sales copies in the form of a Premium theme. So you must have knowledge about the true premium theme and fake premium theme.
From where will you get the Free and Premium WordPress Themes?
You can hunt the treasure of libraries and marketplaces to explore the perfect theme options on the internet. WordPress theme repository is the best place to get Free WordPress themes. You can select it by checking its ratings and reviews, or you can browse on the WordPress Dashboard.
Premium themes are available on various marketplaces, such as
- ThemeForest
- Creative Market
- Mojo Marketplace
- MyThemeShop
- Template Monster
On the other hand, you buy a theme directly from a theme developer, where you can get the best customer support. Google search will give you fantastic options. Some of the reputed theme developers are-
- ThemeIsle
- WPAstra
- Themify
- Nimbus Themes
- Tesla Themes
- aThemes
- ThemeTrust
Conclusion
WordPress themes can deliver a pretty look to your website’s front end. Instead of issuing a boring, blank design, it provides an excellent and magnificent design of the site. You can also modify the functionality and design of the site easily. Site owners can install the theme to integrate and extend multiple functionalities in the site.
Finally, when picking a WordPress theme, you need to consider the purpose of your site, design preferences, and the features that you require. It is essential to strike a balance between aesthetics and functionality to create a site that meets your goals and provides a great user experience.
Most Searched Themes
Education WordPress Theme | Transport WordPress Theme | Ecommerce Mega Store WordPress Theme | Radio WordPress Theme | Travel Booking WordPress Theme | Trucking WordPress Theme | Taxi WordPress Theme | Gaming WordPress Theme
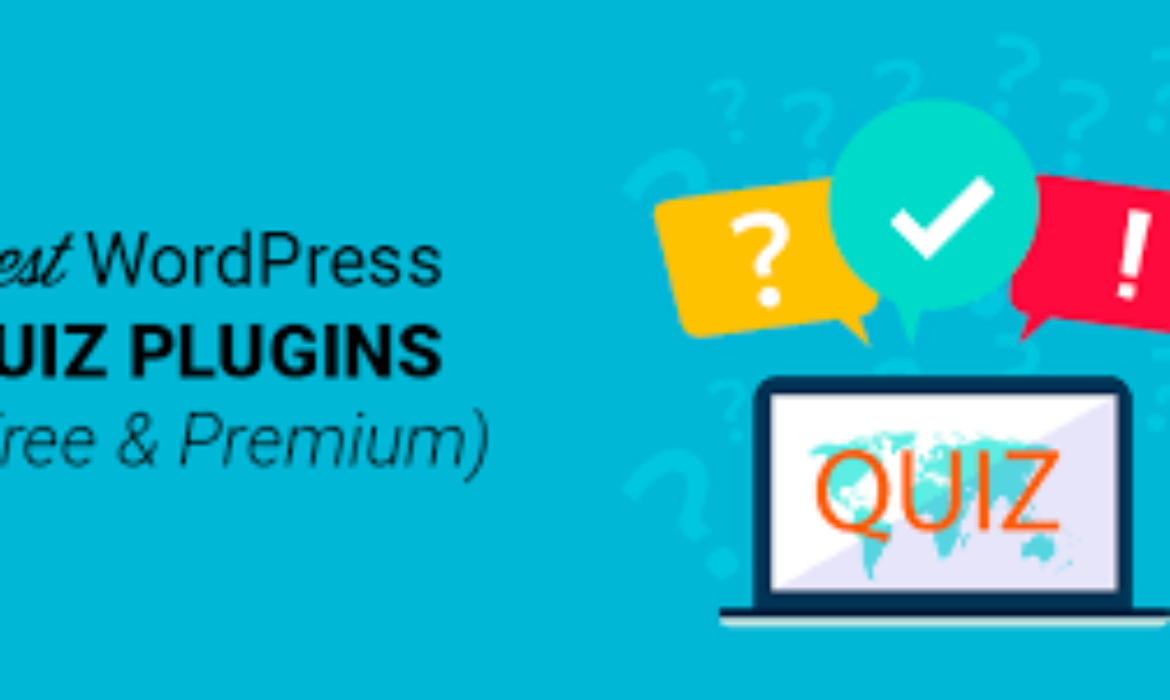
10 Must-Have WordPress Quiz Plugins to Engage Your Audience
WordPress is one of the most popular platforms for creating websites and engaging with audiences. With the addition of quiz plugins, site owners can easily create fun and interactive quizzes that can help increase engagement and drive traffic. However, with so many options to choose from, it can be challenging to know which quiz plugins are worth investing in. To help you make the best decision, we have compiled a list of the top 10 must-have WordPress quiz plugins for engaging your audience. Keep reading to learn more about these powerful tools and how they can enhance your website!
Why are WordPress quiz plugins important?
WordPress quiz plugins are essential for website owners who want to increase their audience engagement and drive traffic to their site. By incorporating quizzes, site owners can make their content more interactive and fun, providing users with an enjoyable experience while they learn or interact with the brand.
The benefits of using quiz plugins for your WordPress site are numerous, including:
1. Increased User Engagement – Quizzes can be fun, educational, and interactive, leading to higher user engagement.
2. Enhanced Brand Awareness – Creating quizzes that relate to your brand or industry can help to increase brand awareness and establish your business as an authority in the field.
3. Improved Site Traffic – Quizzes tend to be shareable, meaning that they can easily go viral and drive more traffic to your website.
4. Better User Data Collection – Quiz plugins can help collect valuable user data, such as email addresses or user preferences, that can be used to tailor your content and marketing efforts.
5. Higher Conversion Rates – Quizzes can effectively lead users down the sales funnel, leading to higher conversion rates and increased revenue.
Overall, incorporating quiz plugins into your WordPress site is crucial for staying competitive in today’s digital landscape. With so many options available, it is essential to select the right plugins that align with your goals and audience preferences.
Top 10 WordPress quiz plugins for engaging your audience
1. Quiz and Survey Master – This plugin allows for customizable quizzes and surveys with various question types, ability to display results, and email notifications for completed quizzes.
2. WP Quiz – This plugin offers a simple and user-friendly interface for creating quizzes with various design options and the ability to display quizzes in different formats.
3. LearnDash Quiz Builder- This plugin is perfect for those running an e-learning platform. It offers advanced quiz creation and management tools such as progress tracking, question randomization, and user feedback.
4. Formidable Forms Quiz Maker – This plugin allows you to create quizzes within a form and offers conditional logic, scoring, and the ability to add images and videos to your quiz questions.
5. Interact Quiz Maker – This plugin offers a drag and drop interface to create engaging quizzes with customizable designs and the ability to embed results on social media.
6. Opinion Stage – This plugin offers various types of quizzes, including trivia, personality tests, and polls. It also offers advanced analytics and the ability to customize every aspect of the quiz.
7. Thrive Quiz Builder – This plugin allows for fully customizable quizzes with various quiz types and the option to display results in different formats.
8. Quiz Cat – This plugin offers easy-to-use features such as customizable quiz design, question randomization, and the ability to display results on social media.
9. ARI Stream Quiz – This plugin offers a unique way to engage audience members with stream quizzes that scroll horizontally and display in real-time.
10. HD Quiz – This plugin offers a simple and user-friendly interface for creating quizzes with customizable design options and responsive formats for mobile devices.
With the numerous quiz plugins available for WordPress, it’s important to select the ones that fit your brand, audience, and goals. Incorporating quizzes into your website can not only increase user engagement but also drive traffic and conversion rates.
WP Quiz – Best Quiz Plugin for Beginners
If you’re new to WordPress and looking to incorporate quizzes into your website, these four WP Quiz plugins are great options for beginners:
1. Quiz Master Next – This plugin allows you to create customized quizzes with various question types, customizable designs, and the ability to display results. It also has a user-friendly interface.
2. WP Quiz Maker – This plugin offers an intuitive interface for creating quizzes with different question types and customizable designs. It also allows you to add images and videos to your questions.
3. Gravity Forms Quiz Add-On – This plugin integrates quizzes with the popular Gravity Forms plugin. It offers various question types, scoring options, and email notifications for completed quizzes.
4. Quiz and Survey- This plugin allows for customizable quizzes and surveys with various question types, ability to display results, and email notifications for completed quizzes. It is a user-friendly plugin that is perfect for beginners.
No matter which WP Quiz plugin you choose, incorporating quizzes into your website can boost user engagement and drive traffic and conversions.
Quiz and Survey Master – Most Comprehensive Quiz Plugin
If you’re looking for a comprehensive plugin to create engaging quizzes and surveys on your WordPress website, Quiz and Survey Master is the perfect choice. This powerful plugin offers an array of features that can help you create dynamic quizzes and surveys even if you have no coding knowledge.
Quiz and Survey Master allows you to create various question types, including multiple-choice, true/false, fill in the blanks, and more. You can customize your quiz or survey by adding images and videos, changing colors, and fonts. Results can be displayed instantaneously with a detailed breakdown of scores, and email notifications can be set up to notify both organizers and participants of the completion of a quiz.
Additionally, Quiz and Survey Master offers a variety of add-ons to make your quizzes even more interactive, such as countdown timers, social media sharing, and custom certificates. You can also create leaderboards to promote a competitive spirit among participants.
Overall, Quiz and Survey Master is an excellent choice for bloggers, educators, and marketers looking to engage their audience with interactive quizzes and surveys.
ARI Stream Quiz – Best Quiz Plugin for Interactive Lists
If you want to engage your audience and attract more visitors to your website, ARI Stream Quiz is the perfect plugin for you. This quiz plugin allows you to create interactive quizzes that can be embedded in lists, which is a great way to keep your audience entertained and engaged.
ARI Stream Quiz is easy to use and comes with a variety of features that make creating quizzes fun and enjoyable. You can choose from multiple quiz types, including personality quizzes, trivia quizzes, and more. The plugin also supports multiple languages, which is great if you have an international audience.
ARI Stream Quiz offers a variety of customization options, including adding images, videos, and different question types. You can also customize the look and feel of your quiz using the built-in theme customizer. The plugin also supports social sharing, which is a great way to reach a wider audience.
Overall, ARI Stream Quiz is an excellent choice for bloggers, marketers, and educators looking to engage their audience with interactive quizzes embedded in lists. With its easy-to-use interface and powerful features, this plugin is a must-have for anyone looking to create engaging content for their website.
Thrive Quiz Builder – Best Quiz Plugin for Marketers
Thrive Quiz Builder is a top-notch quiz plugin designed specifically for marketers. Its easy-to-use interface and powerful features make it an ideal tool for creating highly engaging quizzes to drive traffic, generate leads, and boost conversions.
This plugin comes with more than 200 quiz templates that you can use to create different types of quizzes, including personality quizzes, knowledge quizzes, and more. You can also customize your quizzes by adding images, videos, and other multimedia elements to make them more engaging.
Thrive Quiz Builder also offers a range of advanced features, such as A/B testing, lead generation forms, and analytics tracking, which allow you to test and optimize your quizzes for maximum engagement and conversions. And with its built-in social sharing options, you can easily share your quizzes on social media to reach a wider audience and drive more traffic to your website.
In addition, Thrive Quiz Builder integrates seamlessly with several popular marketing and email automation platforms, such as Mailchimp, Aweber, and Zapier, making it easy to incorporate your quiz results into your marketing campaigns.
All in all, if you’re a marketer looking to create highly engaging quizzes and drive more conversions, Thrive Quiz Builder is the best quiz plugin for you. With its powerful features and intuitive interface, it’s a must-have tool for any marketer looking to take their website to the next level.
HD Quiz – Best Quiz Plugin for Customization
If customization is your top priority when it comes to quiz plugins, then HD Quiz is the best option for you. This plugin offers a wide range of customization options for your quizzes, allowing you to create visually appealing and interactive quizzes that engage your audience.
HD Quiz offers a variety of question types, including multiple choice, true or false, and open-ended questions. You can also customize the layout and design of your quizzes with different backgrounds, colors, and fonts. Additionally, you can include images, videos, and audio files to make your quizzes more interactive.
One of the unique features of HD Quiz is its ability to create conditional branching based on quiz answers. This means that you can direct users to specific questions or outcomes based on their answers to previous questions, creating a more personalized and engaging quiz experience.
HD Quiz also offers a range of customizable options for sharing your quizzes, such as social media sharing buttons and embed codes for your website. And with its built-in analytics tracking, you can easily monitor the performance of your quizzes and optimize them for better engagement and conversions.
Overall, if you value customization and want to create engaging and personalized quizzes for your audience, HD Quiz is the best quiz plugin for you. Its powerful customization options and user-friendly interface make it a must-have tool for any website looking to drive engagement and boost conversions.
Forminator – Best Quiz Plugin for Gamification
If you want to create quizzes that not only educate but also entertain your audience, Forminator is the top choice for you. This powerful plugin offers a range of gamification features, such as leaderboards, badges, and rewards, that make quizzes more engaging and interactive.
Forminator offers a simple drag-and-drop interface that allows you to easily add different question types, including multiple choice, true or false, and open-ended questions, to your quizzes. You can also customize the layout and design of your quizzes to match your brand or website.
One of the biggest advantages of Forminator is its gamification features. You can create leaderboards to show the top performers, award badges for achievements, and offer rewards to incentivize completion of the quiz. This creates a fun and competitive environment for your audience, leading to higher engagement and participation.
Forminator also offers integration with multiple third-party tools, such as Mailchimp and PayPal, to help you collect leads or payments for your quizzes. And with its responsive design, Forminator ensures that your quizzes look great on all devices, from desktops to mobile phones.
Overall, if you want to make your quizzes more interactive and engaging by adding gamification features, Forminator is the best quiz plugin for you. Its user-friendly interface, customizable options, and gamification features make it an essential tool for any website looking to increase audience engagement and retention.
10. Quiz Cat – Best Quiz Plugin for Presentation
If you are looking for a quiz plugin that is easy to use and offers visually appealing quizzes, Quiz Cat should be your go-to choice. With Quiz Cat, you can create engaging quizzes with a range of question types, such as multiple choice, open-ended, and true or false.
The plugin allows you to customize the appearance of your quizzes, including the font, color, and background to match your website’s branding. You can also add images and videos to your quizzes to make them more interactive and engaging.
One of the unique features of Quiz Cat is its ability to generate lead capture forms within your quizzes. This means that you can collect valuable information about your audience while they participate in your quizzes. You can also integrate with third-party tools, such as Mailchimp and Aweber, to automate your lead capture process.
Quiz Cat also offers flexible display options, such as embedding the quiz into a post or page or displaying it as a pop-up. This allows you to present your quiz visually and attractively, making it more likely that your audience will participate.
Overall, if you are looking for a quiz plugin that emphasizes presentation and user-friendliness, Quiz Cat is the best choice. Its customization options and lead capture feature make it an effective tool for engaging and retaining your audience.

8 Criteria To Consider When Choosing The Best Hosting Site For WordPress
WordPress is one of the most popular content management systems (CMS) on the internet, powering over 40% of all websites. When it comes to hosting your WordPress site, choosing the right web hosting provider can be a daunting task. There are dozens of hosting companies to choose from, each offering a range of plans with different features and prices.
To make the decision easier, we’ve compiled a list of 8 criteria that you should consider when choosing the best hosting site for WordPress. From performance and reliability to support and security, we’ll cover everything you need to know to make an informed decision. Keep reading to learn more about how to find the perfect hosting provider for your WordPress site.
Hosting Site For WordPress – 8 Things To Consider
Speed and Performance
When choosing a hosting site for your WordPress website, speed and performance are two of the most critical factors to consider. Your website’s loading time impacts not only user experience but also your search engine ranking. Here are some criteria to consider when evaluating the speed and performance of hosting providers:
1. Server location – Choose a host provider with servers in locations closest to your target audience to reduce latency and improve loading speed.
2. Uptime guarantee – Look for a hosting service that offers a 99.9% uptime guarantee to ensure maximum availability and minimal downtime.
3. Page load speed – Check the average page load speed of the provider’s websites through third-party tools to ensure fast delivery of your content.
4. Server resources – Check if the hosting provider offers scalable resources to manage traffic spikes and ensure faster website performance.
5. Caching and CDN – Look for hosts that offer caching and content delivery networks (CDNs) to increase website speed and reduce latency.
6. PHP version and database optimization – Opt for hosting providers that support the latest PHP version and offer database optimization tools to improve website performance.
7. Server hardware – Look for hosting providers that use the latest hardware for servers to ensure faster processing speeds.
8. SSL certificate – Choose a hosting provider that includes an SSL certificate to ensure secure website transactions and improve search engine visibility.
Consider these factors when selecting a hosting provider for your WordPress site to ensure optimal performance, speed, and reliability.
Security
Security Considerations When Choosing a Hosting Site for WordPress
In addition to speed and performance, security is a crucial criterion to consider when selecting a hosting site for your WordPress site. Ensuring the security of your website can protect you, your users, and your business from various cyber threats. Here are some security considerations to keep in mind when choosing a hosting provider:
1. Backup and recovery – Look for hosting providers that offer daily backups and reliable recovery options to safeguard against data loss in case of any security breaches.
2. Malware protection – Choose hosts that offer malware scanning and removal tools to detect and eliminate harmful software that can compromise your website security.
3. SSL certificate – It is essential to choose a hosting provider that provides an SSL certificate to encrypt the data transmitted between your website and users and create a secure browsing experience.
4. Firewall protection – Consider hosts that offer firewall protection to prevent unauthorized access, hacking attempts, and spam attacks.
5. Two-factor authentication – Opt for a hosting provider that offers two-factor authentication to add an extra layer of security for accessing your website and its backend.
6. Regular updates – Make sure your hosting provider updates the systems and applications regularly to fix vulnerabilities and ensure website security.
7. Support – Look for a hosting provider that provides round-the-clock support to assist you in case of any security-related issues.
Before choosing a hosting provider for your WordPress site, assess their security measures and ensure they offer reliable protection against cyber threats, providing you peace of mind and your users with a safe browsing experience.
Scalability
Scalability Considerations When Choosing a Hosting Site for WordPress
The scalability of a hosting site for your WordPress website is another critical criterion to consider. As your website grows, you need a hosting provider that can accommodate the increased traffic and resource usage. Here are some scalability considerations to keep in mind when choosing a hosting provider:
1. Server resources – Look for hosting providers that offer flexible and scalable server resources that can adjust to your website’s needs. This includes features like CPU, RAM, storage, and bandwidth.
2. Load balancing – Consider hosting providers that offer load balancing to distribute traffic evenly across multiple servers to prevent website slowdowns and crashes during traffic spikes.
3. Content Delivery Network (CDN) – Opt for a hosting provider that offers a CDN to cache and deliver content from servers closest to the user’s location, reducing website load time and improving user experience.
4. Growth potential – Choose a hosting provider that can provide room for growth and expansion as your website scales up. This includes the ability to upgrade your hosting plan seamlessly and add new features as needed.
Before choosing a hosting provider for your WordPress site, assess their scalability features to ensure they can handle your website’s current and future demands without compromising performance or user experience. Scalability should be a major consideration for any business or website looking to expand its online presence.
Customer Support
Customer Support: A Vital Factor in Choosing the Best Hosting Site for WordPress
When choosing a hosting site for your WordPress website, one significant factor to consider is the quality of customer support available. Your website’s reliability and uptime are critical for business and personal use, and when issues arise, you want to have reliable support available to resolve the problem promptly. Here are five customer support considerations you should keep in mind:
1. Availability – Ensure the hosting provider offers 24/7 support, so you can get help when you need it, regardless of the time of day.
2. Communication Channels – Check if the hosting provider offers various communication channels such as live chat, phone support, email support, or a ticketing system. Choose a provider that provides your preferred mode of communication to ensure rapid and effective support.
3. Technical Expertise – The quality of support depends entirely on the expertise level of the customer support team. Look for a hosting provider that employs a technically proficient customer support team that can handle technical issues effectively.
4. Response Time – Response time is one of the most critical factors in assessing the hosting provider’s support performance. Check their average response time for support queries to ensure it meets your requirements.
5. Knowledge Base and Community Forums – Before contacting customer support, you may find answers to your questions from the knowledge base and community forums. The hosting provider should have a searchable knowledge base and active community forums full of helpful information.
In conclusion, when choosing the best hosting site for your WordPress website, the quality of customer support can make all the difference. Ensure that the hosting provider offers reliable and efficient support through multiple communication channels, has technical expertise, and quick response time. A good hosting provider will also provide a comprehensive knowledge base and community forums to give you additional support options.
Pricing
6 Criteria to Consider When Evaluating WordPress Hosting Pricing
When choosing a hosting site for your WordPress website, pricing is a critical factor to consider. Various hosting providers offer different pricing packages, which can range from free to expensive, depending on your website’s size and complexity. Here are six criteria to evaluate when comparing WordPress hosting pricing:
1. Plan Tier and Features – Consider what features are included in each pricing plan. Some providers offer cheaper pricing plans but with limited features, while others provide more comprehensive packages with premium features. Consider what your website needs and choose an appropriate package accordingly.
2. Renewal Rates – It’s essential to evaluate the renewal rates of the pricing plans. Some providers attract customers with low introductory rates, which renew at much higher prices.
3. Contract Length – Consider the length of the contract and whether it’s a month-to-month plan or a long-term commitment. Long-term plans may offer significant savings, but they also mean fewer options to switch providers if you’re dissatisfied.
4. Server Location – Check where the hosting provider’s servers are located. Hosting your website closer to your target audience will improve its loading speed, which can increase customer satisfaction and improve search engine rankings.
5. Add-On Services – Hosting providers often offer add-on services, such as website backups, SSL certificates, and security features, for additional charges. Determine which add-ons are necessary for your website.
6. Scalability – Consider the pricing plan’s scalability, and whether it provides enough room for growth. As your website grows, you may require more resources, and your hosting plan should be able to accommodate it.
In conclusion, pricing is an essential factor when choosing the best hosting site for your WordPress website. Evaluate the pricing packages based on plan tiers and features, renewal rates, contract length, server location, add-on services, and scalability to make the best decision for your website and your budget.
Control Panel
Control Panel: An Important Consideration When Choosing a Hosting Site for WordPress
Along with pricing, the control panel is another critical factor that you should consider when choosing a hosting site for your WordPress website. The control panel is the interface through which website owners manage their website’s features and settings. Consider the following seven criteria when evaluating control panels:
1. User Interface – Consider the control panel’s user interface and whether it is easy to use and navigate. A user-friendly control panel can save time and frustrations for both you and your users.
2. Customizability – Consider if the control panel is customizable to your website’s specific needs. A customized control panel can help ensure that you have all the necessary tools to manage your website.
3. Security – Consider the control panel’s security features, such as two-factor authentication, to ensure that your website is secure from hackers and other cyber threats.
4. Technical Support – Consider the level of technical support provided by the hosting site through their control panel. Make sure the hosting site has knowledgeable and responsive technical support available 24/7.
5. Backup and Restore – Consider if the control panel has built-in backup and restore features to ensure that your website’s data is protected and recoverable in the event of a problem.
6. Application Installer – Consider if the control panel has an application installer that allows you to quickly and easily install popular web applications like WordPress, Drupal, or Joomla.
7. Traffic Analytics – Consider if the control panel has built-in traffic analytics to provide you with detailed insight into your website’s performance and user engagement.
In conclusion, the control panel is an important consideration when choosing the best hosting site for your WordPress website. Evaluate the control panel based on user interface, customizability, security, technical support, backup and restore, application installer, and traffic analytics to make the best decision for your website.
Integration with Third-Party Applications
8 Criteria To Consider When Choosing The Best Hosting Site For WordPress: Integration with Third-Party Applications
Another critical factor to consider when choosing the best hosting site for your WordPress website is its integration with third-party applications. Third-party applications are non-native software that you can integrate with your website to add certain features or functionalities. Here are eight criteria to consider for integration with third-party applications:
1. Compatibility – Consider if the hosting site is compatible with the applications you want to integrate.
2. Ease of Integration – Consider if the hosting site facilitates easy integration with third-party applications.
3. Availability – Consider if the hosting site offers third-party applications within their control panel or if you need to install them separately.
4. Security – Consider if the hosting site has necessary security measures in place to ensure the safety of your website and third-party applications.
5. Support – Consider if the hosting site provides technical support to solve any issues you might face during integration.
6. Customizability – Consider if the hosting site allows customization of third-party applications to suit your website’s specific requirements.
7. Updates – Consider if the hosting site provides regular updates to the integrated third-party applications.
8. Cost – Consider any additional cost the hosting site charges for integration with third-party applications.
Conclusion
In conclusion, the integration with third-party applications is an essential factor to consider when choosing the best hosting site for your WordPress website. Evaluate the integration based on compatibility, ease of integration, availability, security, support, customizability, updates, and cost to make the best decision for your website. By choosing a hosting site that offers strong integration features, you can enhance your website’s functionalities and improve its overall performance.
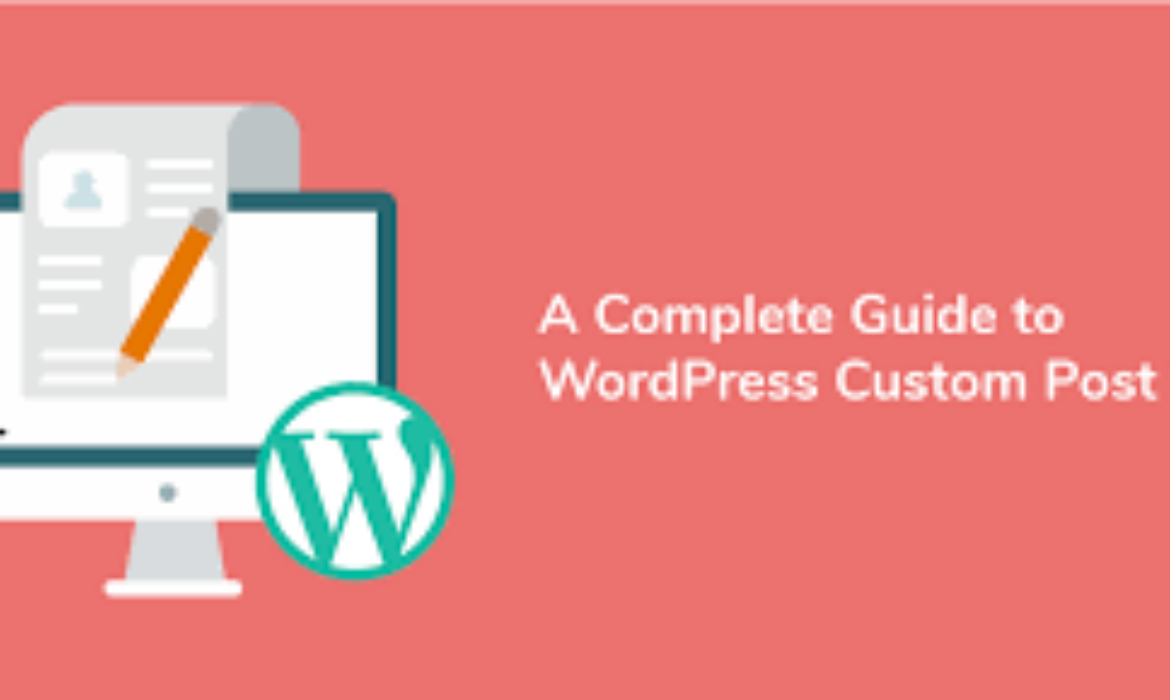
Understanding Custom Post Types in WordPress | Complete Guide
WordPress is one of the most popular blogging platforms in the world, and for good reason. It’s easy to use, highly customizable, and comes with a wealth of features right out of the box. It has became leading Content Management Systems for Business Website. However, did you know that you can create custom post types in WordPress? This powerful feature allows you to define your own content types beyond the default post and page types. Custom post types can help you better organize and showcase your content, whether you’re running a blog, an e-commerce website, or anything in between. In this article, we’ll explore understand custom post types in WordPress, including what they are, how they work, and why they’re so powerful for WordPress users.
Understanding Custom Post Types in WordPress
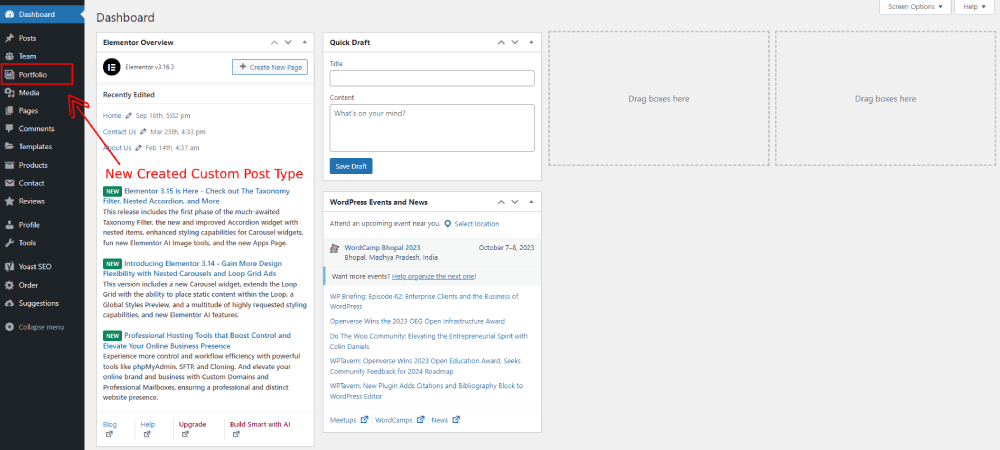
Custom post types in WordPress allow users to add content types beyond just posts and pages, allowing for greater flexibility and customization of their website. A custom post type is essentially a new type of content that is defined by the user and can include its own unique features and functionality.
For example, a website that features recipes may want to create a custom post type for recipes, which would allow for specific fields such as ingredients, cooking time, and serving size to be added to each recipe post. This makes it easier for visitors to search and browse through recipe content, and for the website owner to organize their content more effectively.
Understanding and utilizing custom post types in WordPress can be a game-changer for website owners who want to go beyond the default post and page types. By creating custom post types, they can create a more tailored user experience that meets the specific needs of their website and audience. Additionally, custom post types can be further enhanced with custom taxonomies, which allow for even more targeted organization and filtering of content.
Overall, custom post types are a powerful tool in the arsenal of any WordPress user who wants to take their website to the next level of customization and functionality. With a little knowledge and experimentation, anyone can create custom post types that will truly make their website stand out.
Must Read: Ultimate guide to create a website using WordPress Themes
Benefits of Using Custom Post Types
Custom post types offer numerous benefits to WordPress users, including:
1. Enhanced Organization: Custom post types allow for the categorization of content in a more targeted and specific way. This enables website owners to create a more organized and structured website, making it easier for visitors to find relevant content.
2. Improved User Experience: With custom post types, website owners can create a more tailored user experience that meets the specific needs of their audience. Custom fields, taxonomies, and post types can be used to create intuitive navigation, improved search functionality, and easy access to related content.
3. Increased Flexibility: Custom post types give WordPress users the freedom to create new and unique content types beyond just posts and pages. This increased flexibility allows for greater customization and a more personalized website experience for visitors.
Using custom post types, WordPress users can make their websites more professional and impactful. You can create recipe posts for a food blog or event types for a community calendar with custom post types.
How to Create Custom Post Types in WordPress
Creating custom post types in WordPress is a simple and straightforward process. Here are the steps:
1. Install and activate a custom post type plugin: There are numerous custom post type plugins available in the WordPress repository. Install and activate the one that suits your needs.
2. Create a new custom post type: After activating the plugin, navigate to the plugin settings and click ‘Add New’. Here, you will need to provide a name and a few other details for your custom post type.
3. Set up custom taxonomies: Taxonomies are used to categorize your content. Custom taxonomies can be created and associated with your custom post type.
4. Add custom fields: Custom fields can be used to capture specific data about your posts. A popular custom field plugin is Advanced Custom Fields.
5. Associate custom templates: Once you have created your custom post type, you can create custom templates to display your content in a unique and visually appealing way.
With these steps, you can easily create and manage custom post types in WordPress. You can create and manage your content using custom post types to create a portfolio, business listing, or directory.
Adding Custom Fields to Your Custom Post Type
Adding custom fields to your custom post type is an essential step that can help you capture more specific information about your content. Custom fields give you the flexibility to add unique content and enhance the functionality of your website.
Here are the steps to add custom fields to your custom post type in WordPress:
- 1. Install a custom field plugin: There are several custom field plugins available, such as Advanced Custom Fields, Pods, and Meta Box. Install and activate the plugin that suits your needs.
- 2. Create a custom field group: Navigate to the custom field plugin settings and click ‘Add New’. Here, you’ll need to provide a name and other details for your custom field group.
- 3. Add fields to your group: Once you’ve created your custom field group, you can add specific fields to capture data. You can add text fields, image fields, select fields, etc.
- 4. Associate the group with your custom post type: You’ll need to associate the custom field group with your custom post type to display the fields on the post editing screen.
- 5. Display the custom field data: You can display the custom field data in various ways, such as using template tags, shortcodes, or custom functions.
Adding custom fields to your custom post type can enhance the user experience and provide more information about your content. It can also help you create a more versatile and dynamic website.
Displaying Custom Post Types on Your Website
Displaying Custom Post Types on Your Website
Once you have created your custom post type in WordPress, it’s time to display it on your website. Here are some steps to follow:
1. Create a custom template: In order to display your custom post type, you will need to create a custom template in your WordPress theme. This template will be used to display the posts from your custom post type.
2. Use a loop: Next, you will need to use a loop to display the posts from your custom post type. This can be done using the standard WordPress loop function, or you can use a custom loop function specific to your custom post type.
3. Customize the display: You can customize the display of your custom post type by using different HTML and CSS elements. This can help you create a unique look and feel for your custom post type.
4. Use shortcodes: Another option for displaying your custom post type is to use shortcodes. WordPress has built-in shortcodes that allow you to display posts from your custom post type in different ways. For example, you can use a shortcode to display only the most recent posts from your custom post type.
5. Use plugins: There are also a number of plugins available that can help you customize the display of your custom post type. For example, you can use a plugin to add a filter to your custom post type, or to display posts from your custom post type in a specific order.
By following these steps, you can easily display your custom post types on your website. This will help you create a more dynamic and engaging website for your users.
Advanced Techniques for Custom Post Types
Custom post types are a powerful feature of WordPress that allow developers to create their own content types, such as portfolios, event calendars, and job listings. Once you’ve created a custom post type, there are a number of advanced techniques you can use to take your website to the next level.
1. Custom Taxonomies: By creating custom taxonomies, you can organize your custom post type content into categories and tags, just like regular posts and pages. This can help improve the navigation and user experience of your site.
2. Custom Fields: Custom fields allow you to add additional data to your custom post type, such as dates, locations, and prices. This data can then be displayed on your website using templates and shortcodes.
3. Custom Post Statuses: You can create custom post statuses, such as “In Progress” or “Needs Review,” to help manage your custom post type content more efficiently. This can be especially useful if you have a team of contributors working on your website.
4. Custom Templates: By creating custom templates for your custom post type, you can completely control how your content is displayed on your website. This can include custom layouts, styles, and functionality.
5. Custom Queries: Custom queries allow you to display your custom post type content in a variety of ways, such as by date, category, or tag. This can be helpful for creating dynamic pages, such as archives and search results.
6. Custom Post Types in Widgets: You can add your custom post type content to widgets using plugins like Custom Post Type Widgets. This can be useful for creating a custom sidebar or footer on your website.
7. Custom Post Types in Navigation: You can also add your custom post type content to your website’s navigation menus using the WordPress Menu Editor. This can help improve the accessibility of your custom post type content.
By using these advanced techniques, you can take full advantage of custom post types in WordPress to create a dynamic, engaging website that stands out from the crowd.
Final Thoughts on Custom Post Types in WordPress
In summary, custom post types are a powerful feature of WordPress that give website developers the ability to create their own content types. By utilizing custom taxonomies, custom fields, custom post statuses, custom templates, custom queries, custom post types in widgets, and custom post types in navigation, you can create a dynamic and engaging website that stands out from the crowd.
It’s important to remember that while custom post types offer a lot of flexibility, it’s also important to use them thoughtfully and strategically. Consider whether a custom post type is truly necessary for your website, and how it will impact the user experience. Additionally, make sure you thoroughly test any custom post types and associated functionality before launching your website.
With custom post types in WordPress, you can take your website to the next level.
WordPress Cache: How To Clear Your Cache In 5 Simple Steps
One of the most important aspects of website maintenance is clearing your cache regularly. A cache is a temporary storage location for files that are accessed frequently. Caching helps to improve website performance by reducing the time it takes to load pages.
WordPress websites are particularly prone to caching issues because of the way the platform works. In this article, we will show you how to clear your WordPress cache in 5 simple steps.
How To Clear Your Cache In WordPress
Clearing your WordPress cache is essential for keeping your website efficient and up-to-date. Here’s how to do it in 5 simple steps.
Step 1: Log into your WordPress dashboard
The first step is to log into your WordPress dashboard. This can be done by visiting the URL of your website and clicking the “Login” link in the upper-right corner of the page.
Step 2: Navigate to the “Tools” section
Once you are logged in, navigate to the “Tools” section of your dashboard. This can be found in the left-hand sidebar under the “Settings” menu.
Step 3: Seect the “Clear Cache” option
From the “Tools” section, select the “Clear Cache” option. This will bring up a page that provides you with the ability to clear your website’s cache.
Step 4: Confirm the action
On the “Clear Cache” page, you will be presented with a confirmation button. Be sure to read the warning message before clicking on the confirmation button as it will delete your website’s cached files.
Step 5: Refresh the page to see the changes
Once you have clicked the “Clear Cache” button, your website’s cached files will be deleted. In order to see the changes, you need to
Must Read: The Ultimate Guide To Select A Hosting Provider
What Are The Different kinds of Caches?
The term “cache” in WordPress refers to the different types of data that are stored by the CMS in order to make your website run faster and smoother.
There are four main types of caches that WordPress uses in order to optimize the user experience:
1. Page cache – This type of cache stores static copies of your web pages on a server. Whenever a user visits your website for the first time, the page cache is used to make the website load faster by loading a pre-generated copy of the page rather than regenerating it from the ground up.
2. Object cache – Object caches are used to store more complex information such as database queries rather than static content. This makes the website more responsive and less prone to slow down due to heavy database requests.
3. Fragment cache – Fragment caches are used to store parts of a page, such as a header or footer. in order to reduce the amount of processing power required to render the page. This can be particularly useful for very large or complex web pages.
4. Transient cache– Transient caches store data in the form of ‘cookies’ which can be used to speed up the loading of dynamic content. This type of cache is commonly used for saving login sessions and tracking user activity.
By understanding the different types of caches and how they work, you can optimize your WordPress site and make it faster and
Benefits Of Clearing Your Cache
Clearing your WordPress cache can have many benefits for your website. Here are some of them:
1. Faster website loading times – When a user visits your website, their browser will request the information it needs for the page to load. Your server will then have to parse and generate the HTML from the requested data.
By using a cache, the server can return the stored HTML version of the page quicker than having to generate it from scratch. This reduces website loading times.
2. Better search engine rankings – Search engine algorithms take website loading times into account when ranking websites. The quicker your website can process and display information, the better your rank will be on search engine results pages.
Thus leading to more website traffic.
3. Reduced server strain – Similarly to how a cache helps reduce the time it takes to process a page request, it also reduces the strain on your server.
By caching parts of webpages, the server will not have to parse and generate HTML as often, reducing the strain on the server and any resulting concerns such as CPU usage and latency.
4. Lower bandwidth usage – Clearing your caching can also reduce bandwidth usage as the server will not have to serve the same data to multiple users. By servicing the same data from a cache, the requests will be sent faster, thus reducing the total overall bandwidth usage.
How Often Should You Clear Your Cache?
How often you should clear your WordPress cache depends on how active your website is. Different caching plugins have different settings and functions, so it is important to check the settings of the plugin you are using.
If you have a static website with little activity, you can clear your cache less often. For example, if you have a blog that does not receive a lot of comments or new posts are not added very often, manually clearing the cache every couple of months or when needed should be enough.
On the other hand, if you have a website that is active and constantly receiving new posts, comments, and traffic, you should look into setting up a daily or weekly schedule to clear your cache. You should also look at ways to automate the process, such as setting up an automated plugin to take care of the cache clearing. This will ensure your website is running optimally and your visitors are served the latest content.
Wrapping Up
Now that you know the basics of how to clear your WordPress cache and how often you should do it, it’s time to wrap up. Clearing your WordPress cache can help enhance your website’s performance and make your content easily accessible to your visitors. This can help create a better user experience for your readers and help your website get more organic traffic.
It is also important to remember that different caching plugins have different settings and functions, so you should always check the settings of the plugin you are using. Finally, if your website is busy, it is best to setup a schedule to clear your cache regularly. Automating the process can make sure that your website is running optimally and that your visitors are served the latest content.
